
Self Hosting Small Blog Using Linode
 admin
admin Below is a screenshot of the current blog setup:
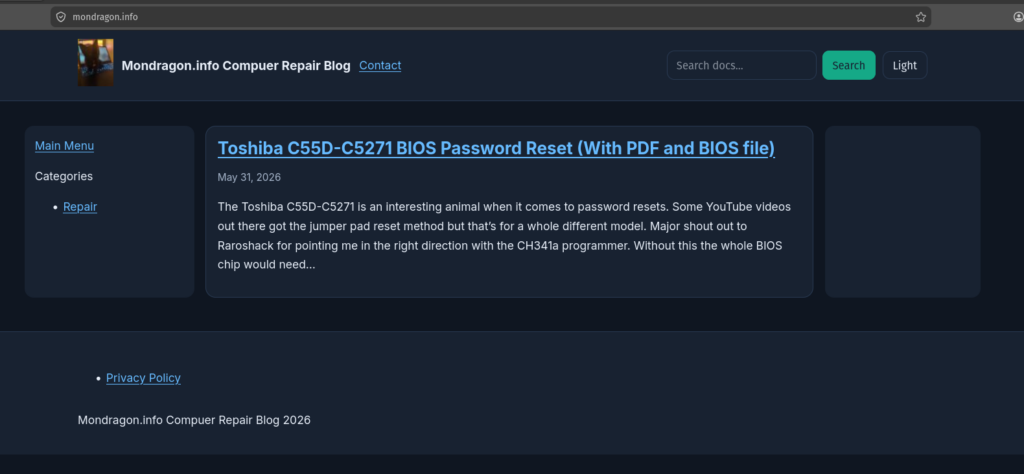
This how-to-guide shows you how to setup your own blog using Linode, WordPress, Namecheap, Bitwarden, and Proton Mail for basic email support.
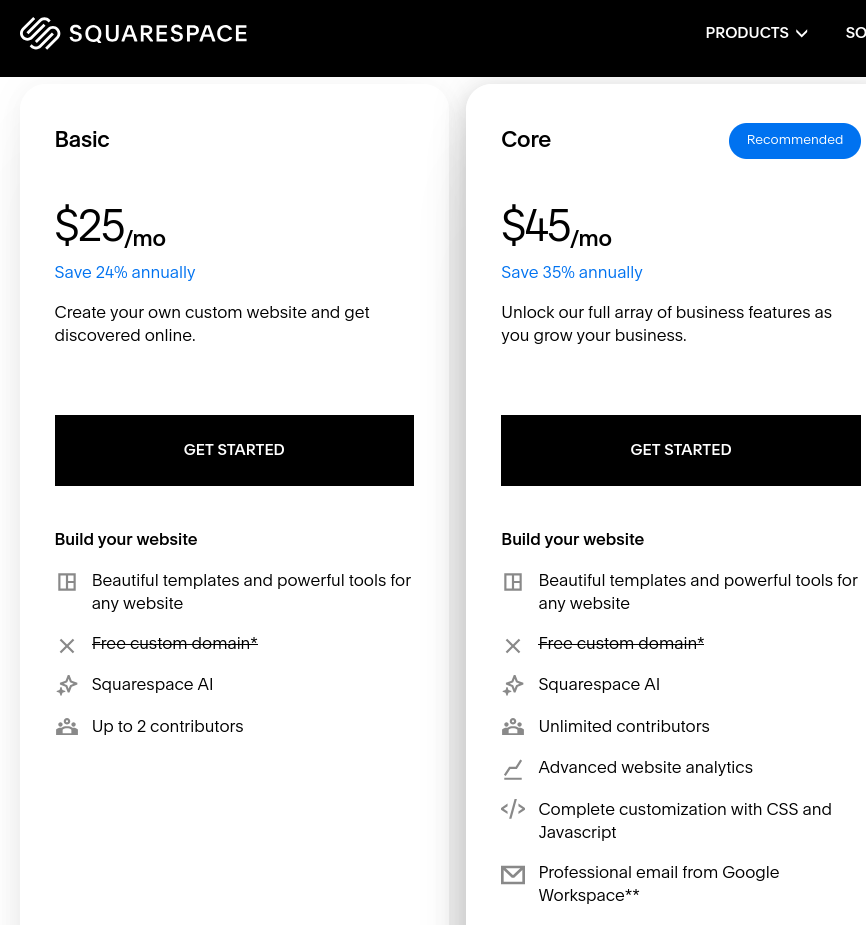
Total cost: $5.50/month without email, $9.49/month with Proton email.
Beats Squarespace $25/month without email and $45/month with Google email
Disclaimer
This guide is for those who are looking to setup their own small blogs / wiki’s with minimal intention to go commercial. Squarespace and other custom platforms such as Shopify save a lot of time and come with security out of the box every step of the way. This guide only keeps you secure at the bare minimum. You’re on your own if you choose to self host paid content or setup your own e-commerce platform. This can be done with custom WordPress extensions/plugins but we won’t get that far with that in this tutorial.
This guide is for educational and informative purposes only. By continuing with this guide you accept the risks associated with self hosting. This is just for fun and should not be used to run a full on professional business. Small business web presence with contact info and job / gigs published should be fine as this site is just that. Please be careful and never upload any sensitive material you wouldn’t want published indefinitely on the internet. Follow good OPSEC and never use public facing usernames (hence Bitwarden for password management – can create / generate new usernames), scrub metadata prior to uploads, and be mindful of what you publish.
Part I: Setting up Bitwarden as password manager
- Step 1: Create a Bitwarden password manager account to keep track of logins used
- Recommended: https://bitwarden.com
- Pros: Free
- Cons: Advanced features require paid plan (not required for this setup)
- Tbh any free password manager works but this example uses Bitwarden
- Recommended: https://bitwarden.com
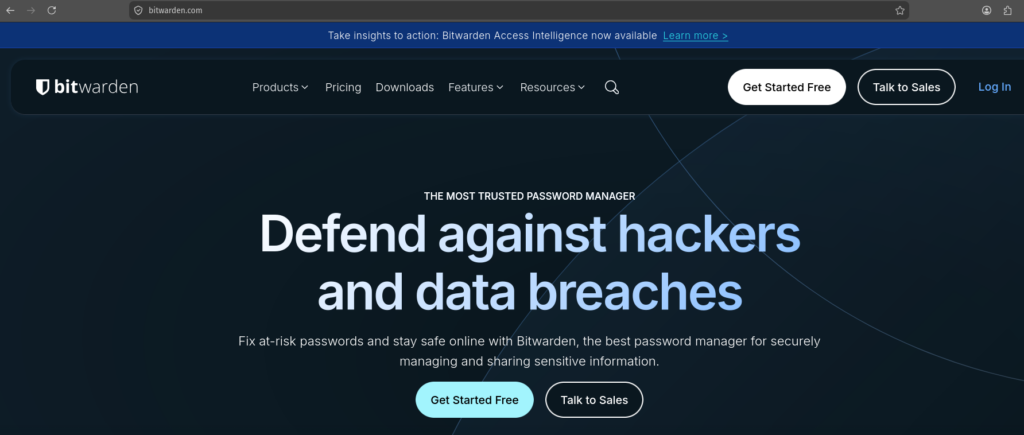
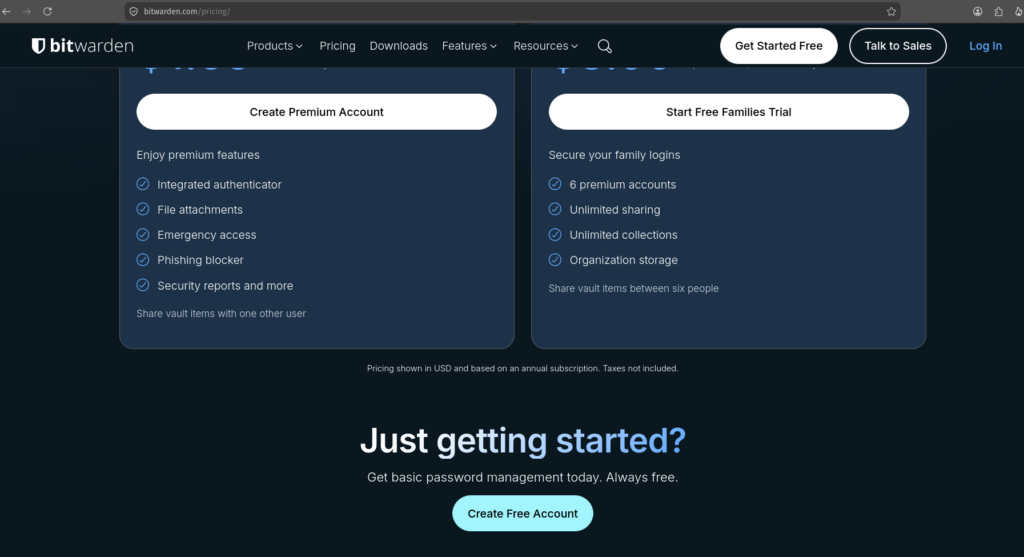
- Step 2: Click on ‘Get Started Free’
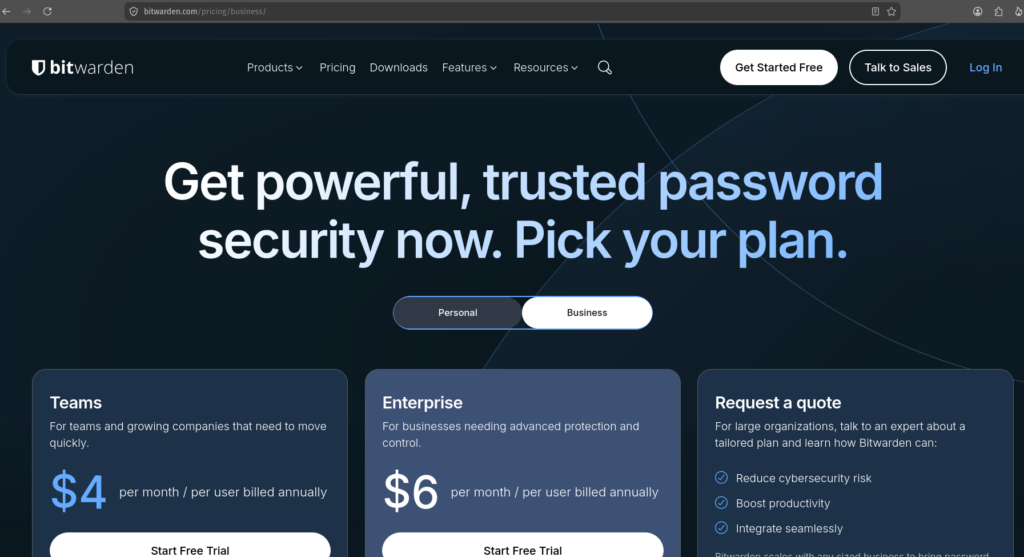
- Step 3: Click on ‘Personal’
- Step 4: Click on ‘Create Free Account’
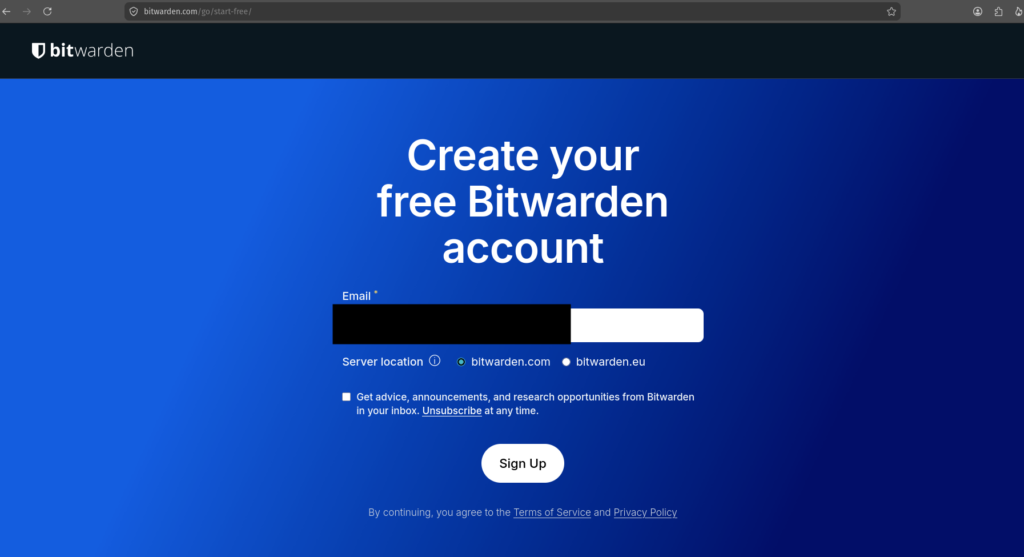
- Step 5: Use an email you already own to create this. I recommend keeping this separate from what you will create later on in case you lapse on billing or something else happens. Enter your email and click on ‘Sign Up’
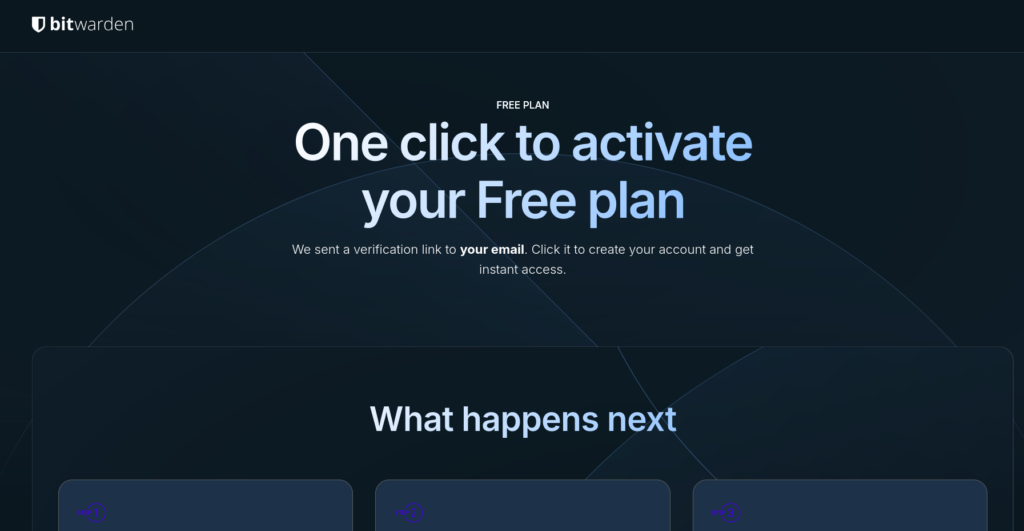
- Step 6: Check your email for the verification
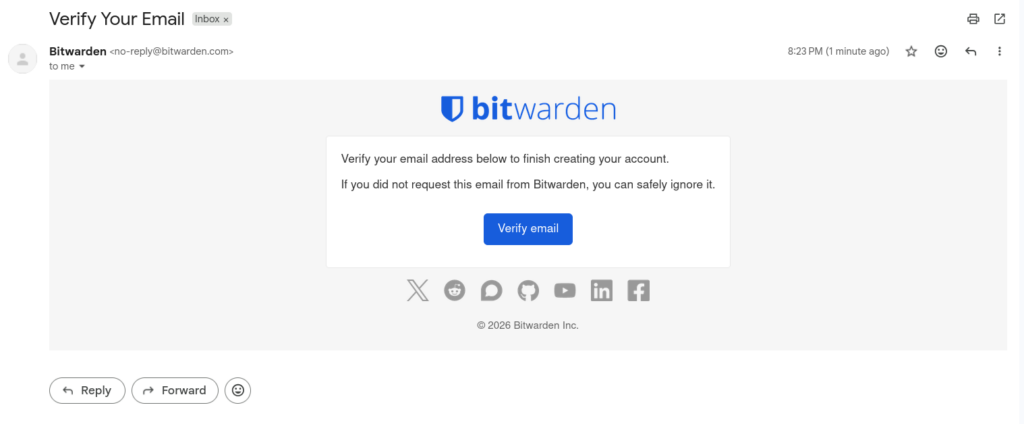
- Step 7: Create master password DO NOT LOSE THIS OR YOU WILL BE SCREWED
- I don’t usually recommend writing something down but if you lose this…yeah you’re done for lol. Probably best to keep it somewhere you would store something else important like the deed to your house or social security card…you get the point.
- Click on ‘Create Account’
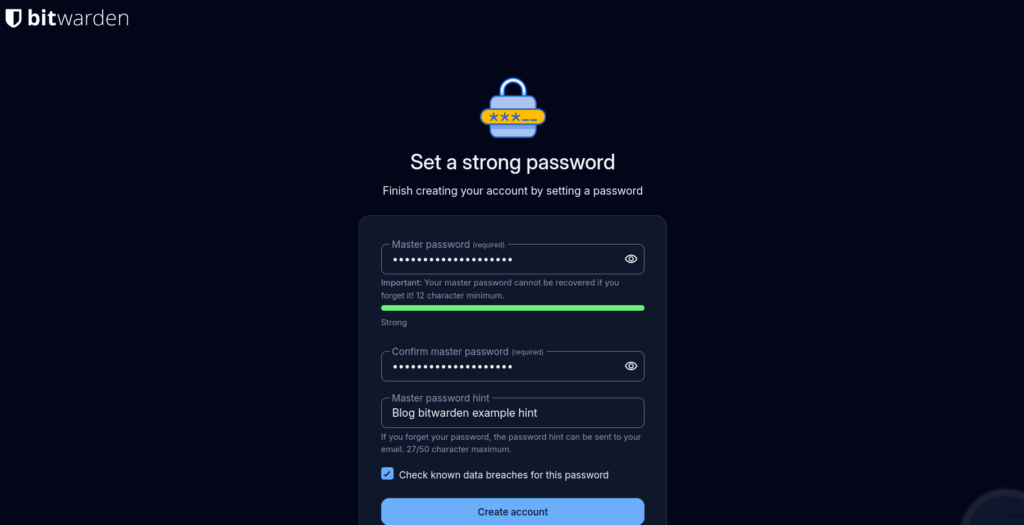
- Step 8: Click ‘Skip to web app’ and then ‘Skip’ to skip tutorial (don’t worry it’s easy to use)
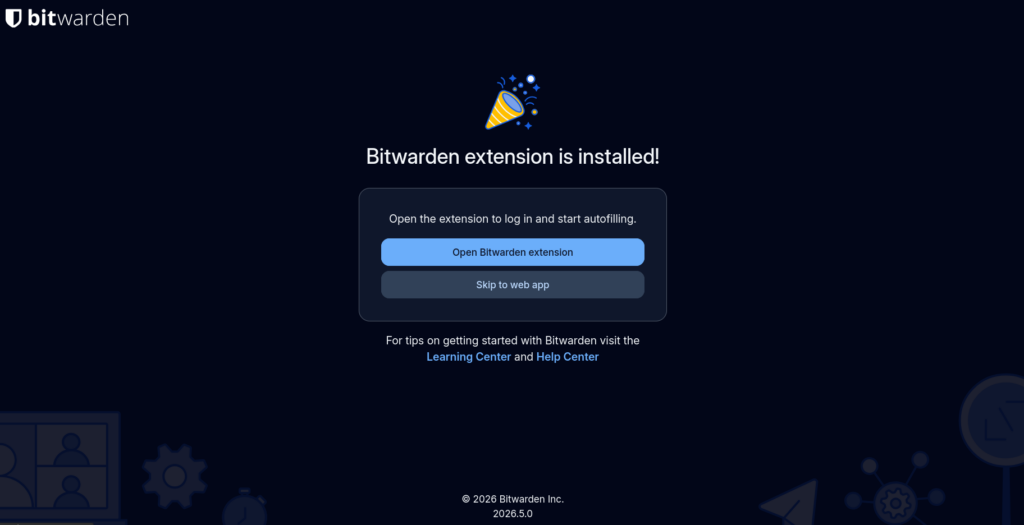
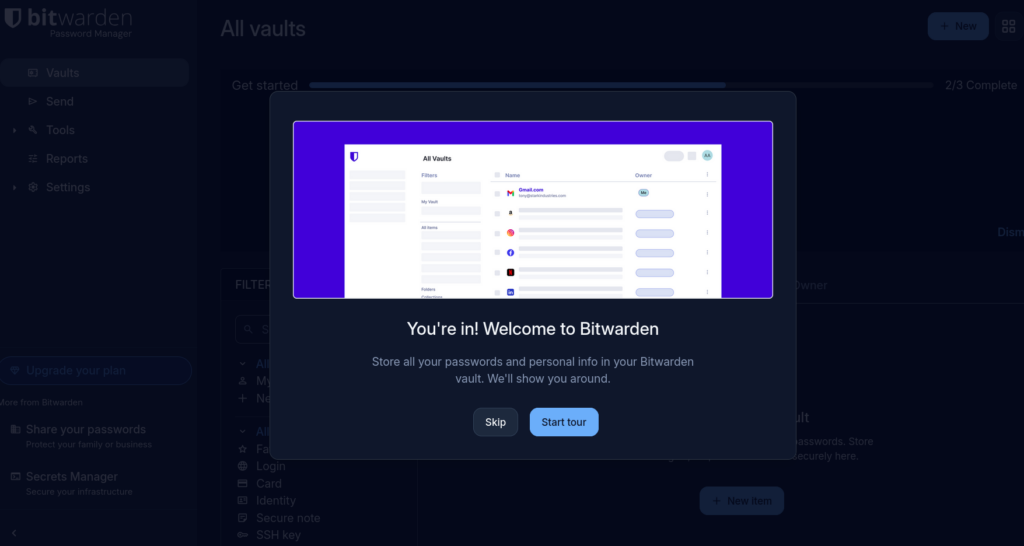
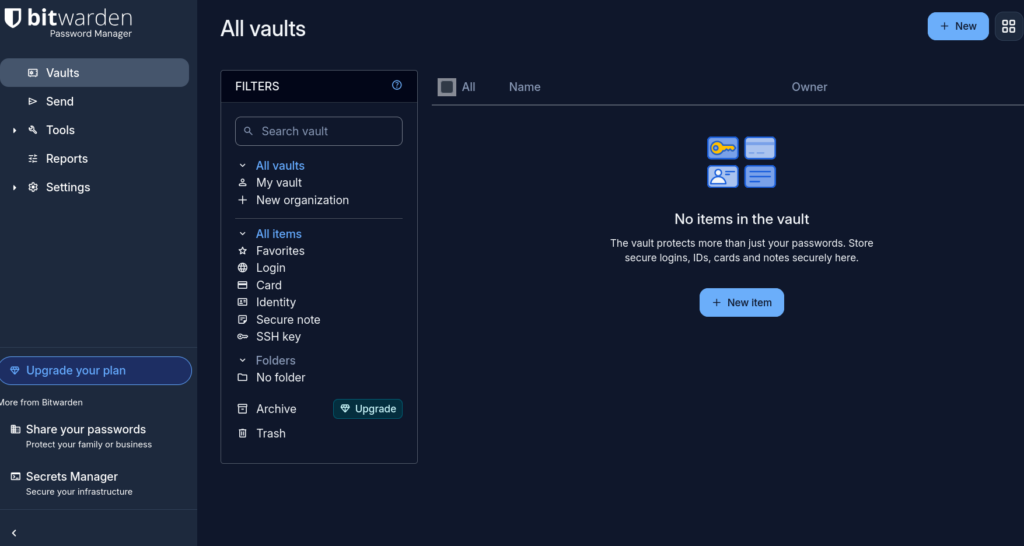
- Step 8 (continued): Once you land at the page below it’s safe to keep it open in the background for later
- Optional: Install Bitwarden browser extension for easier navigation
Part II: Setting up Namecheap account
- Step 9: Secure domain name using name domain name purchasing site such as NameCheap. Click on ‘Sign up’ on the top left.
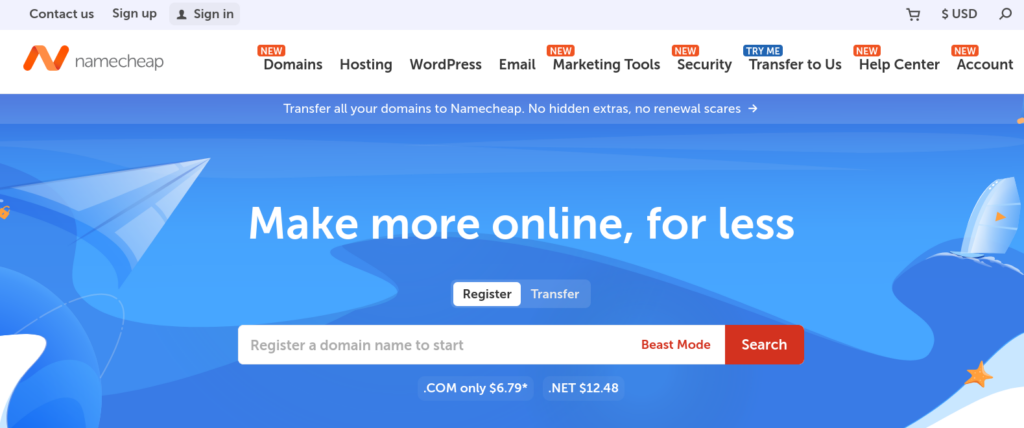
You will see the following screen:
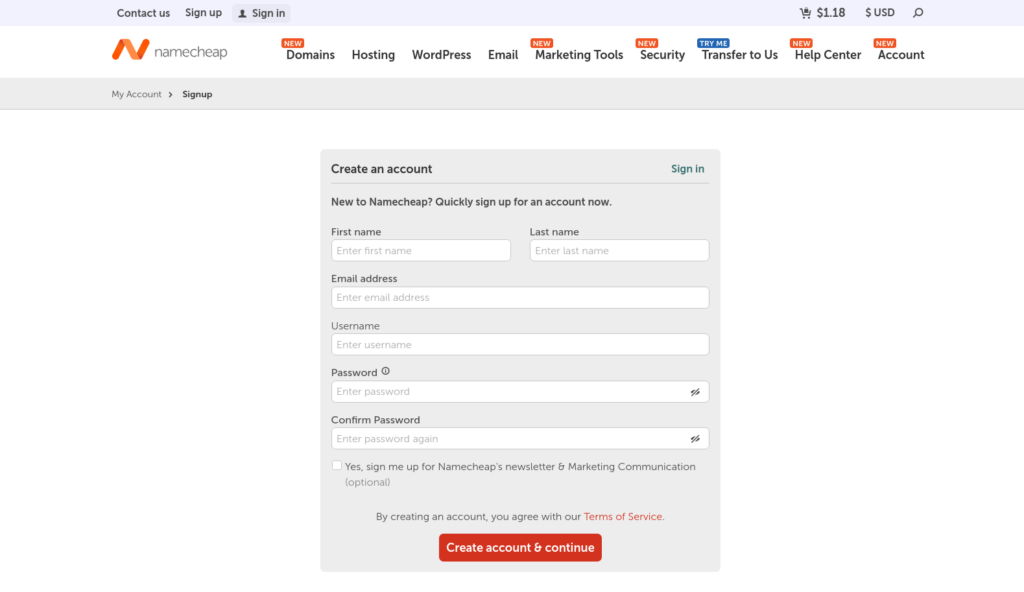
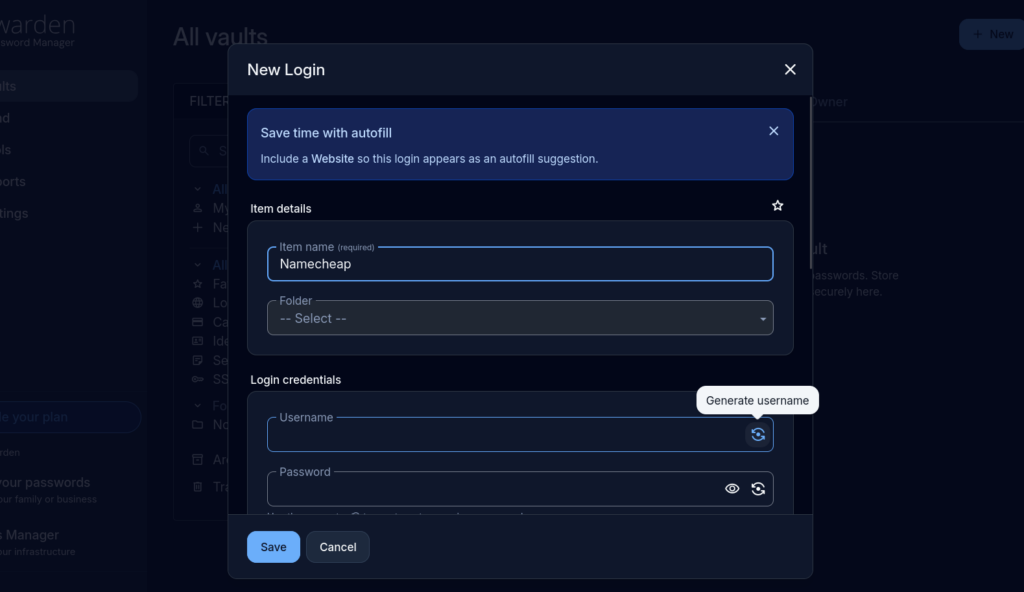
- Step 10: Navigate back to your Bitwarden tab to generate a fresh username and password. Click on ‘New item’ and fill out ‘Item name’ with ‘Namecheap’. Click on ‘Generate Username’
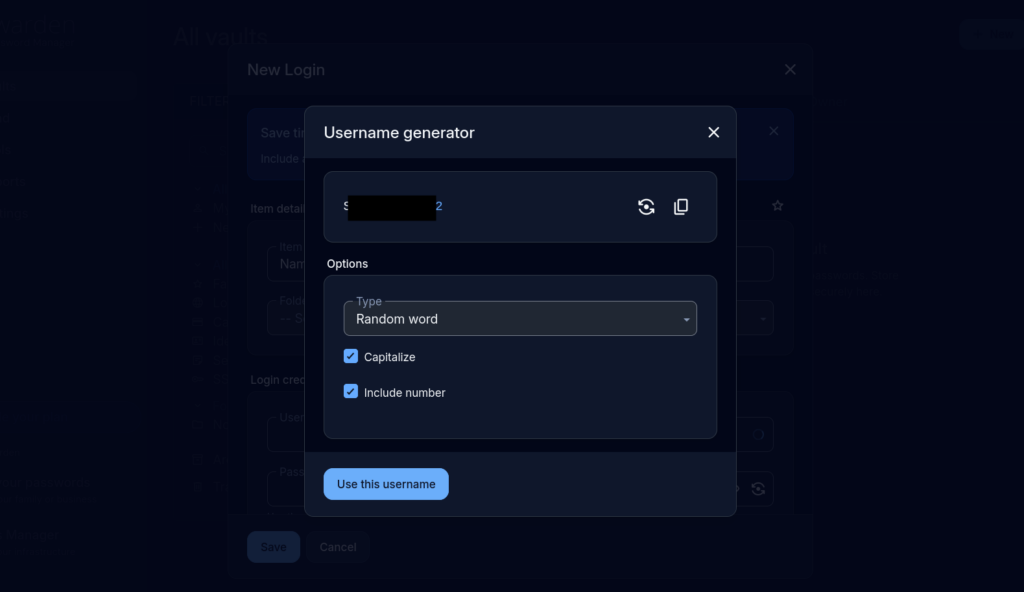
Checkoff the ‘Capitalize’ and ‘Include Number’. Click on the arrows a few times to ‘spin the block on the opps’ and get something that’s pretty random. Click on ‘Use this username’.
- Step 11: Click on ‘Generate password’
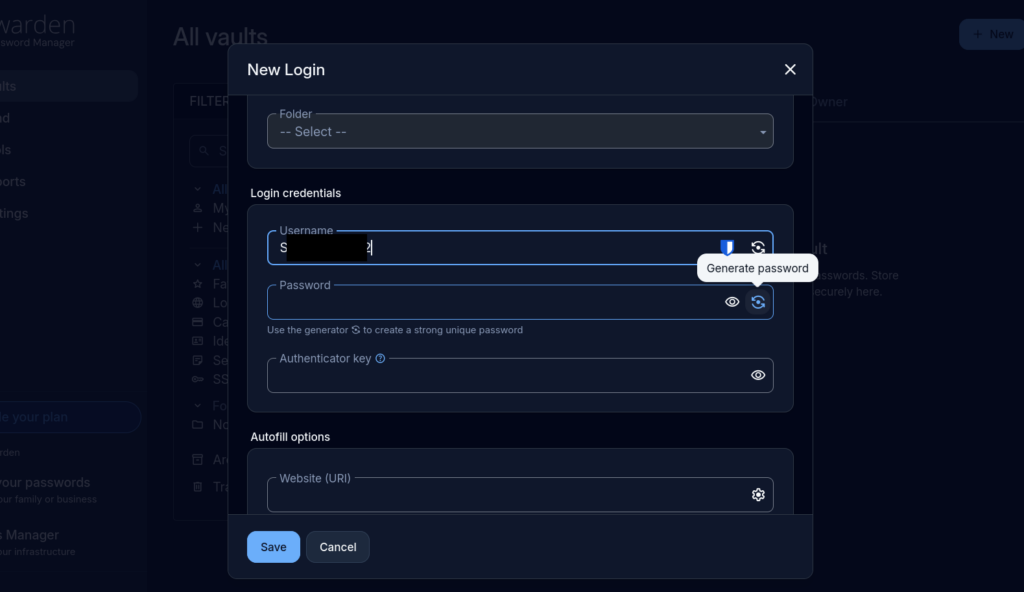
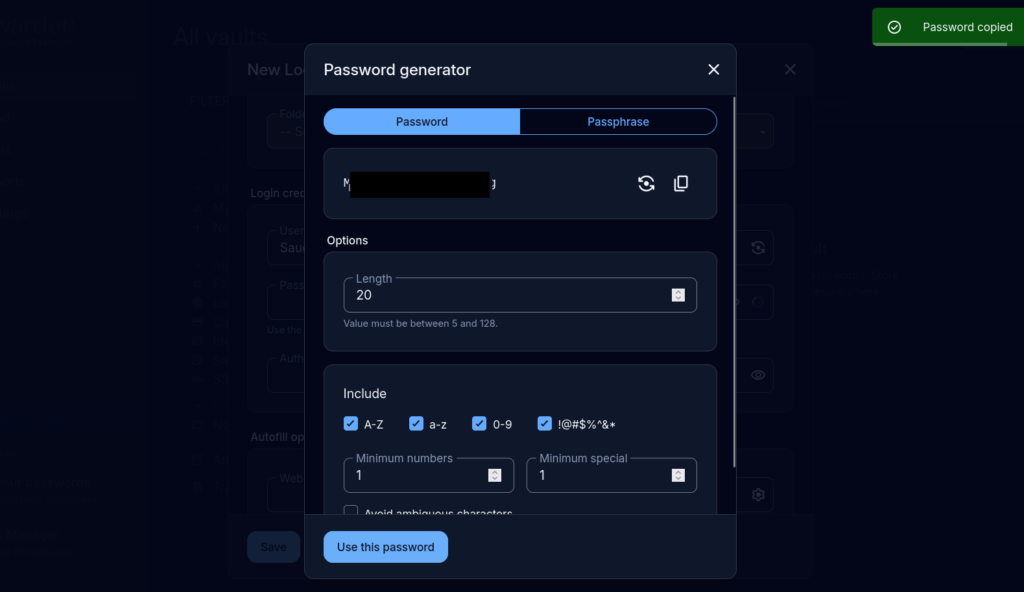
Bump up the length and check off all 4 boxes on the bottom of ‘Include’. Click the two squares to the right of the arrows to copy this password to your clipboard. Click on ‘Use this password’.
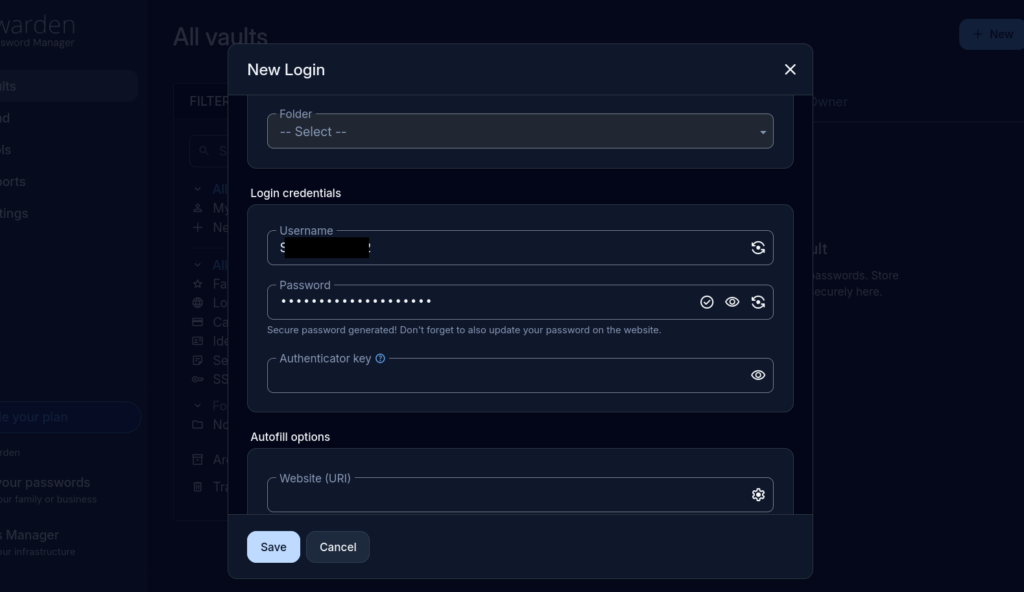
Click on ‘Save’
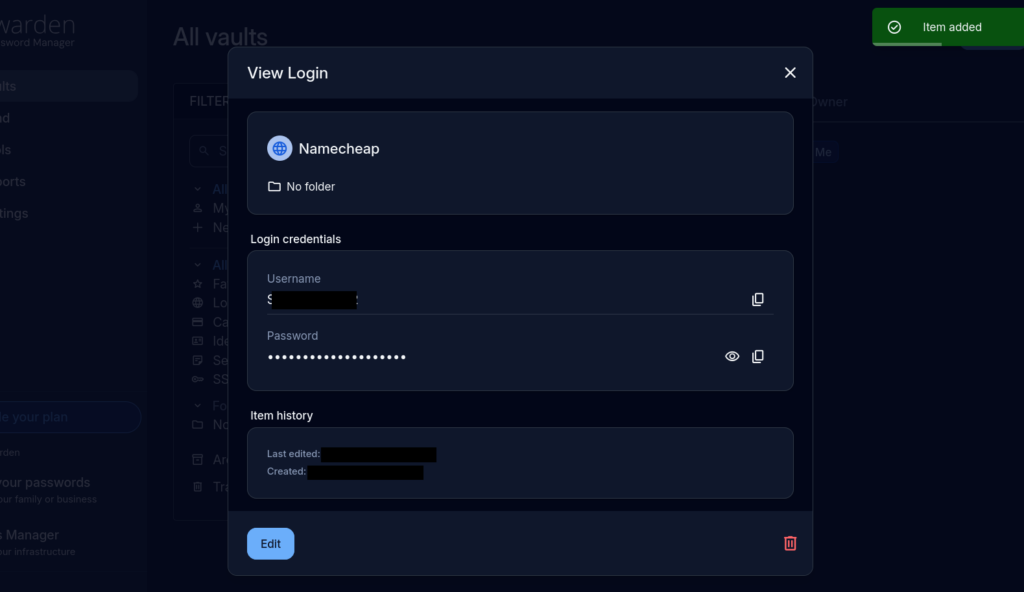
Congrats! You just created your first login item
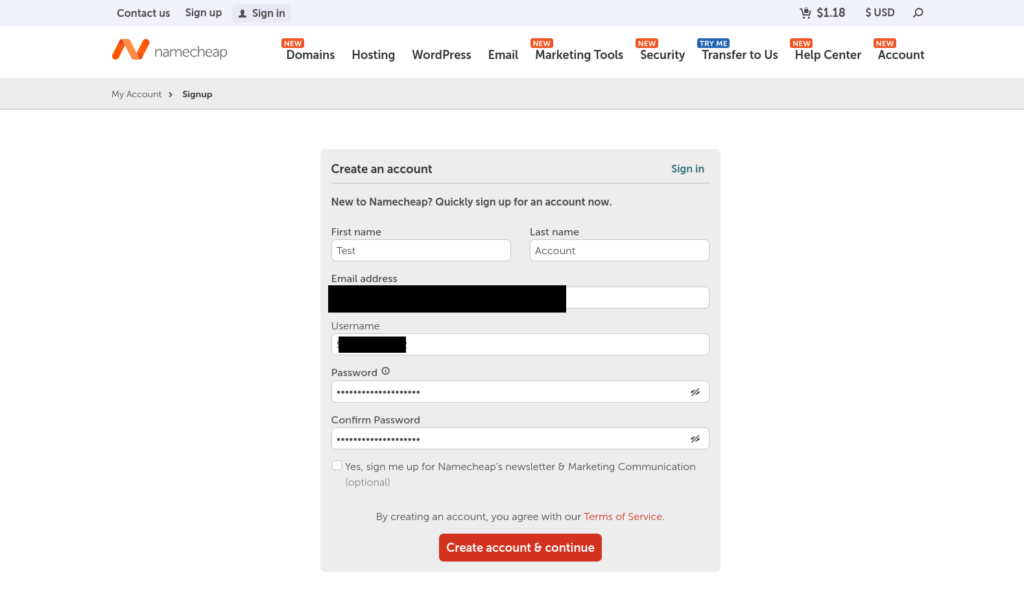
- Step 12: Use new username and password to setup Namecheap account. Uncheck marketing communication box.
- Step 13: Setup 2FA within Namecheap
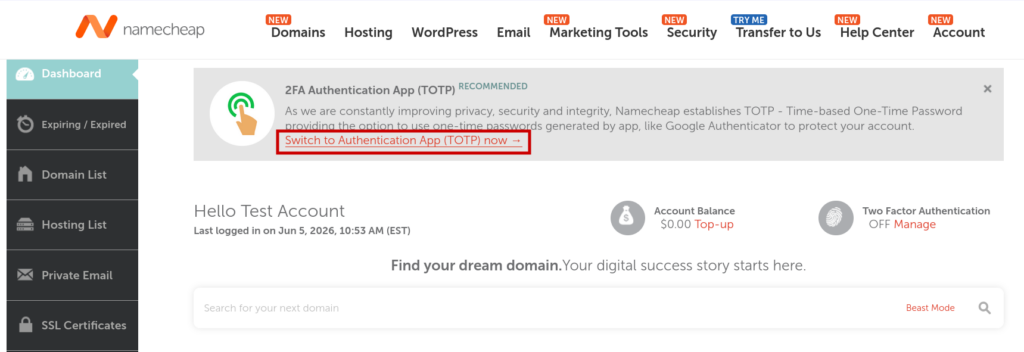
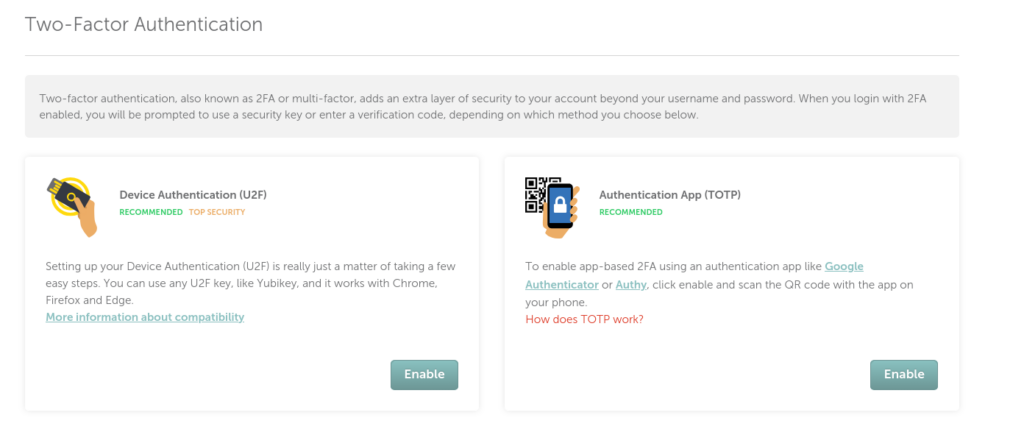
This can be done with either a physical security 2FA key such as a Yubikey or phone app such as Cisco DUO (I’ll be using DUO for this example). Click on ‘Enable’.
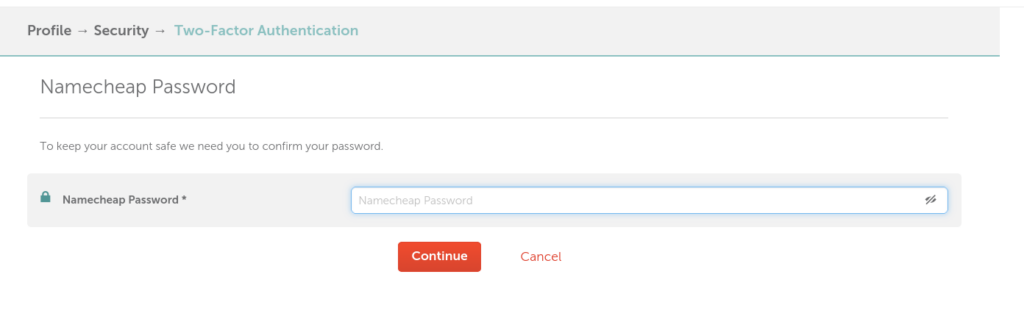
Re-enter your Namecheap password
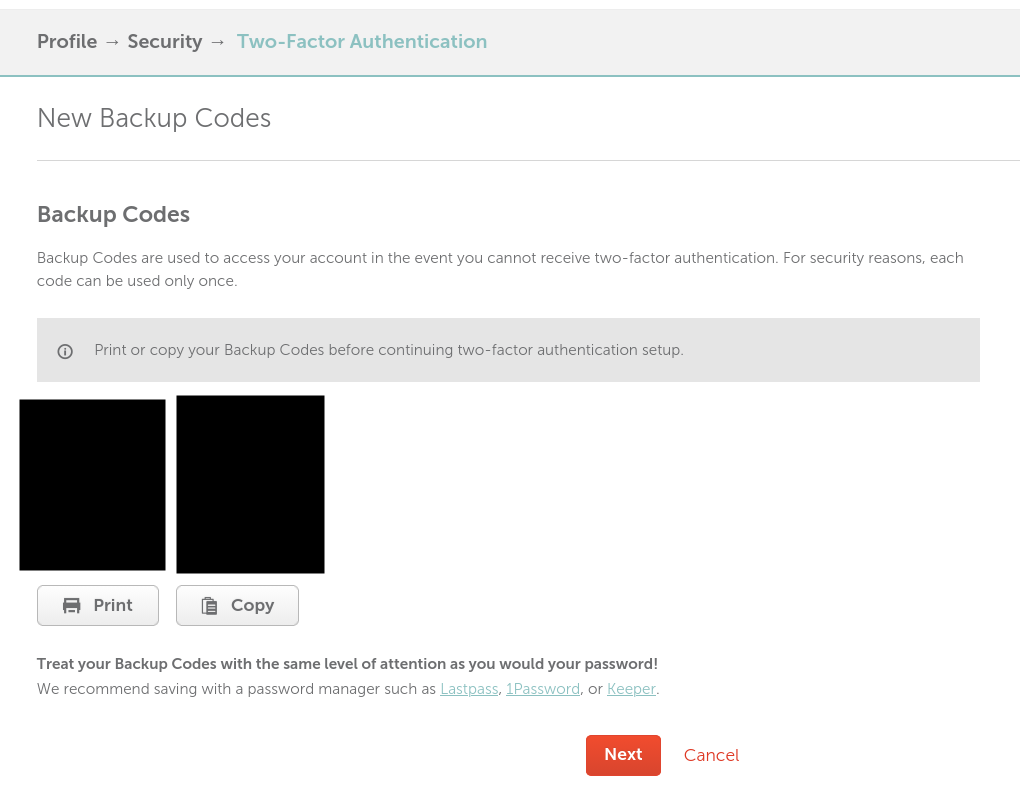
Write down your recovery codes and keep them in a safe or store them on Bitwarden (We will be using Bitwarden for this example). Click on ‘Copy’ and navigate over to Bitwarden.
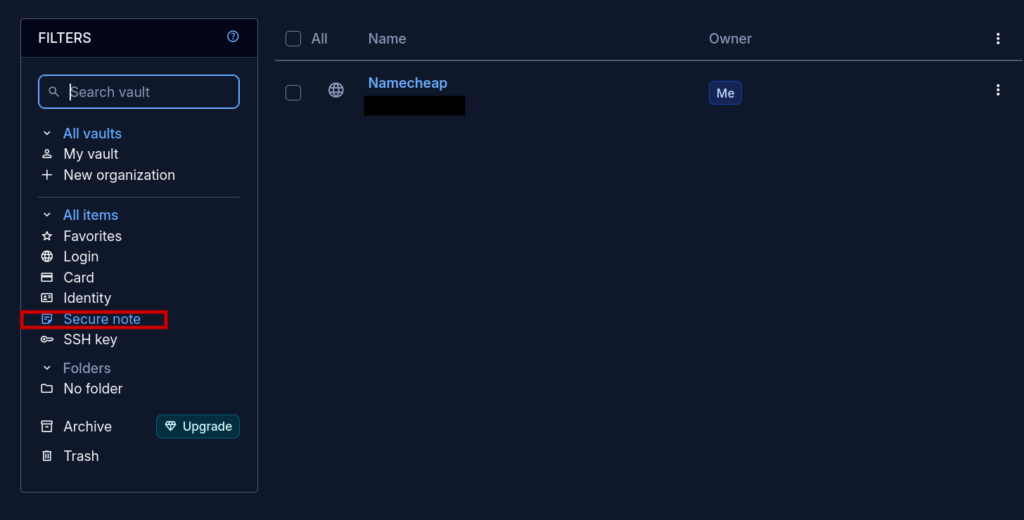
Click on ‘Secure Note’
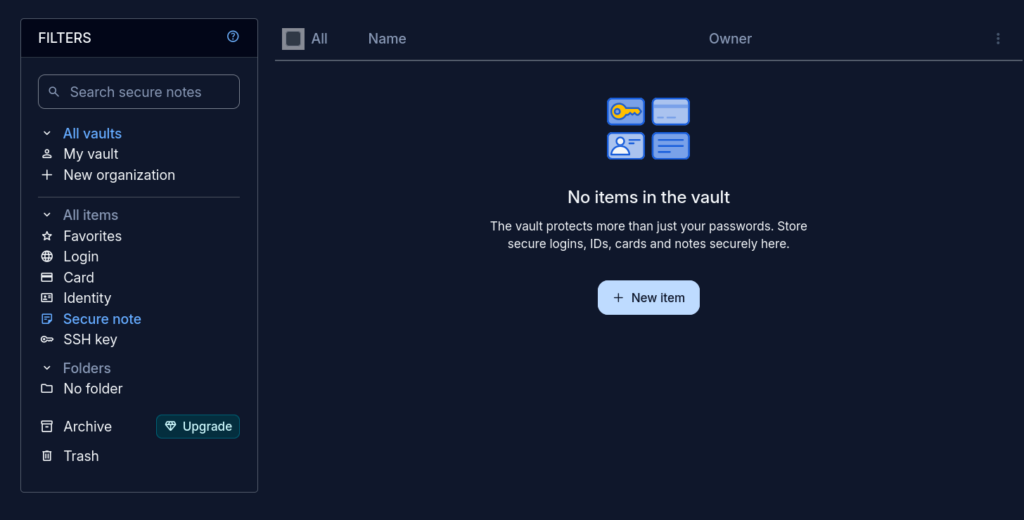
Click on ‘New item’
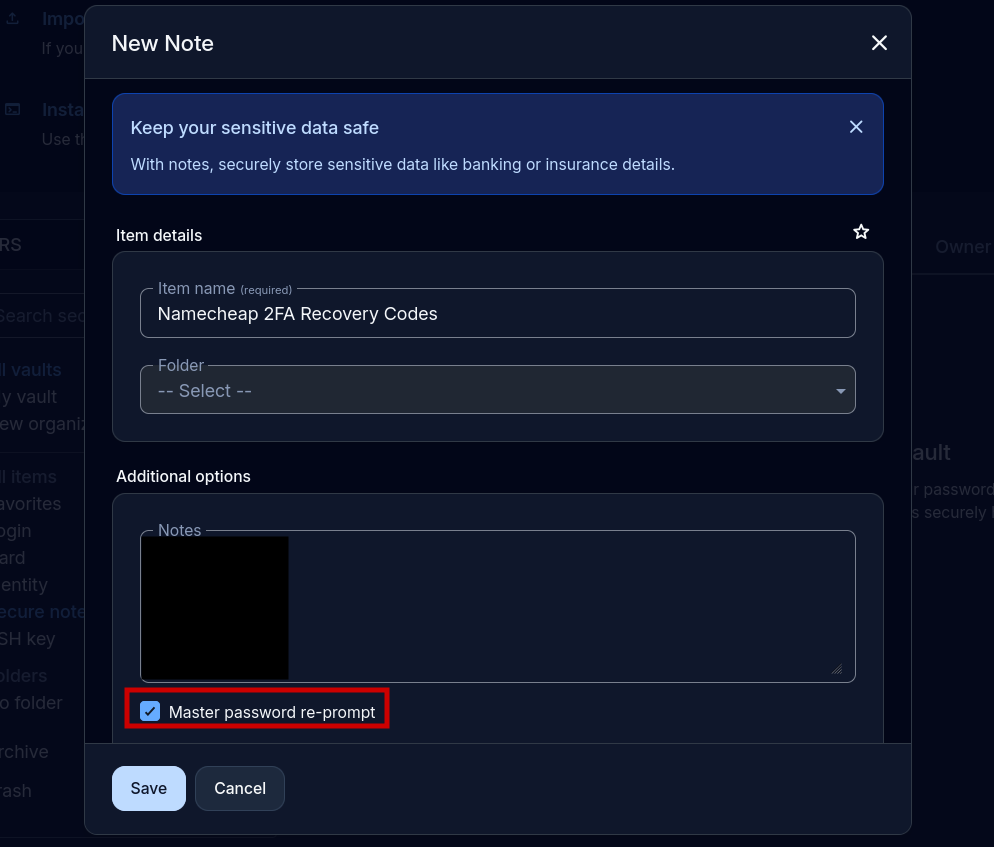
Title it ‘Namecheap 2FA recovery codes’ and paste the codes in the box below. Check off ‘Master password re-prompt’
Go back to Namecheap and click on ‘Next’. Use DUO to scan the QR code and enter the 2FA you see listed
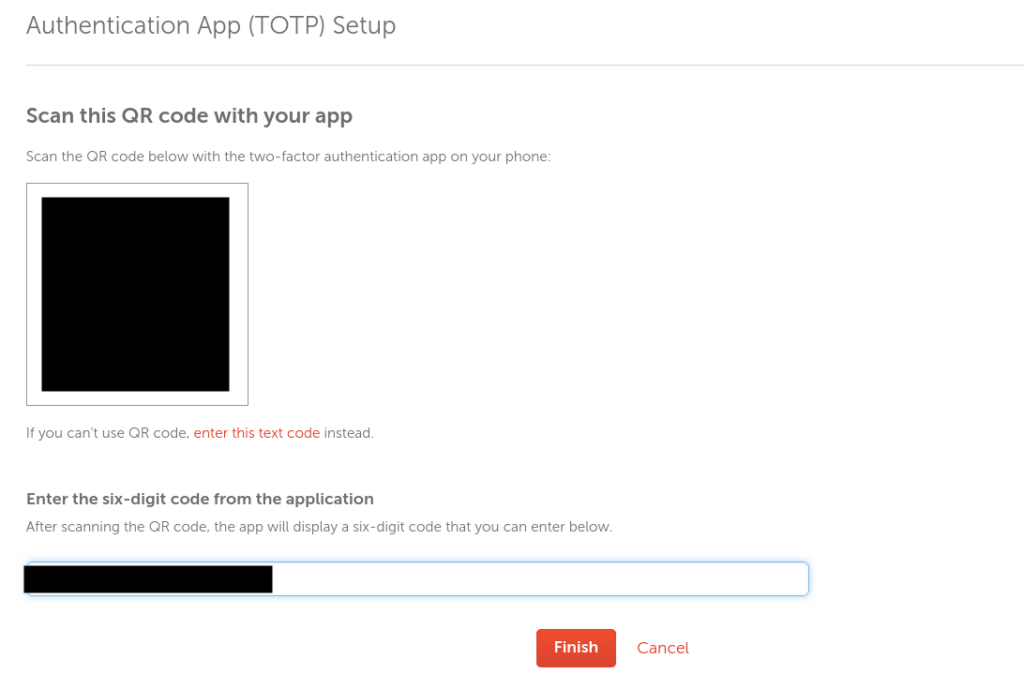
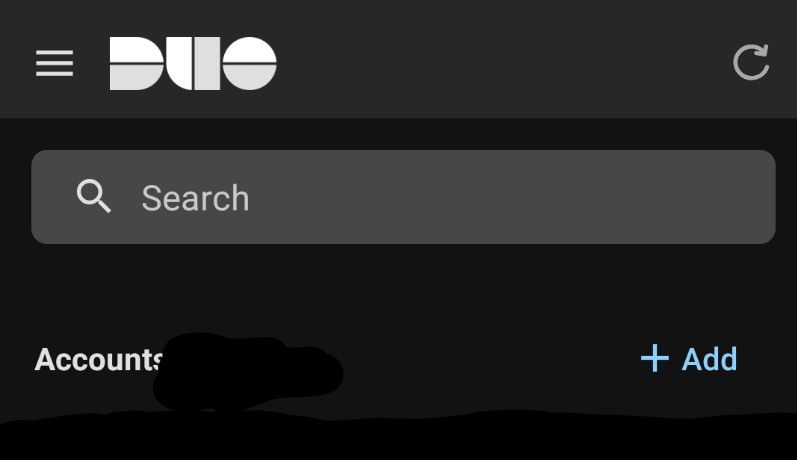
Scan the QR code with Duo by pressing ‘+ Add’
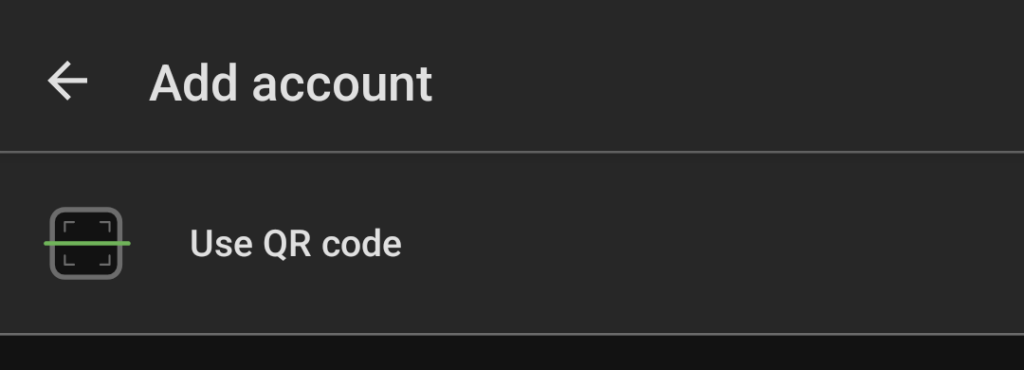
Click on Use QR code
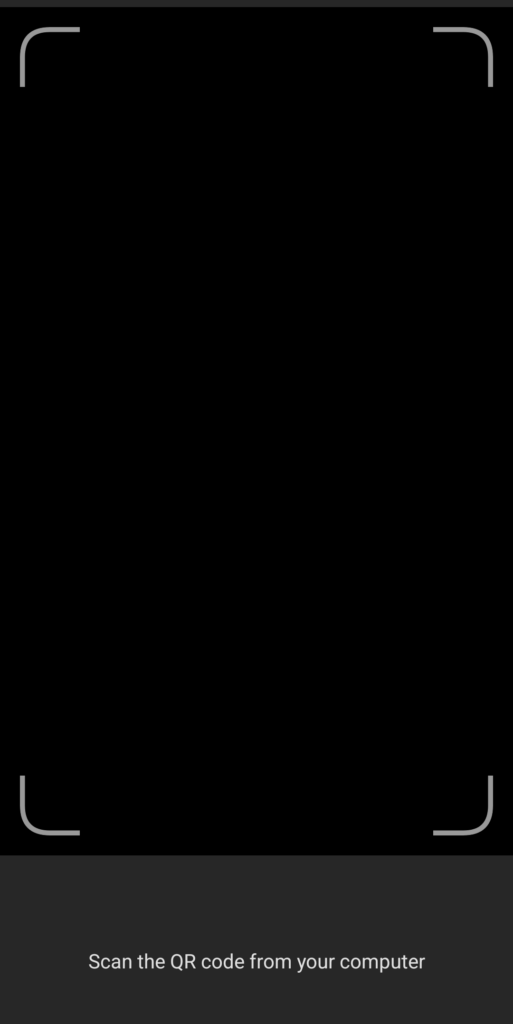
Scan the QR code using your phone
You will see your Namecheap username, click on ‘Save’
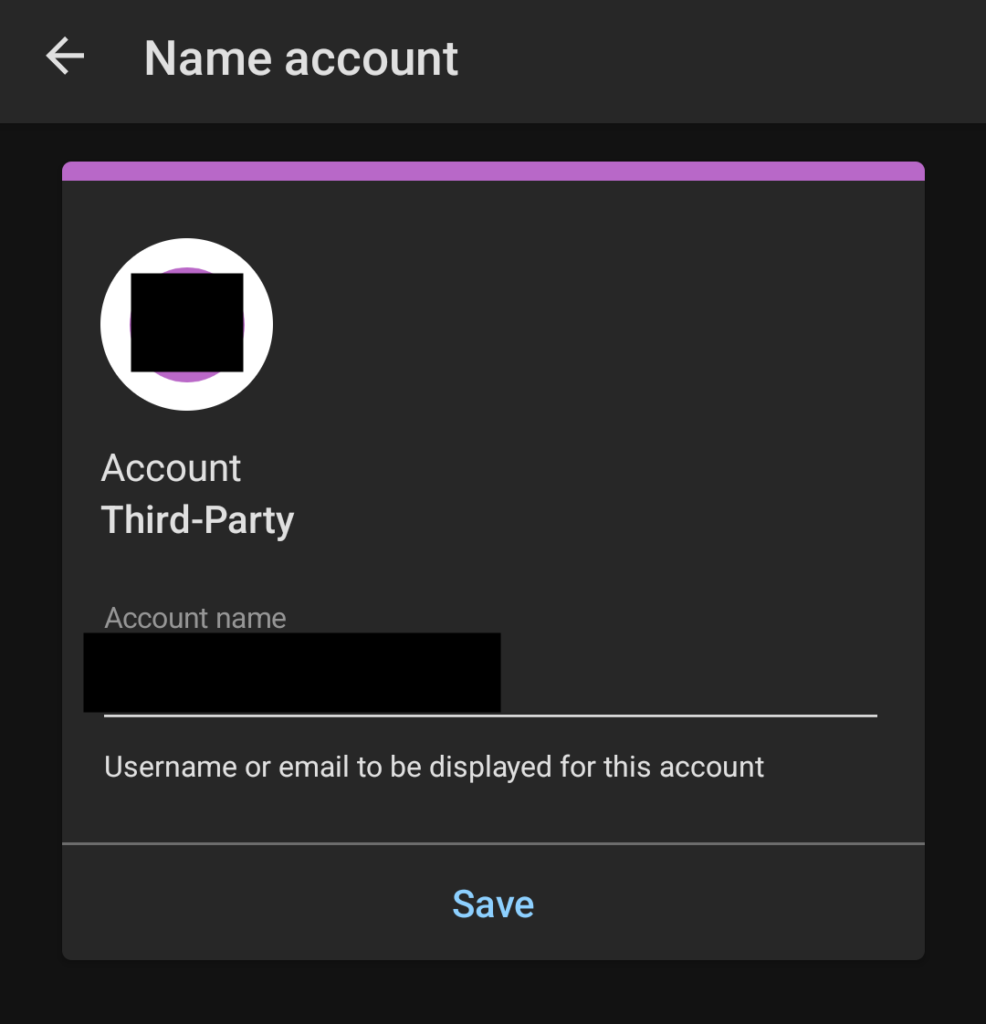
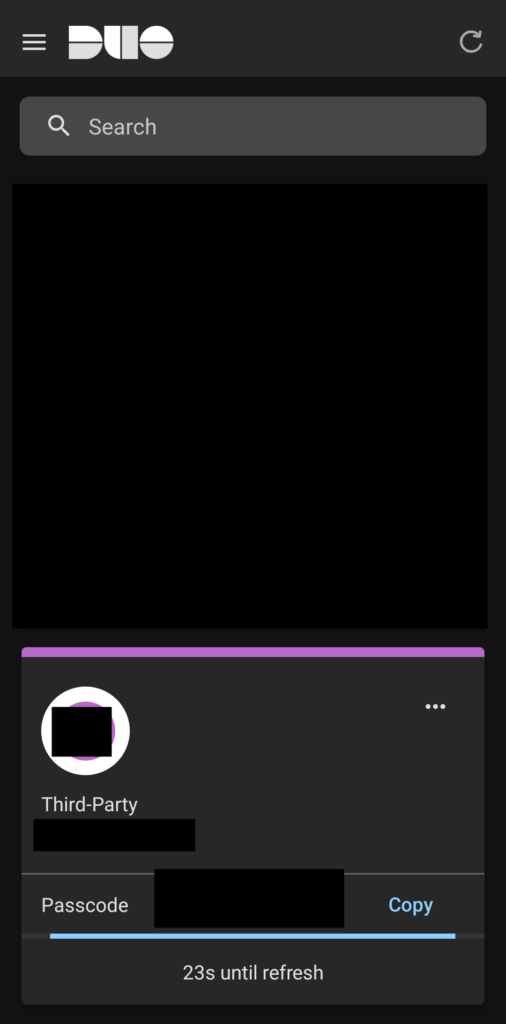
Enter the 6 number 2FA code listed from Duo into Namecheap and click on ‘Finish’
Part III: Purchase Custom Domain Name
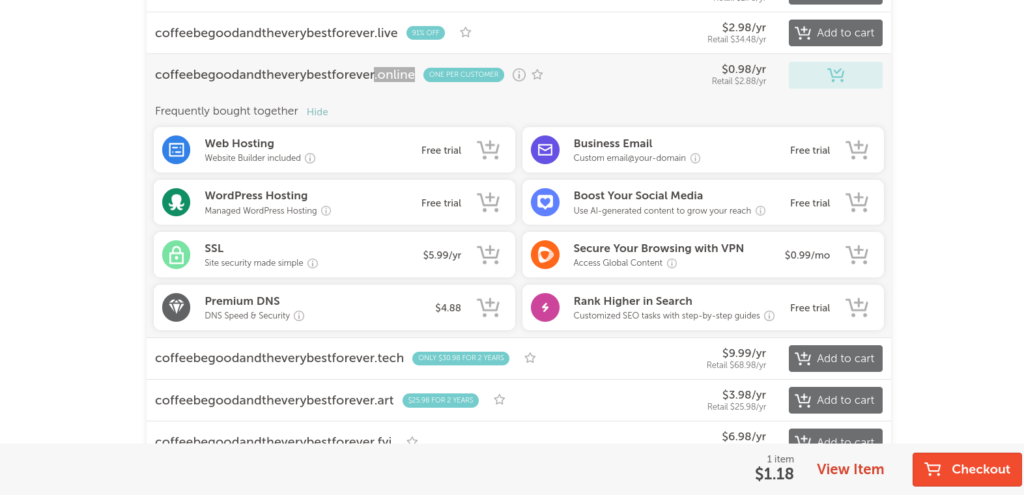
- Step 14: Search Namecheap for whatever domain you want
Pay attention to the retail price. This is what you will renew at. The first price listed is the promotional. Scroll down and look at your options. In this example I used coffeebegoodandtheverybestforever.online

- Step 15: Add to cart and click checkout
Keep the domain privacy enabled but take off the ‘Stellar Web Hosting’ add-on (We’ll be using Linode for this)
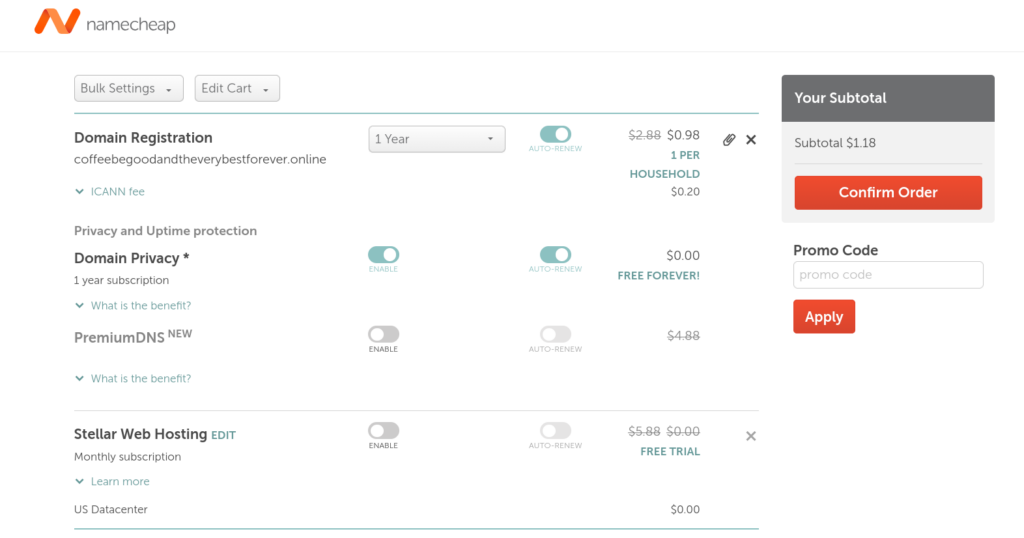
Side-note: Why is domain privacy important? When you buy a domain you have to register with ICANN alongside some contact info. Namecheap handles this and keeps these details secure with the domain privacy so that if anyone looks up your domain using ICANN’s tool here, they’re given a ‘withheldforprivacy’ email vs. your real life info. Don’t worry, if you need to be reached ICANN and Namecheap will contact you. The emails sent to that random email get filtered for spam but you’ll still be able to get contacted just in case. You just won’t get spammed a lot compared to if you were to actually put in your real life info.
Click on ‘Confirm order’ and then fill out your billing info. Then click on ‘Pay now’
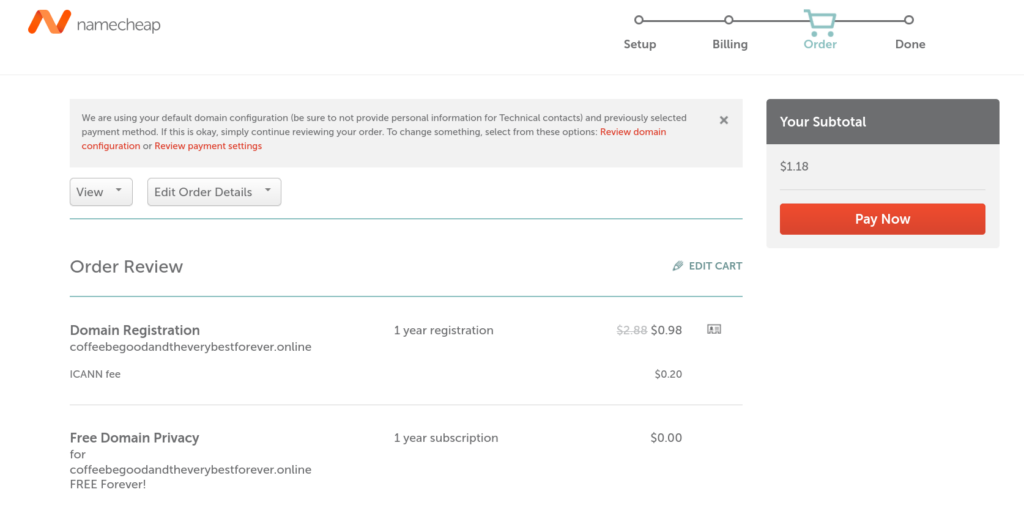
- Step 16: Click on ‘Namecheap’ to go back to the main menu

Part IV: Create Email Account with Proton Mail (optional)
While you don’t have to do this, it would be nice to have a custom email such as contact@coffeebegoodandtheverybestforever.online (yes it works lol say hi if you want).
We’ll be using Proton Mail for this example:
- Step 17: Register for Proton Mail’s ‘Mail Plus’ tier
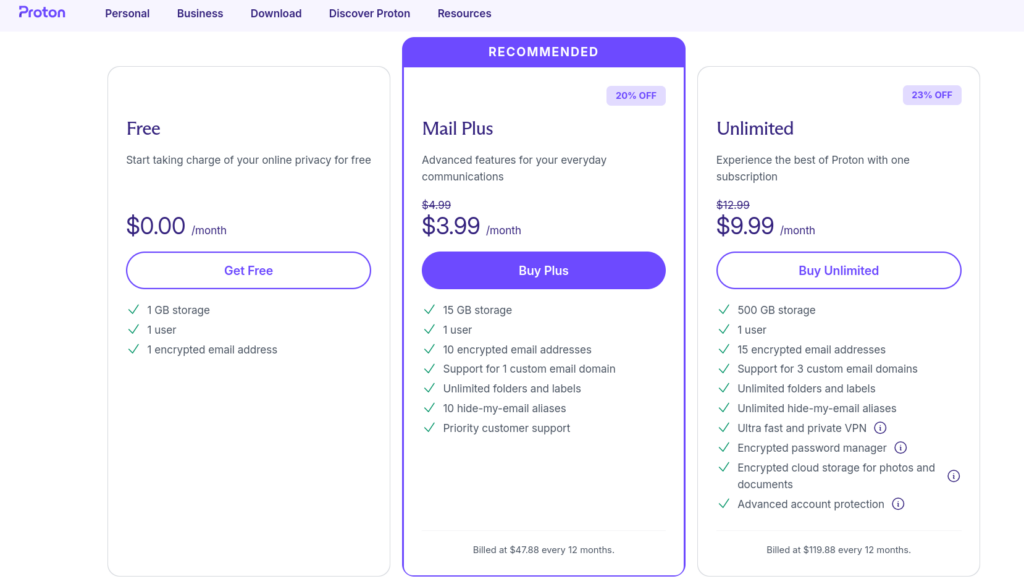
You can register at https://proton.me/pricing
Feel free to use my referral and get $20 in credits! https://pr.tn/ref/TSKPJ15Q
Now that you have your own Proton email created (remember: Use a different email than what you will normally use). We can move onto the next step and setup your own Linode account. Once we get that setup we can begin the process of configuring your own WordPress instance using the Namcheap domain and then configuring email by making some changes to DNS.
Part V: Create Linode Account
Linode was bought out by Akamai a while back ago and it’s now known as Akamai Cloud
- Step 18: Sign up with Akamai
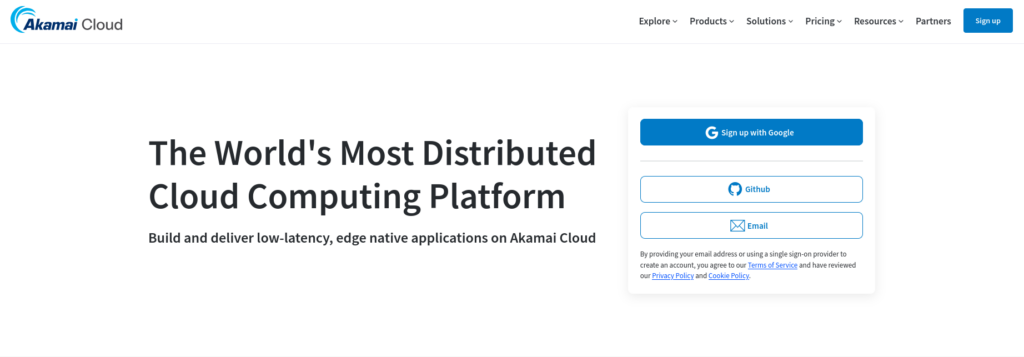
NOTE: You will be prompted to verify your phone number and email address. You won’t get billed until you start using it.
Part VI: Setup Firewall in Linode / Akamai Cloud
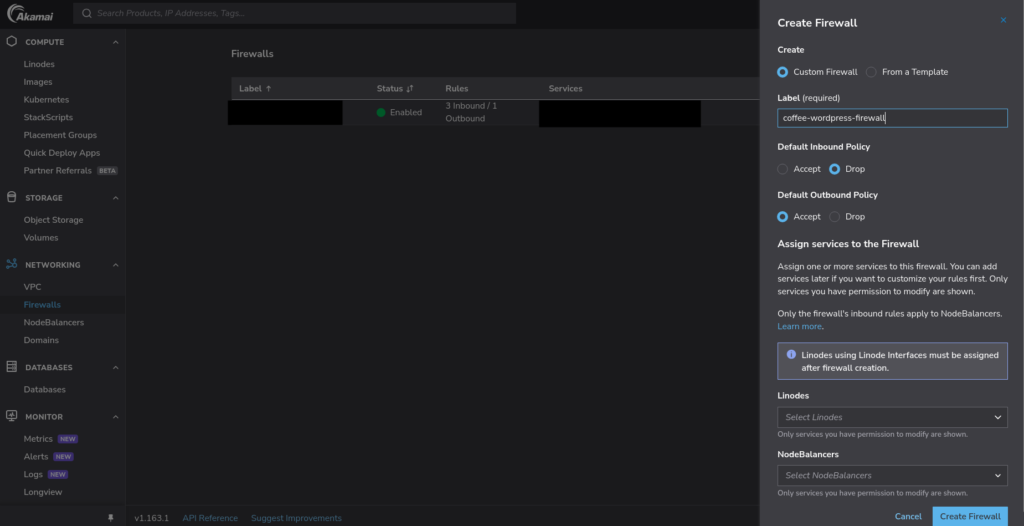
- Step 19: Reach your dashboard and click on ‘Firewalls’ on the left hand side. Click on ‘Create firewall’
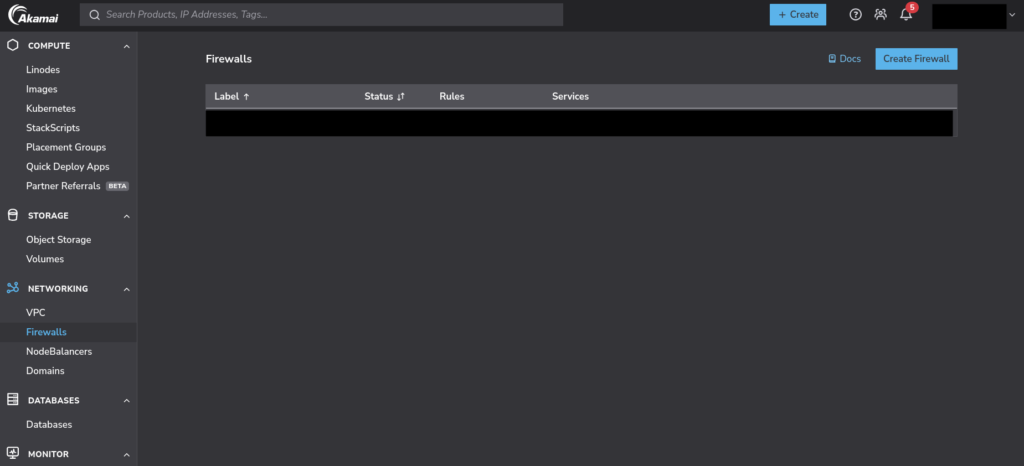
- Step 20: Give your firewall a label such as ‘name-wordpress-firewall’ and set the following parameters
- Create: Custom Firewall
- Default Inbound Policy: Drop
- Default Outbound Policy: Accept
- Click on ‘Create Firewall’
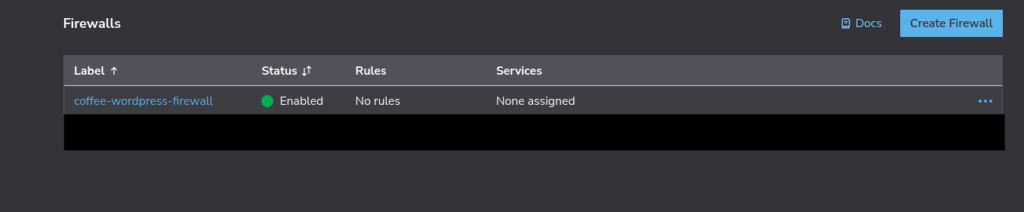
- Step 21: Click on your newly created firewall
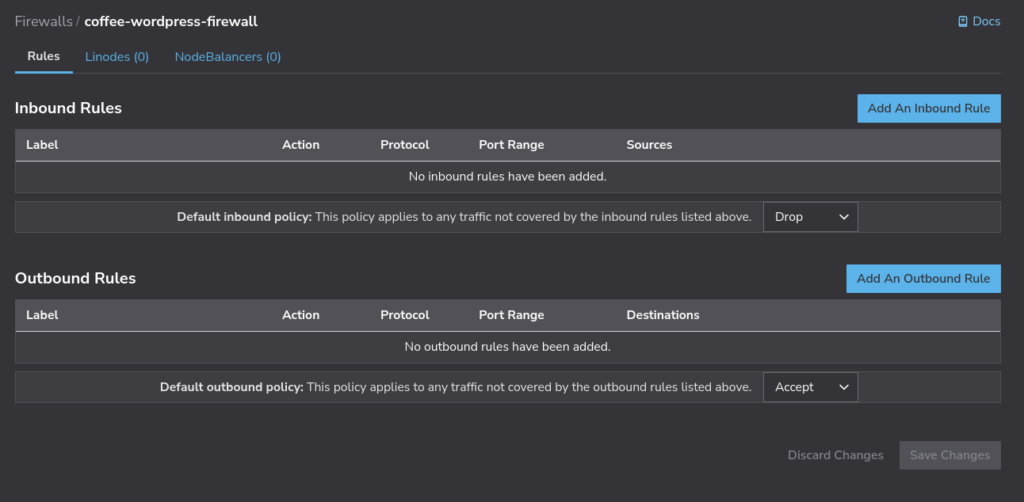
You will see the following:
- Step 22: On a new tab search up ‘What’s my IP?’ and copy that number
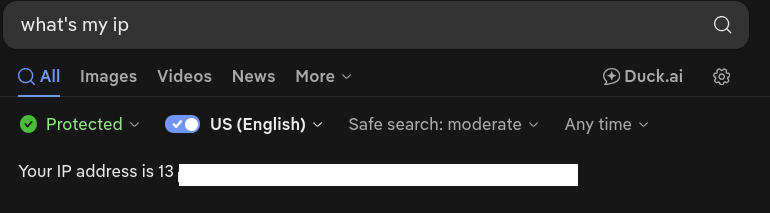
Why? IP addresses can change and happens with any ISP. Your ISP may not own the whole block but if it changes by a few you should be safe. For now, just know that if you ever run into any issues SSHing into your WordPress instance that you can always come back to edit this part using the IP address you see from searching ‘What’s my IP?’.
- Step 23: Add inbound SSH rule
Go back to your Akamai tab and click on ‘Add an Inbound Rule’. Copy the following config using your IP address. Add a /32 after your IP address. Click on ‘Add Rule’.
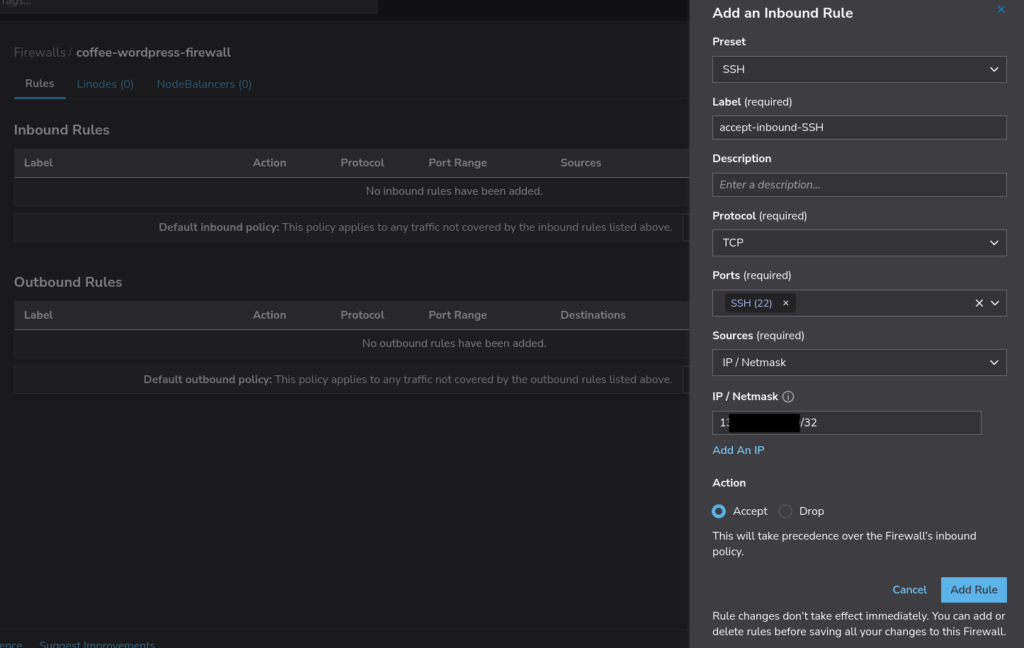
You should now see the following. Click on ‘Save changes’.
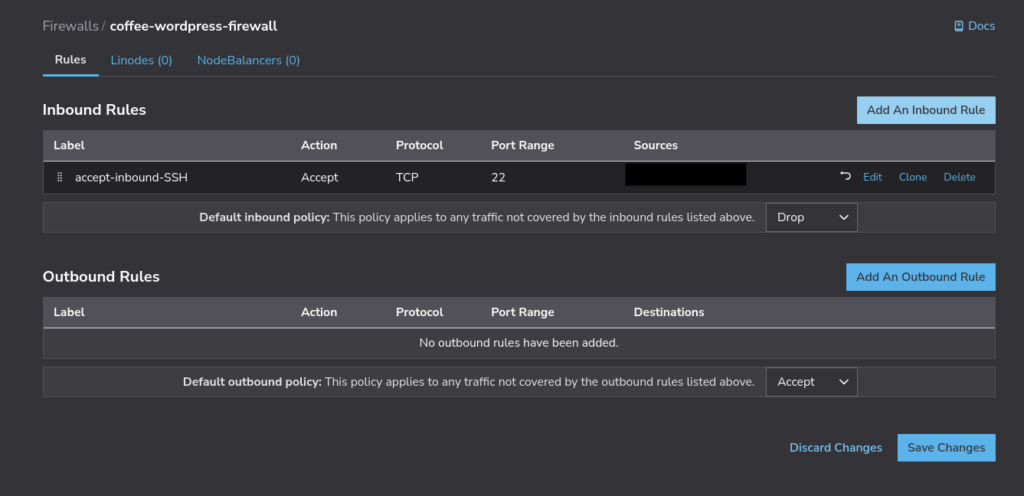
- Step 24: Add inbound rule for HTTP and HTTPS
Click on ‘Add an Inbound Rule’ and select the ‘HTTP’ preset. Why? All browsers redirect to HTTPS nowadays. This is just so that your web site can still accept HTTP traffic if for whatever reason HTTPS is not available. The preset should auto fill everything. Click on ‘Add Rule’ and then ‘Save Changes’ just like you did in the last step.
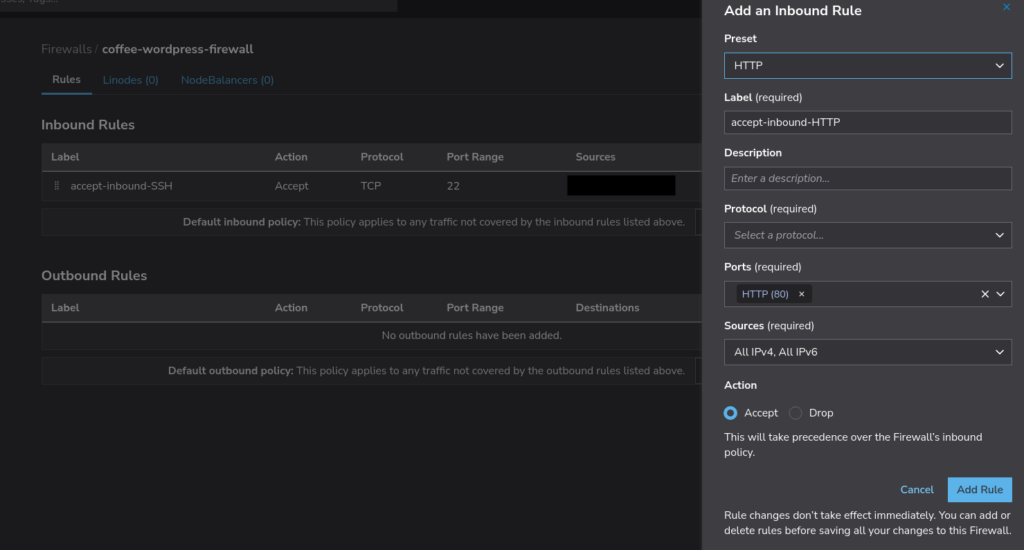
Repeat for HTTPS. Click on ‘Add rule’ and ‘Save changes’
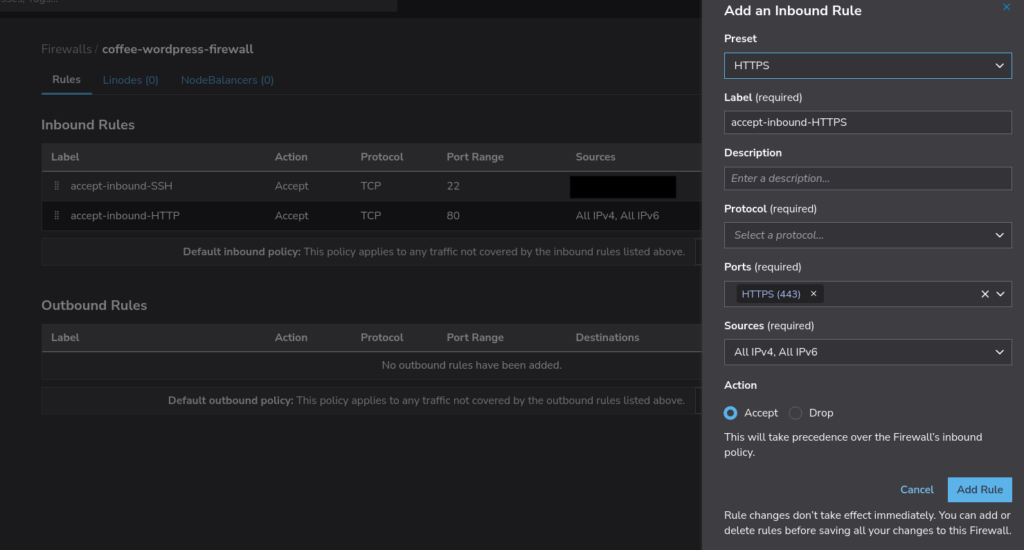
You should now have the following:
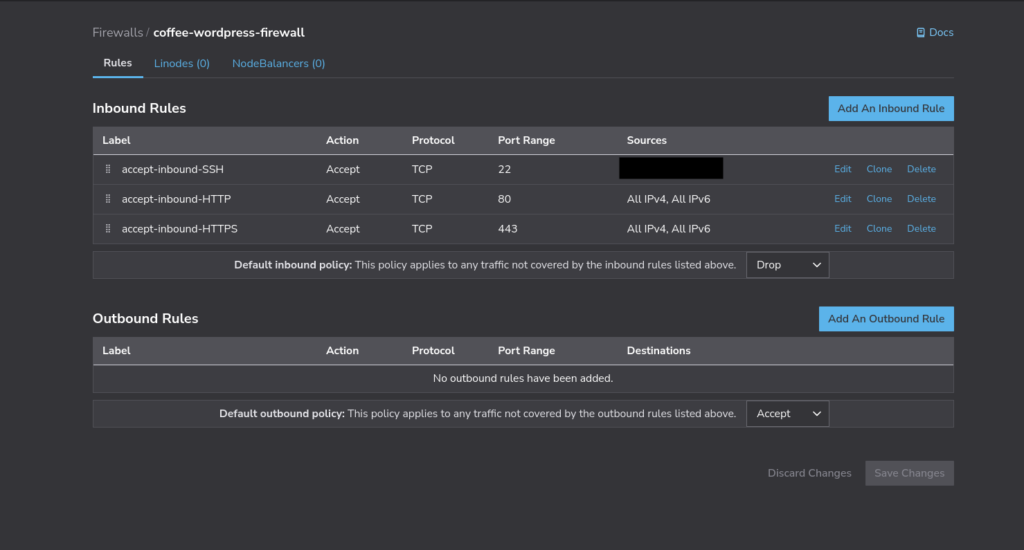
- Step 25: Configure Outbound Rules
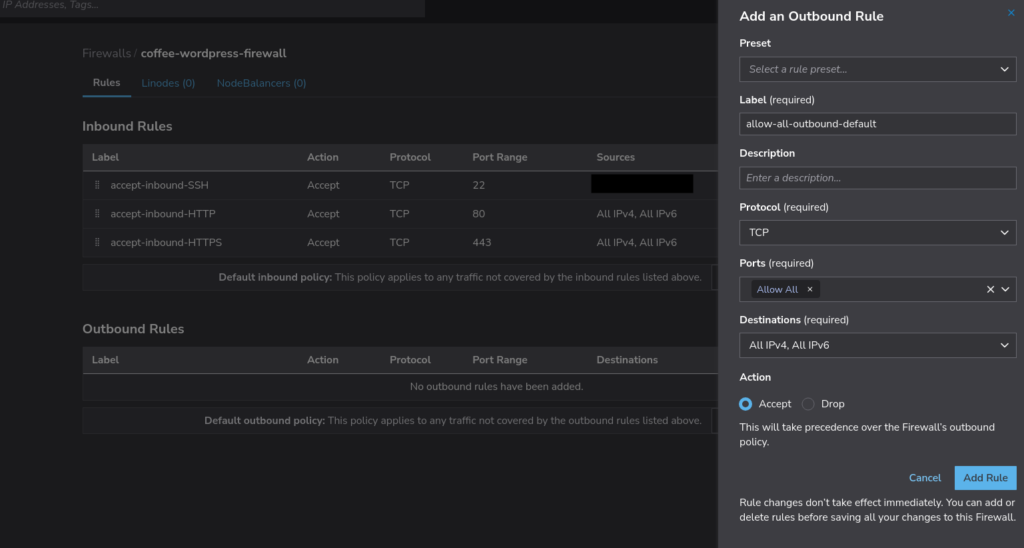
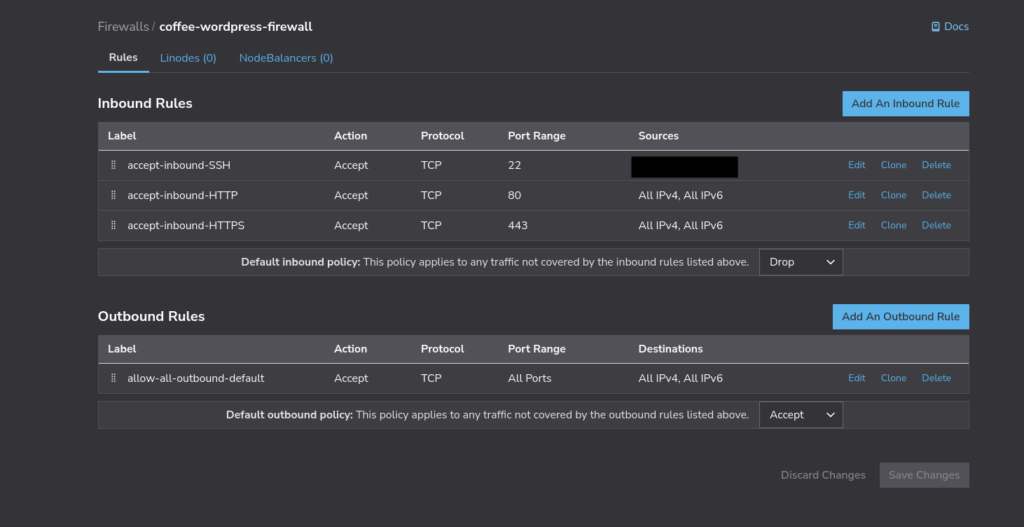
The firewall you just configured set rules for what is allowed in. Now you have to specify what is allowed to come out. Click on ‘Add an outbound rule’ and copy the following. Click on ‘Add rule’ and ‘Save changes’.
You should now see the following:
Part VII: Setup Domains API Token in Linode / Akamai Cloud
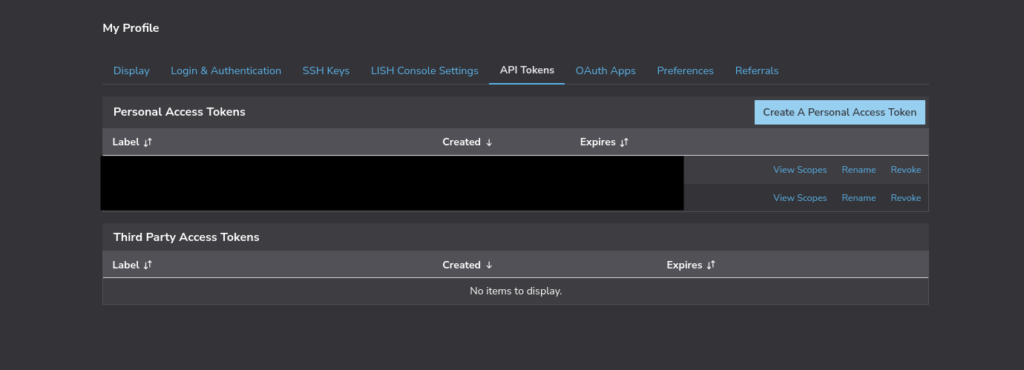
- Step 25: Click on your profile on the top right corner and select ‘API Tokens’
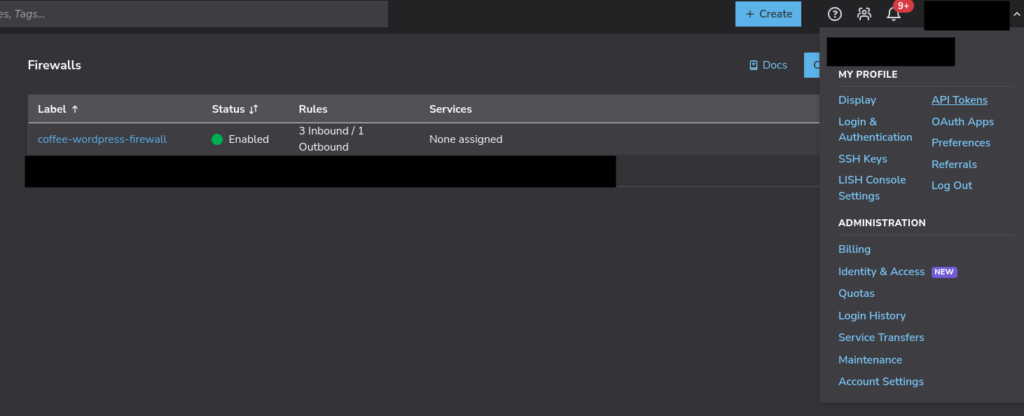
Click on ‘Create a personal access token’
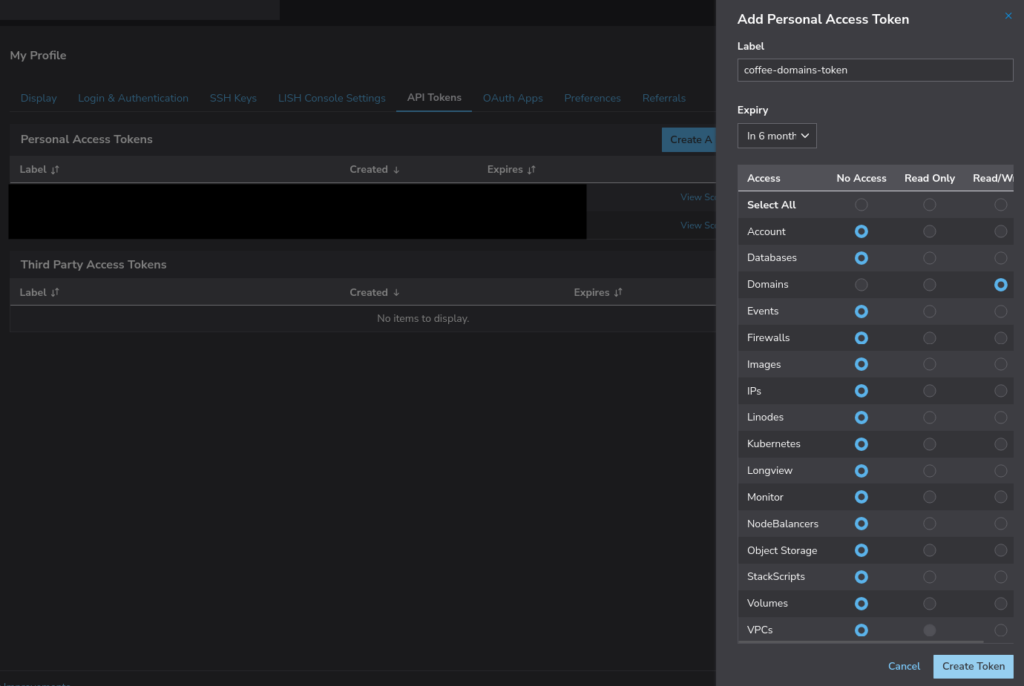
Select the following:
- Label: whateveryouwant-domains-token
- Expiry: 6 months or never (you’ll have to update this manually when the time comes. Don’t worry, it’s easy and you can do this after you setup your WordPress instance. You’ll see here shortly).
- Access: No access for ‘Select all’ (this will highlight everything which is what we want)
- Click on the dot on ‘Domains’ for ‘Read/Write’
If you did everything correctly you should see something like what’s below. Click on ‘Create Token’.
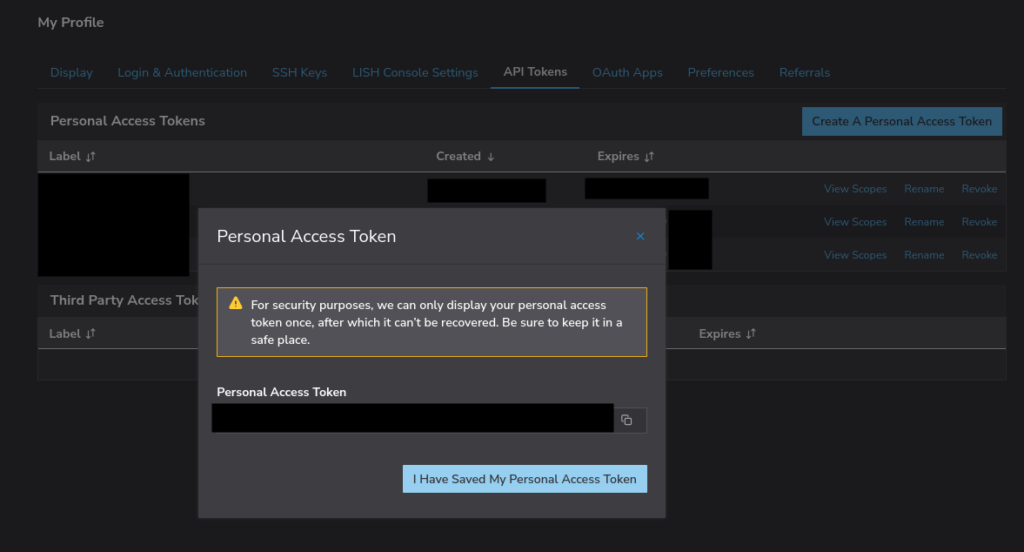
- Step 26: Copy your API token into Bitwarden
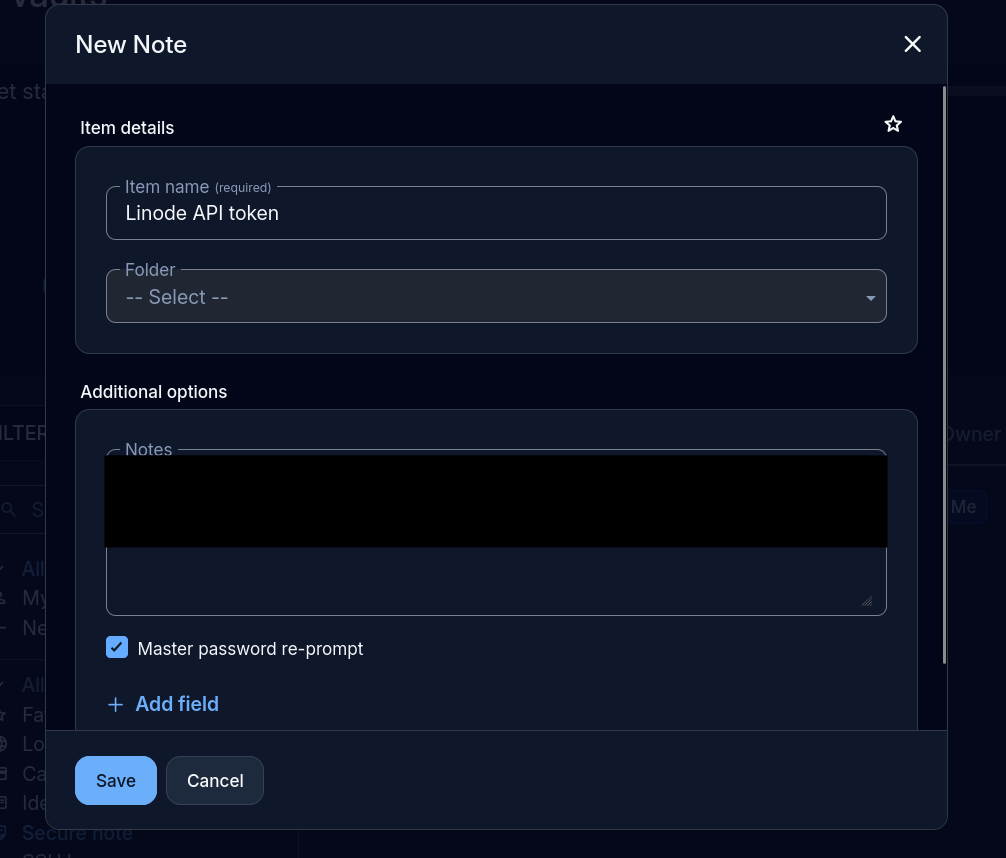
Recommend keeping ‘Master password re-prompt’ checked. You can add this under the ‘Note’ section when clicking ‘New’ to add.
REMEMBER: DO NOT SHARE THIS WITH ANYONE
Click on ‘Save’
Go back to Akamai and select ‘I have saved my personal access token’. You will now see it listed as such:
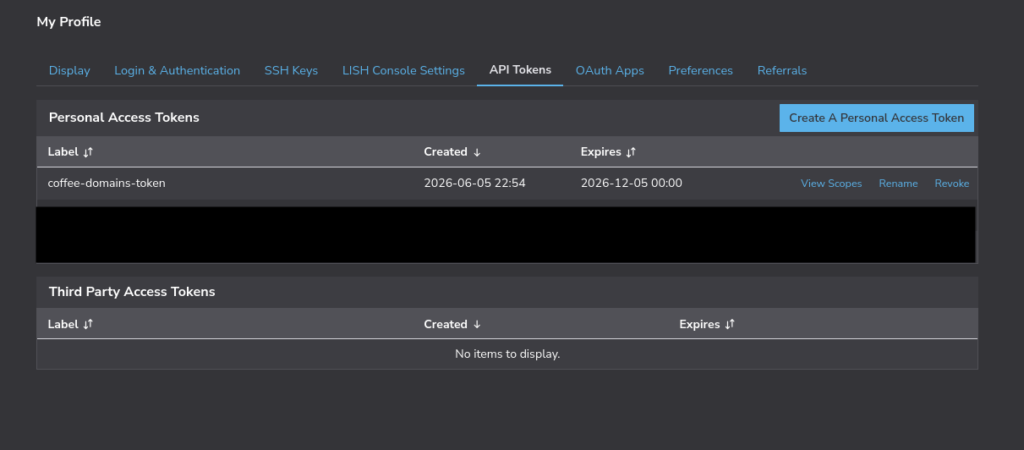
NOTE: For security purposes you won’t be able to copy this from Akamai. This is one of the reasons we setup Bitwarden to save this info.
Part VII: Setting up SSH Keys in Akamai / Linode
Next up, we need to setup our SSH keys. These can be generated with Bitwarden.
- Step 27: Navigate to your profile picture on the top right and select ‘SSH Keys’
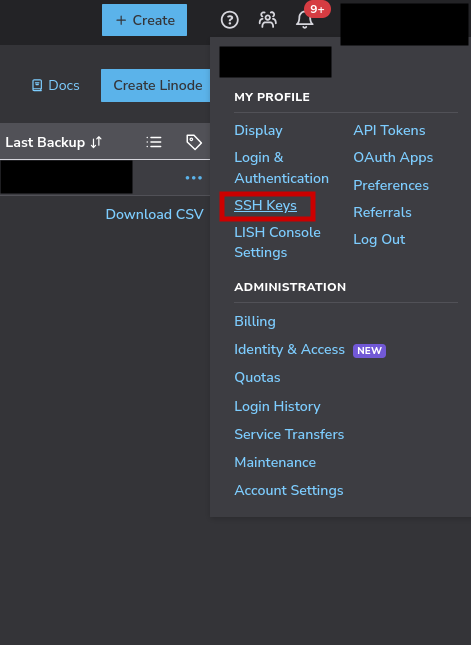
Click on ‘Add an SSH Key’
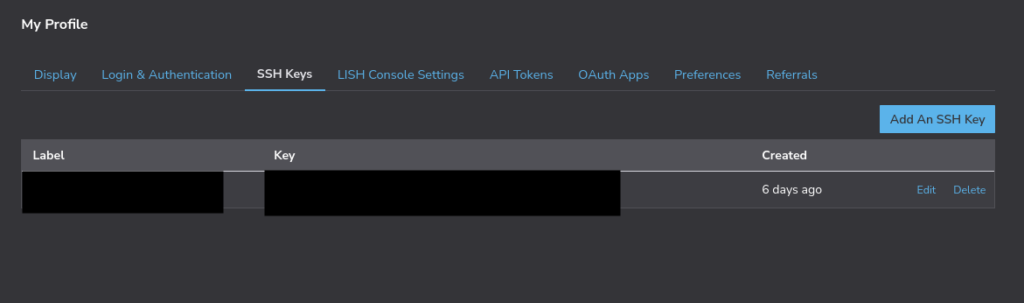
You will see the following:
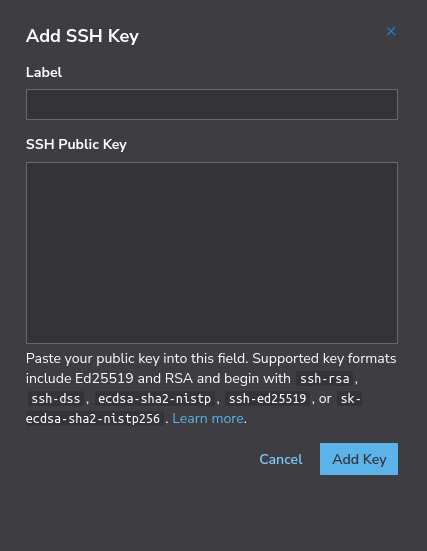
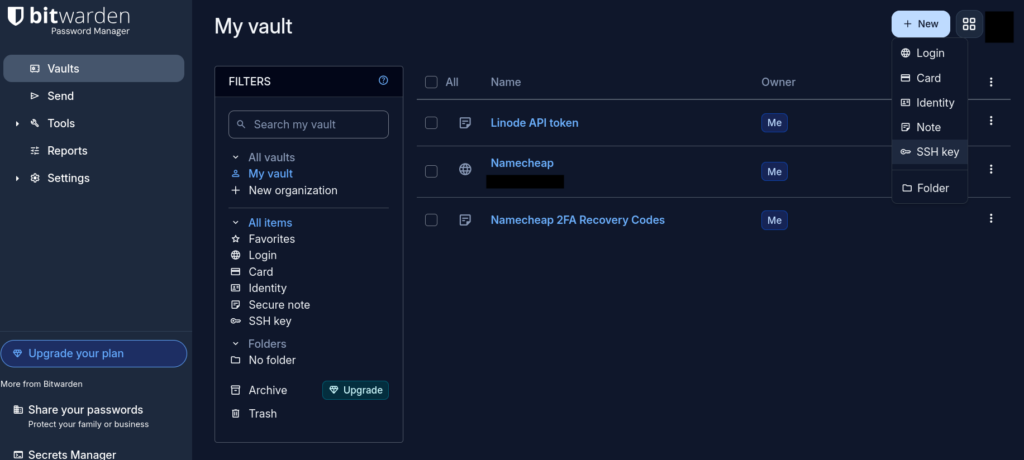
- Step 28: Go to your Bitwarden tab and select ‘New’ > ‘SSH Key’
- Step 29: Give it a name and click on save
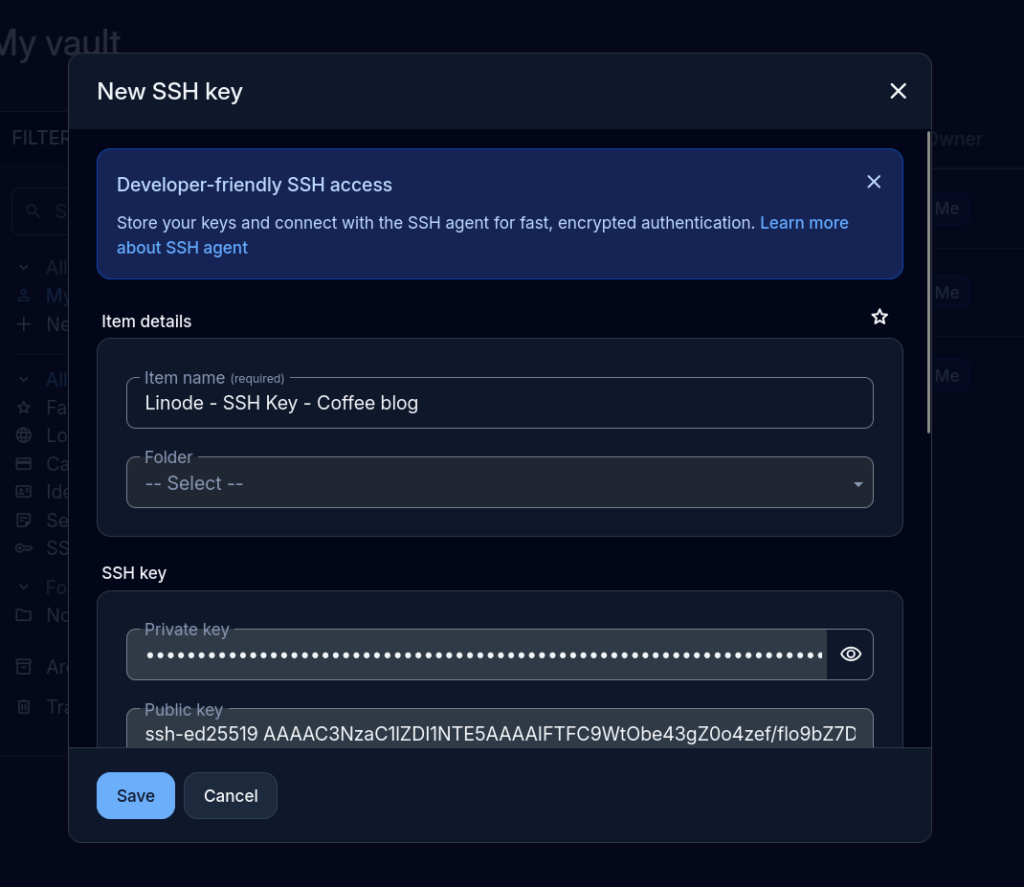
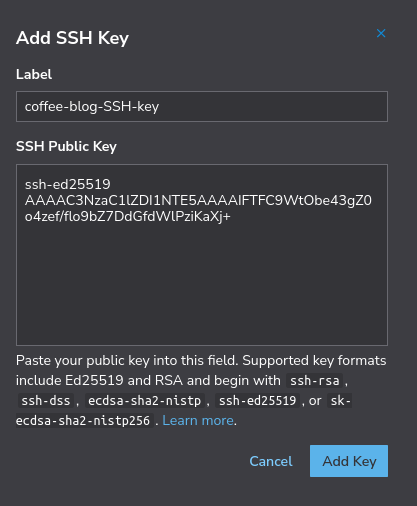
Keep the private key private and DO NOT SHARE WITH ANYONE. The public key is designed to be public and shared. Copy this and go back to Linode / Akamai. Give it a label and click on ‘Add key’.
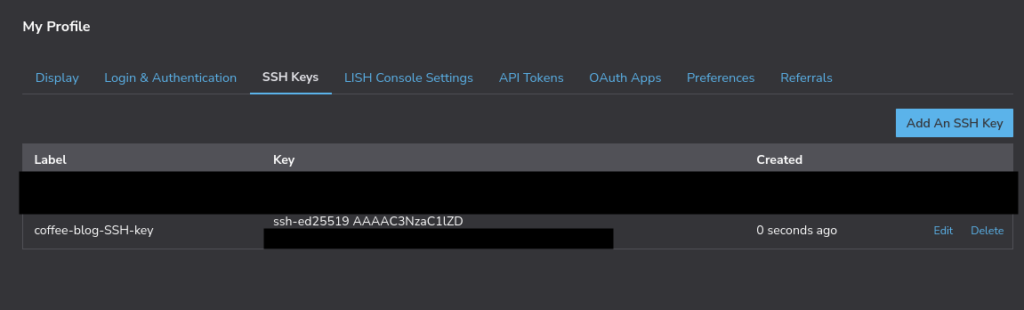
You will now see something similar to the following:
Part IX: Setting up DNS
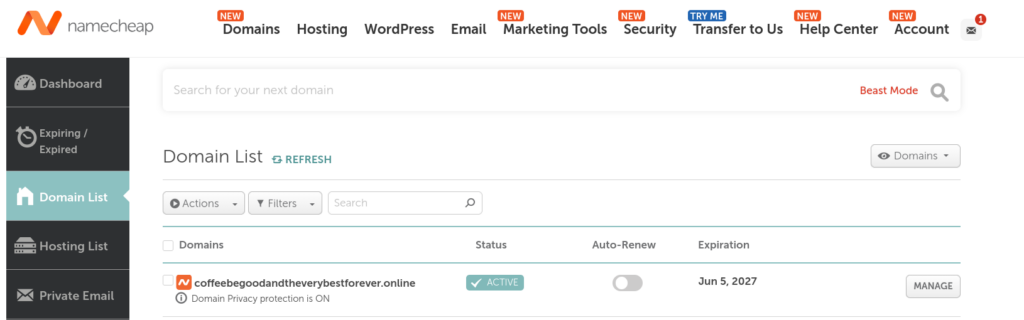
- Step 30: Navigate over to Namecheap and go to ‘Domain List’. Click on ‘Manage’.
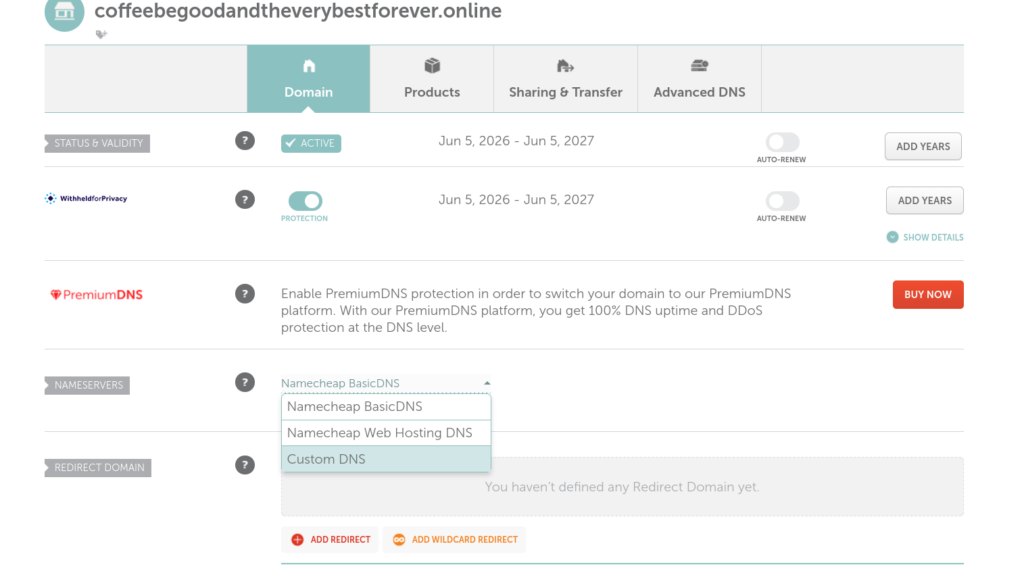
Scroll down and click on ‘Name servers’ and select ‘Custom DNS’
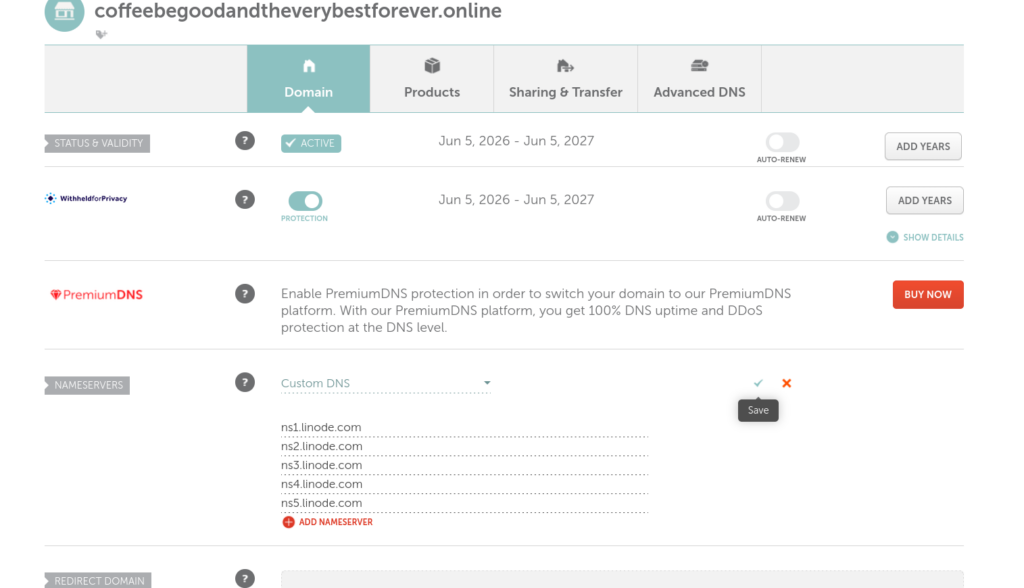
Add the following (as of 06/2026 from Akamai post):
- ns1.linode.com
- ns2.linode.com
- ns3.linode.com
- ns4.linode.com
- ns5.linode.com
Click on ‘Save’
NOTE: This can take up to 48 hours to update but during the setup of this blog it took a little bit over an hour.
- Step 31: Setting up DNS in Linode / Akamai
Now that we configured Namcheap, we need to setup a similar thing back over in Linode / Akamai. Go back to Linode and click on ‘Domains’. Then click on ‘Create Domain’:
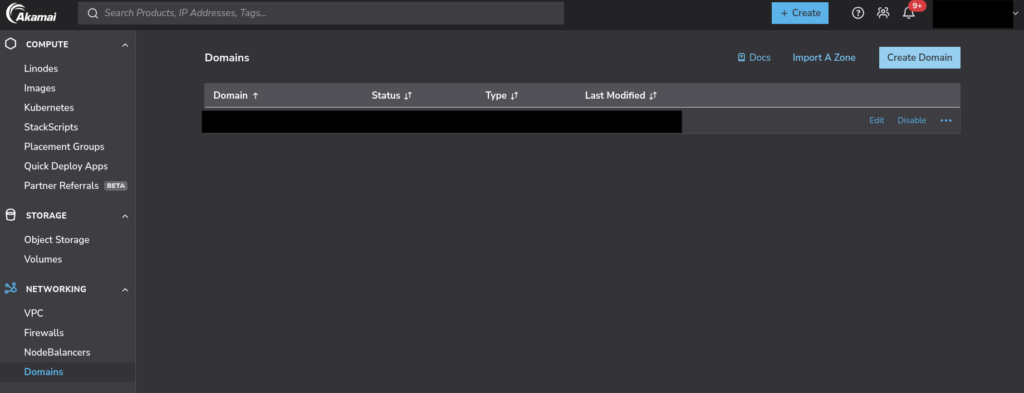
Add your domain and the separate Proton email you setup earlier. NOTE: You can add any email including the ones you want to create using the domain but only do this if you’re sure you won’t lapse on billing. Once all details are filled, click on ‘Create Domain’.
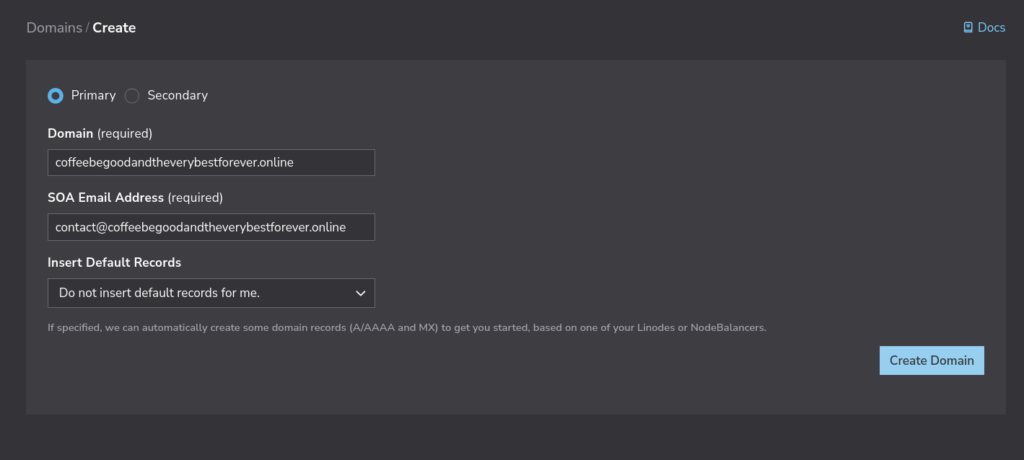
Reason: This email will be public record under the SOA record type and anyone will be able to see it using tools such as mxtoolbox.com
Example of public viewable SOA record using MXToolbox from the https://mondragon.info/ domain:
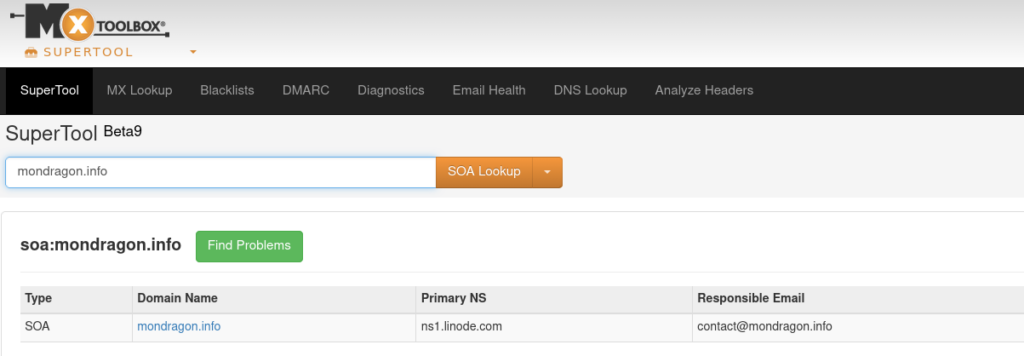
I recommend using the separate Proton Mail email (@proton.me) as it was assumed you set it up as a separate inbox for the purpose of this blog. You can keep a custom contact@domain.sample email but just be mindful of keeping your card details updated. I recommend you put in a calendar event on your phone now to remind you the day before and the week before for billing on both the Namecheap, Linode, and Proton Mail.
Part X (optional): Configuring Proton Mail Email for Linode Instance
Now that you have DNS and your domain setup in Linode, it’s time to get Proton Mail involved.
- Step 32: Navigate over to Proton Mail
Click on the gear icon next to your email Select ‘All settings’
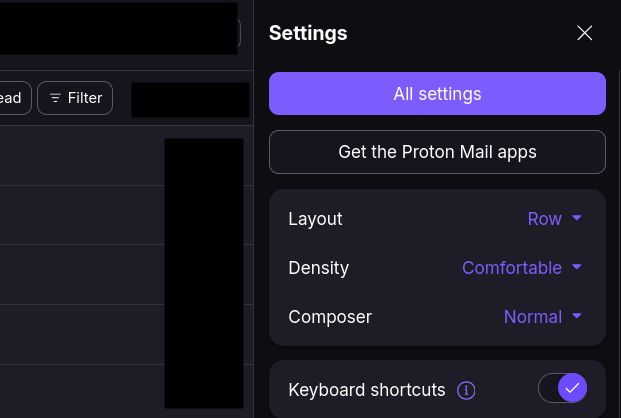
Scroll down until you hit ‘Domain names’ and click on it.
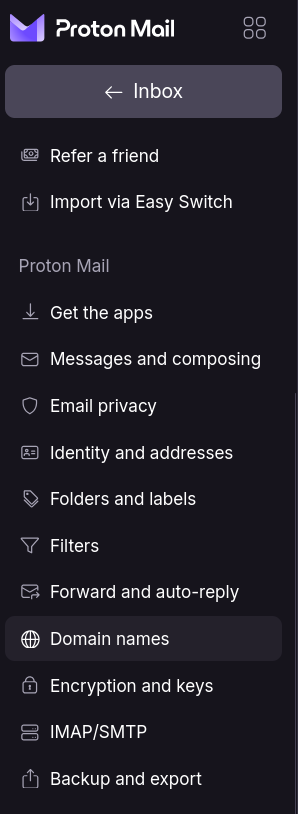
- Step 33: Click on ‘Add domain’
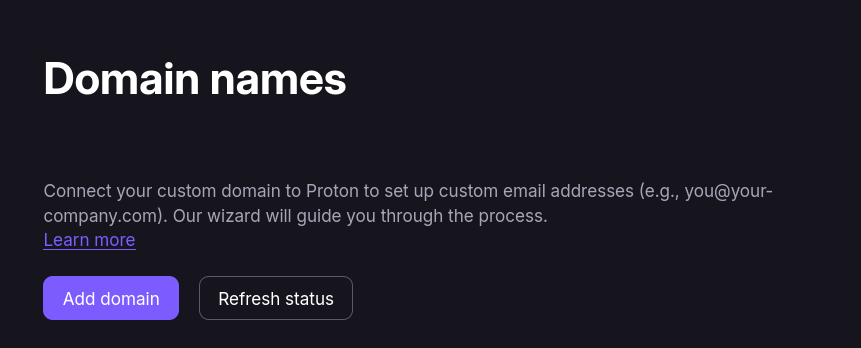
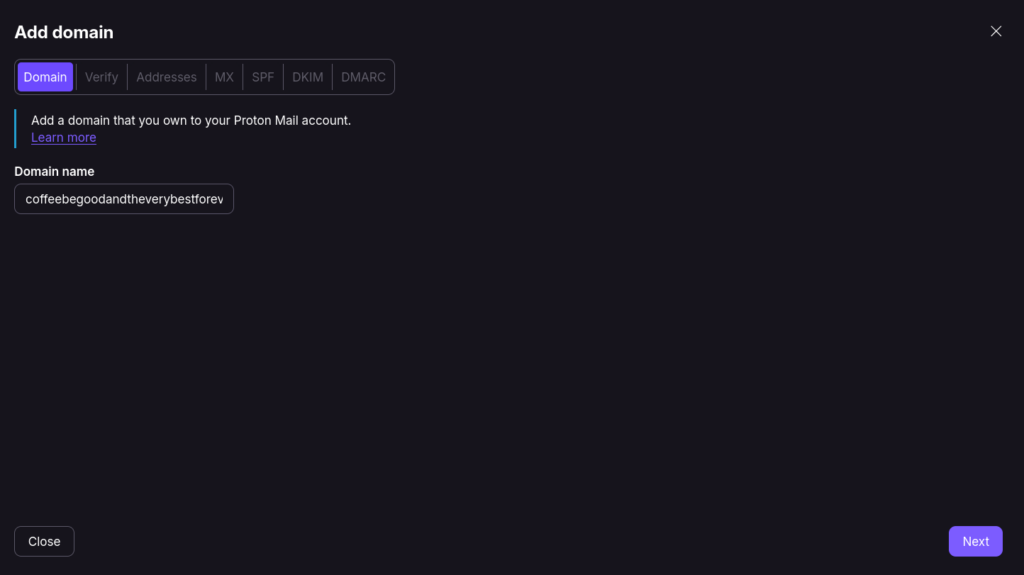
Enter your domain and click on next:
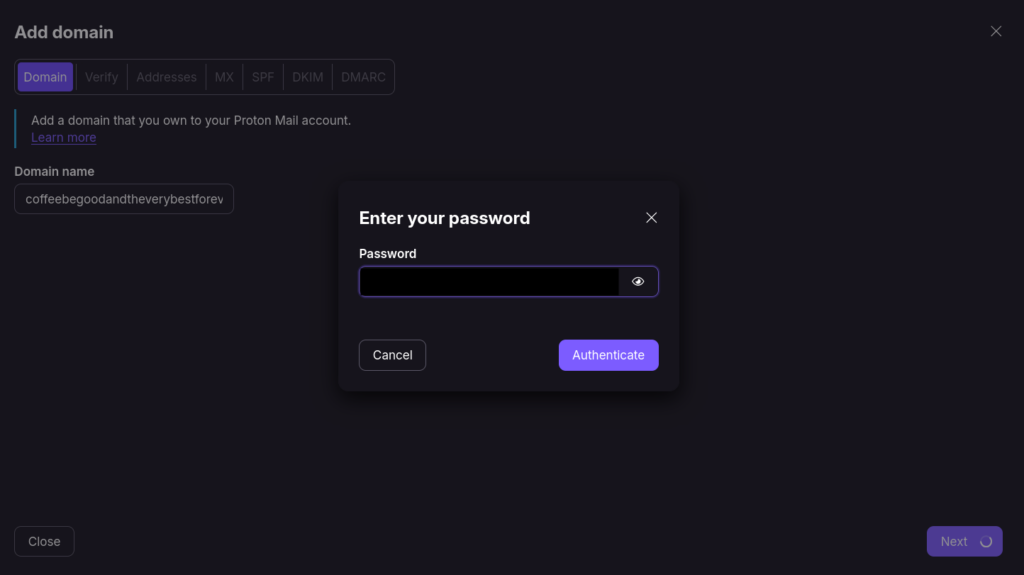
Authenticate with your Proton Email password:
You will now see the following for ‘Verify’:
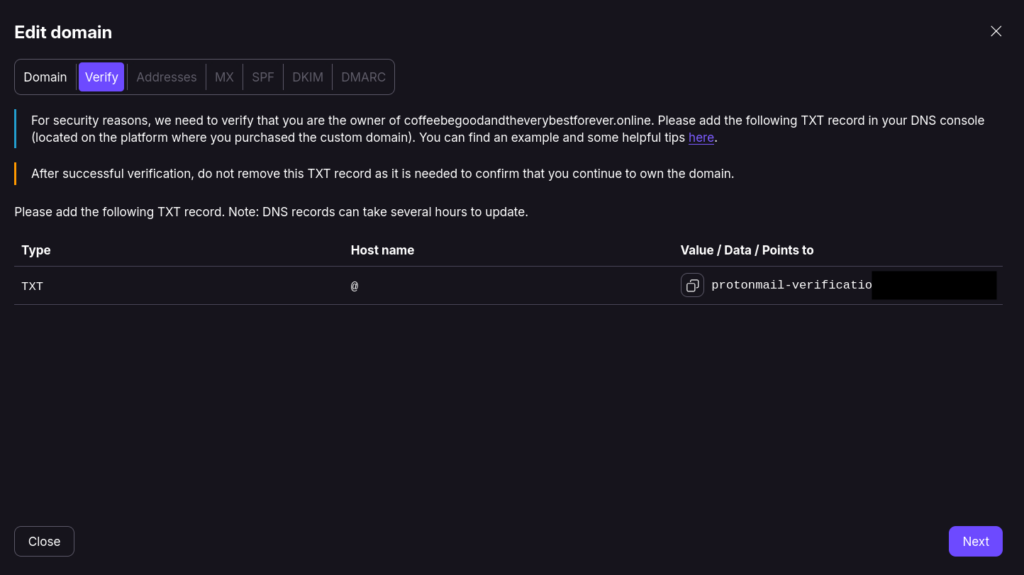
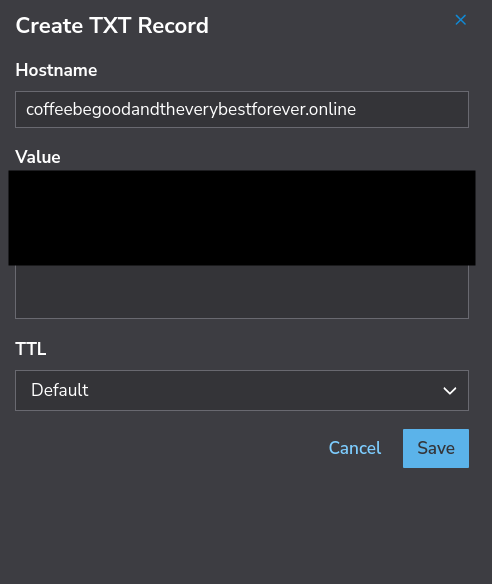
- Step 34: Go back to Linode / Akamai and scroll down until you hit ‘Add a TXT record’
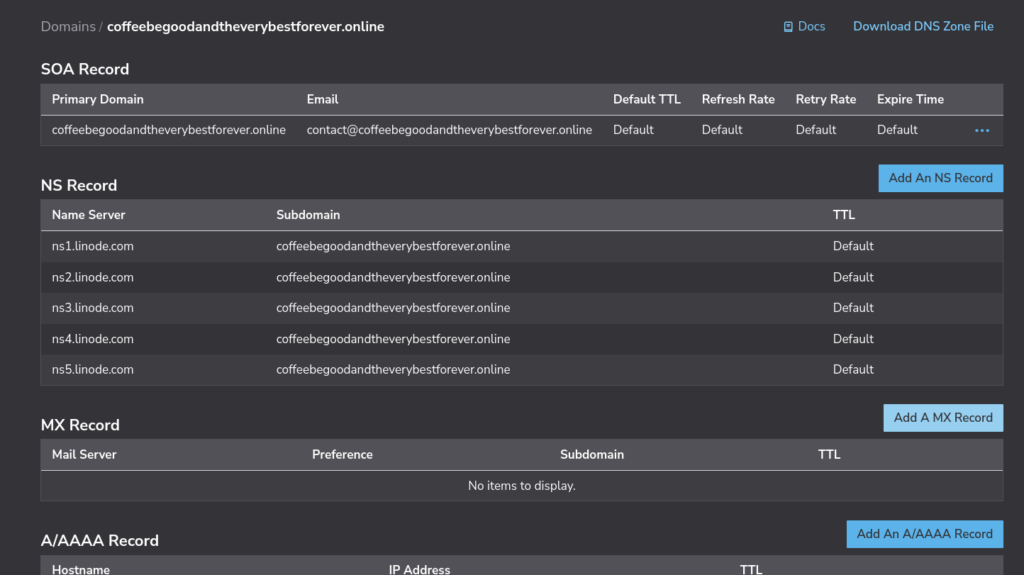
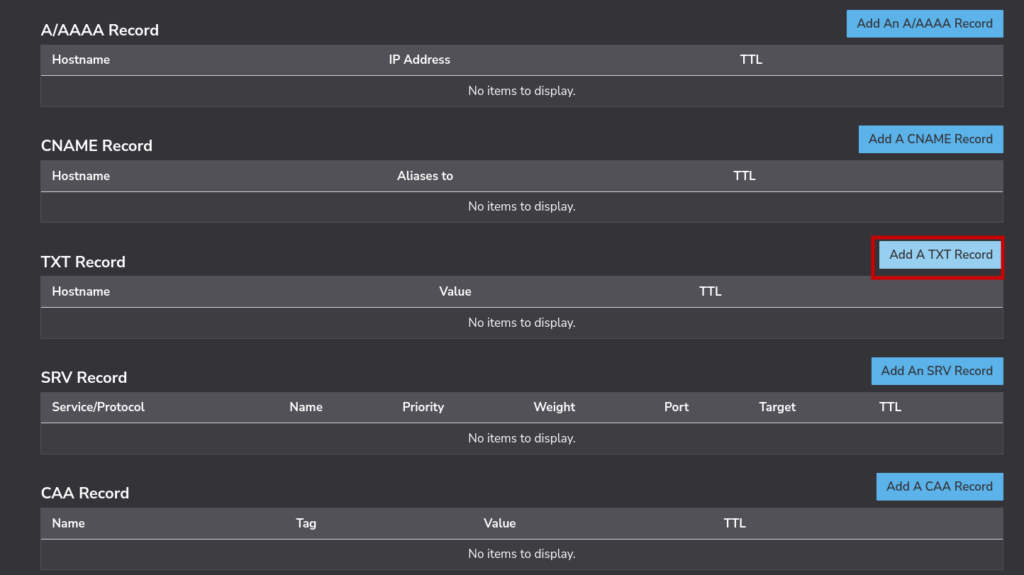
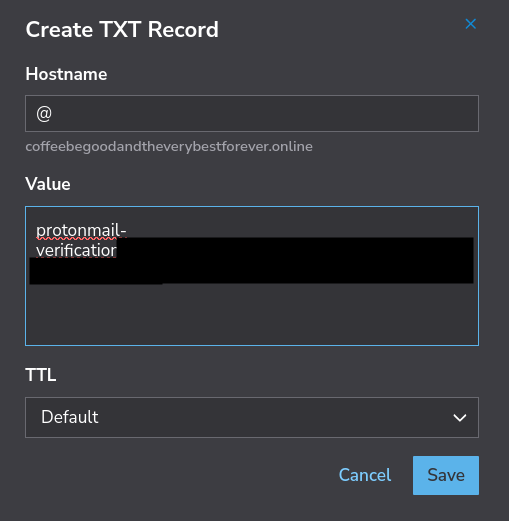
Paste the value from Proton using ‘@’ as the hostname. Click on ‘Save’.
Head back to Proton and click on ‘Next’. NOTE: If you get an error try again in another hour. Click on add address:
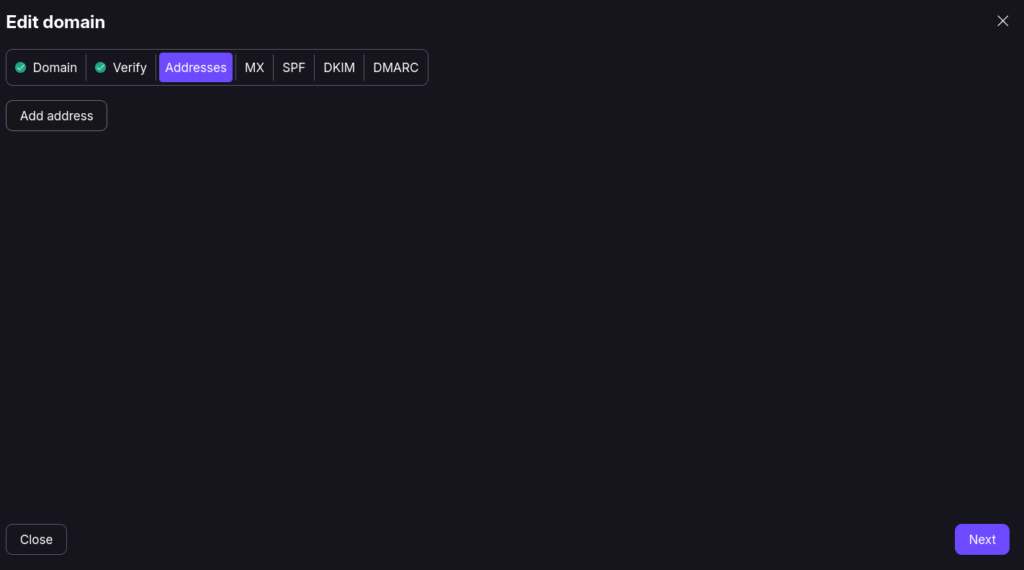
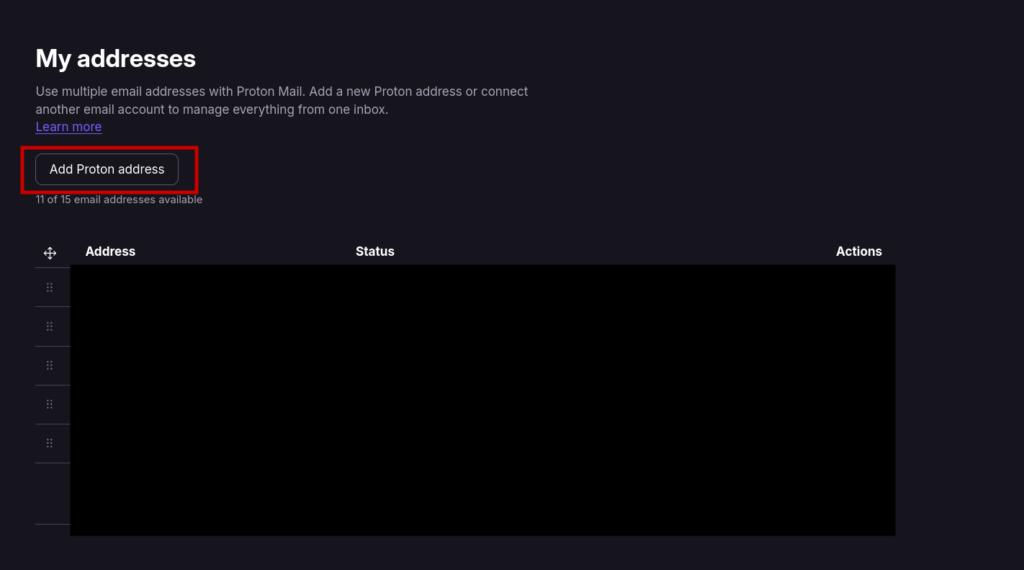
You’ll be taken to a different part of Proton Mail. Click on ‘Add Proton address’
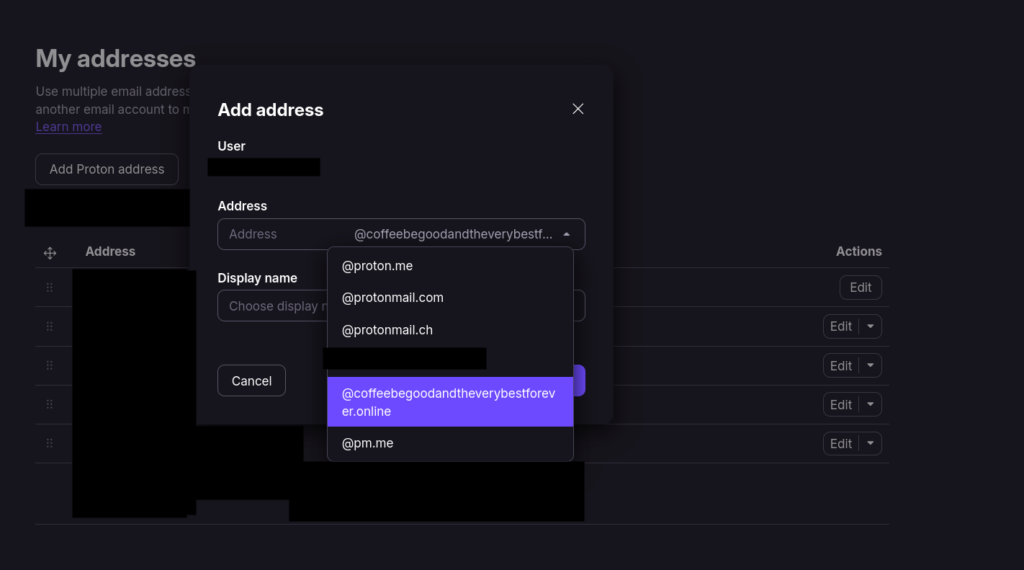
Click on the drop down and select your domain:
Create a custom address:
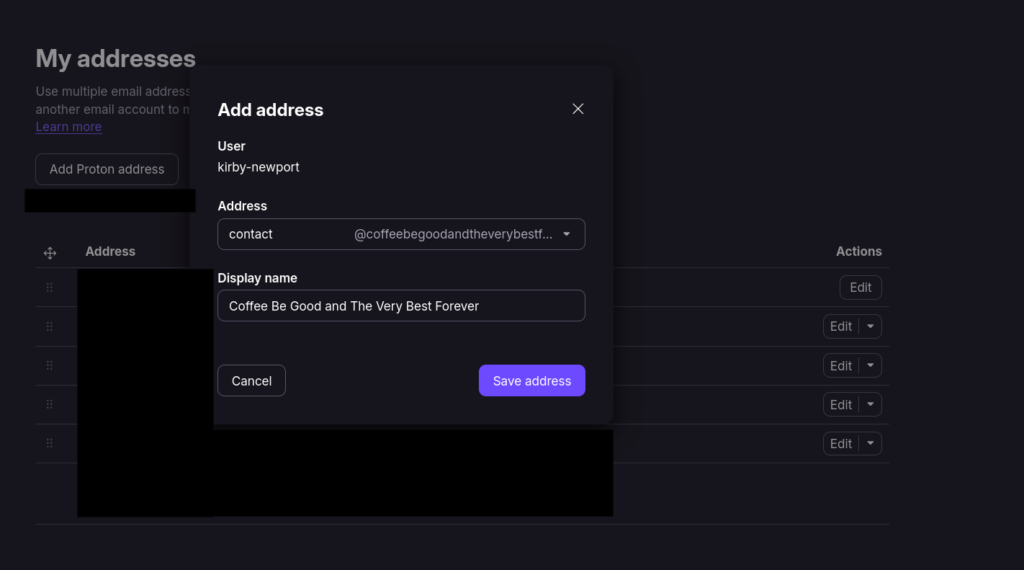
NOTE: The Display Name is what people will see when the email comes through in their inbox
Click on Save Address. You will be prompted to authenticate again with your Proton email password.
- Step 35: Go back to Domain Names on Proton, click on Review, and go to the MX tab
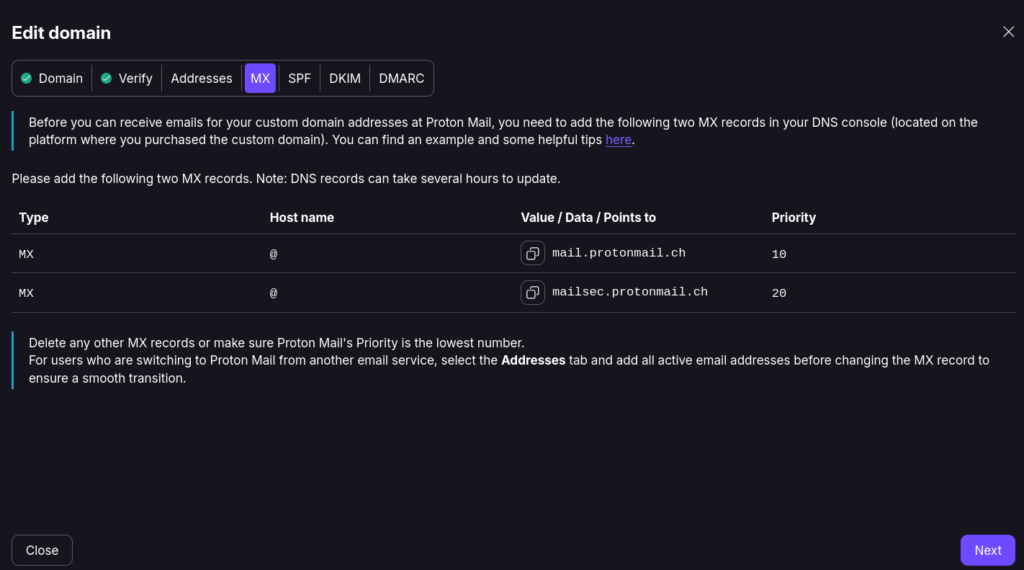
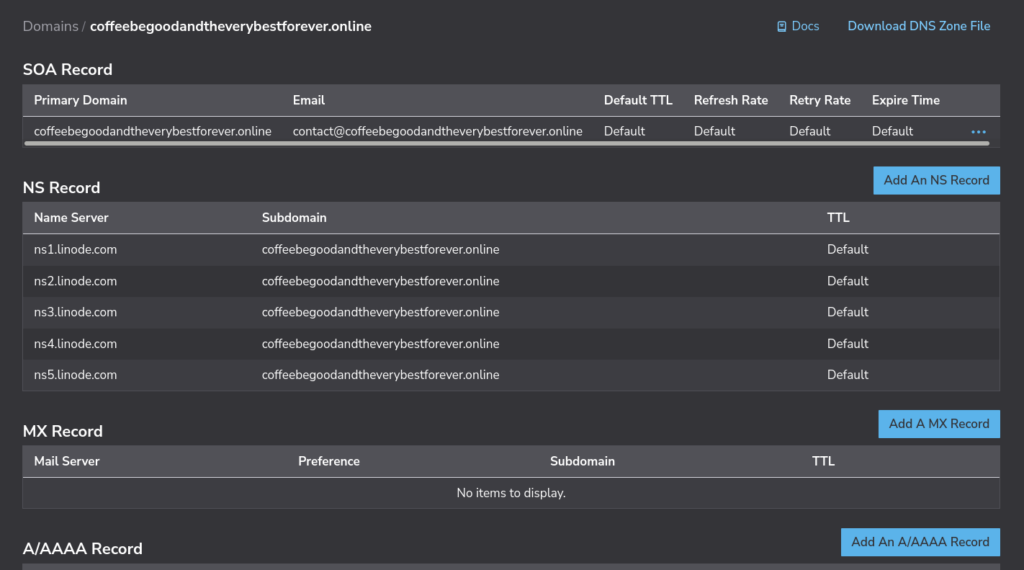
- Step 36: Go to your Linode tab and click on ‘Domains’ then click on your custom domain. Click on ‘Add an MX record’:
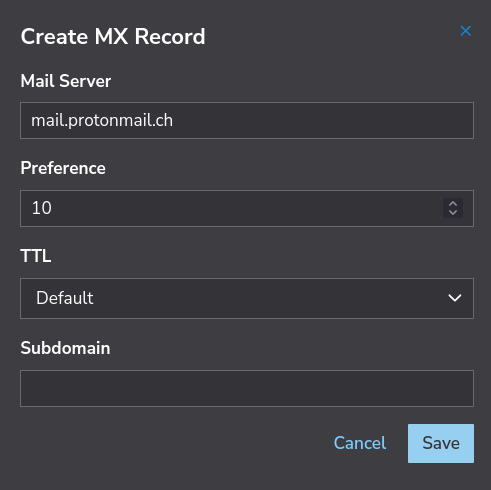
Add your 1st MX record using the values you see on Proton:
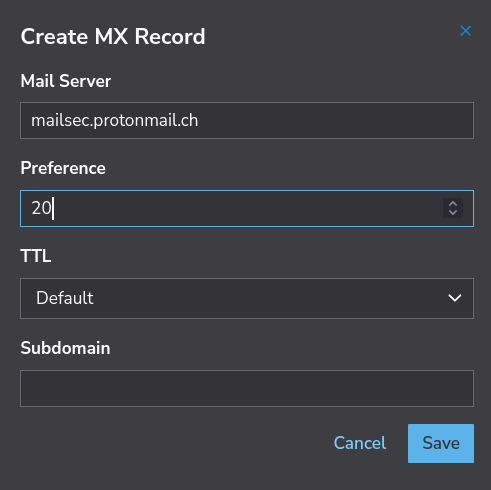
Click on ‘Save’ and repeat the process for the 2nd MX record (don’t forget about the priority being a different number). Click on ‘Save’:
Go back to Proton and click on ‘Next’. You’ll be in the ‘SPF’ tab:
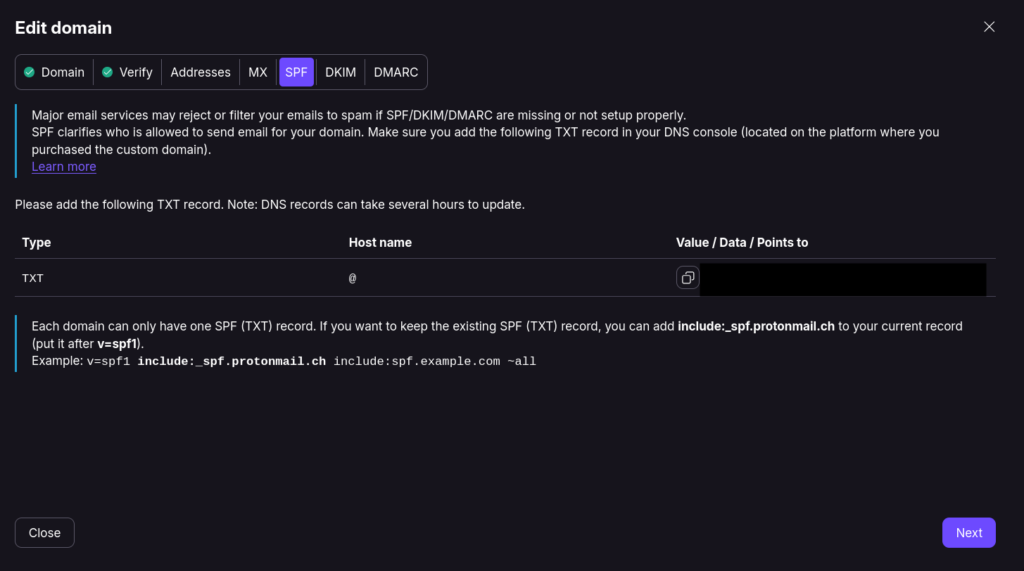
Copy the stuff on the right side using the clipboard icon and go back to Linode. Scroll down and click on ‘Add a TXT record’:
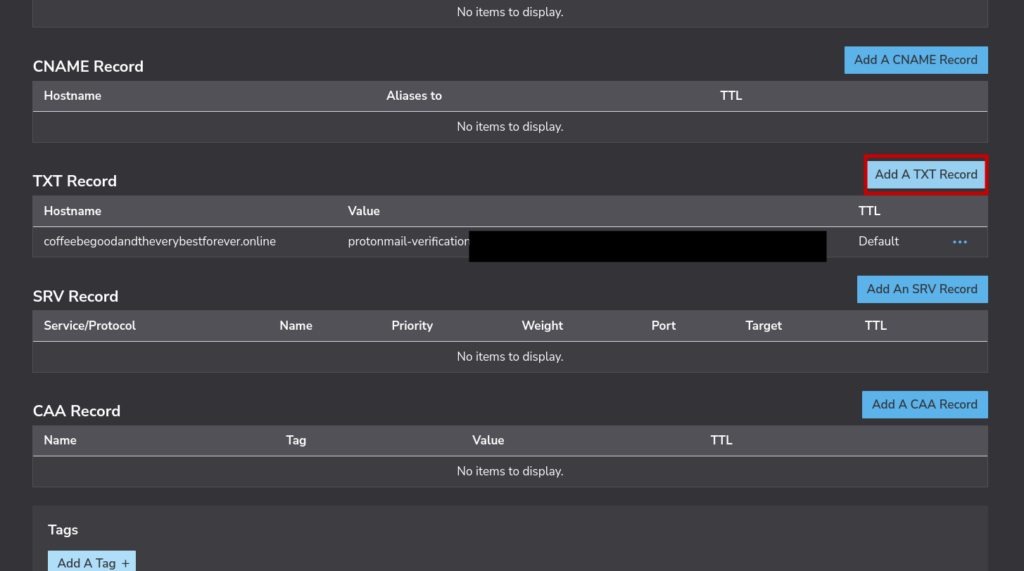
Add the SPF record using your domain name and the value you copied over from Proton. Click on save:
- Step 38: Add CNAME record
Go back to Proton and click on ‘Next’. You’ll see the following:
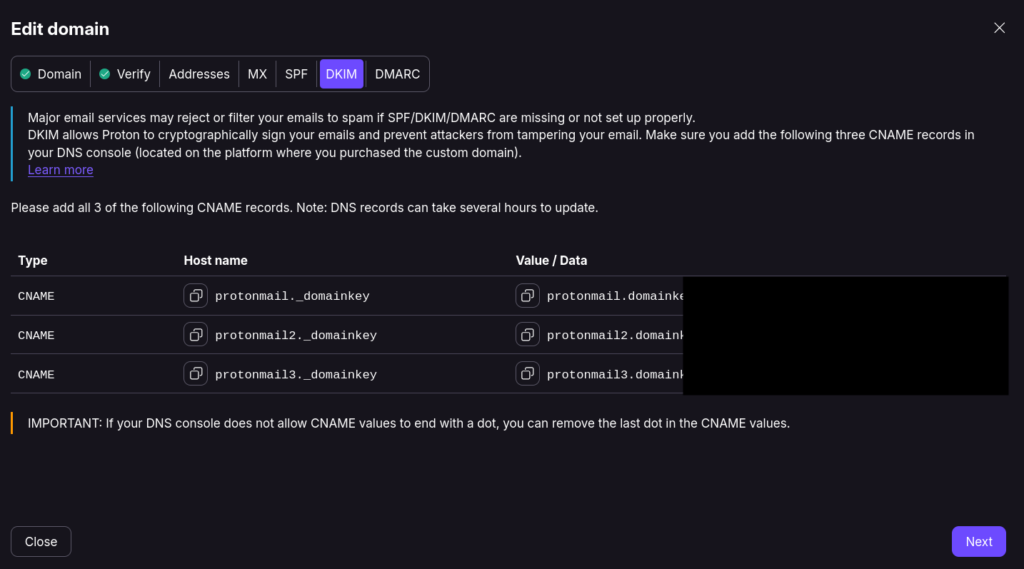
Go back to Linode and find the ‘Add a CNAME record’ button. Click on it and copy over the values as such for each one. Click on ‘Save’:
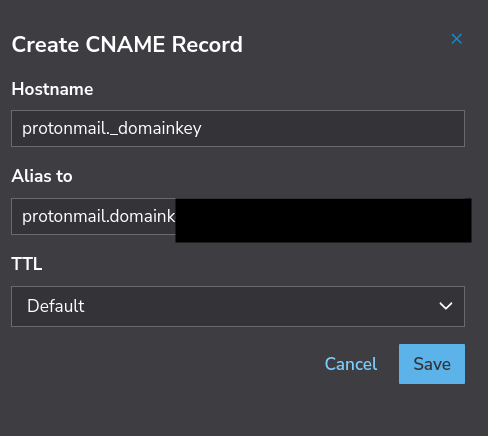
You should now see the following:
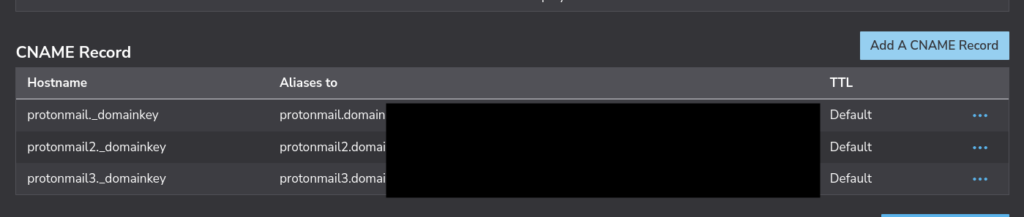
- Step 39: Setup DMARC record
Go back to Proton and click on next. Copy what you see on the DMARC tab:
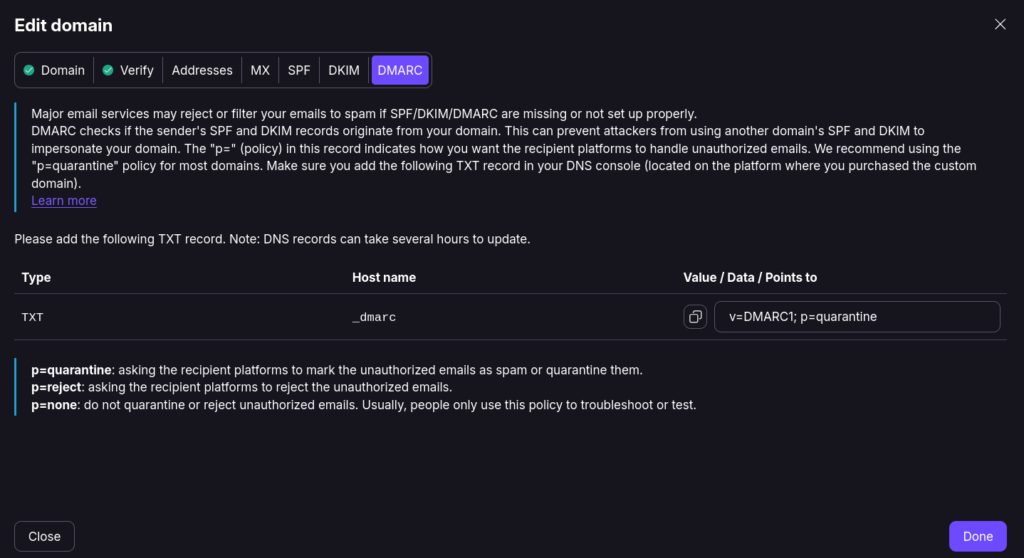
Go back to Linode and add an TXT record using what you see. Click on Save:
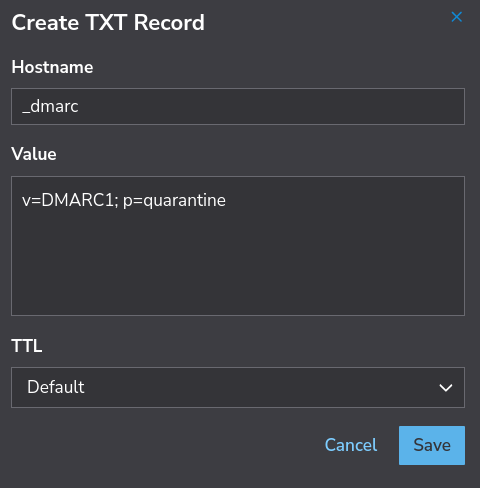
- Step 40: Setup catch-all email in Proton
What is catch-all? It just means you can receive mail even if someone sends it to the wrong email but pointing to your domain name. Example: Someone sends an email to randominbox@coffeebegoodandtheverybestforever.online but you don’t have ‘randominbox’ setup in Proton. You’ll still be able to receive the mail.
Go back to Proton and go to domains, click on the drop down for your domain and select ‘Set catch-all’:

Don’t worry if the SPF record isn’t green. This can take 1-2 hours and sometimes up to 24 hours to populate.
Check off the email you created earlier:
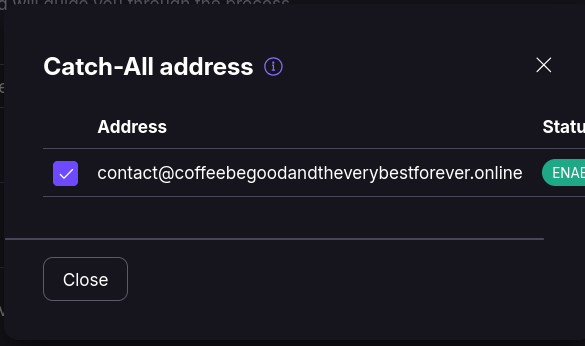
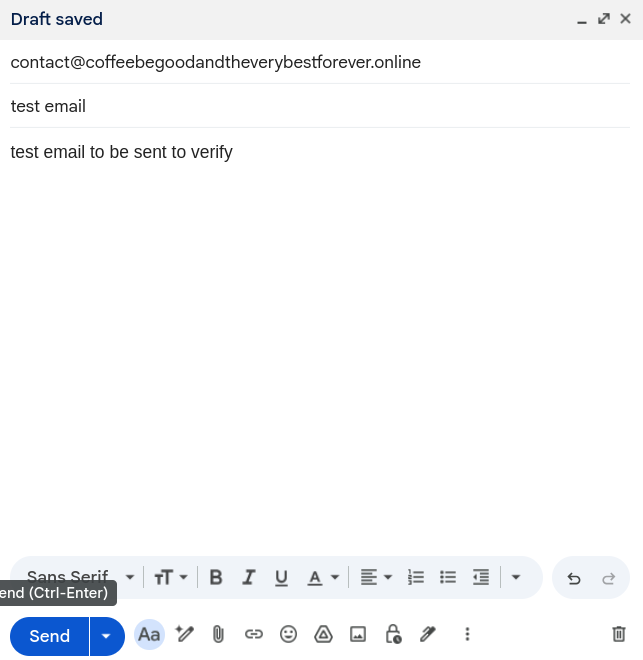
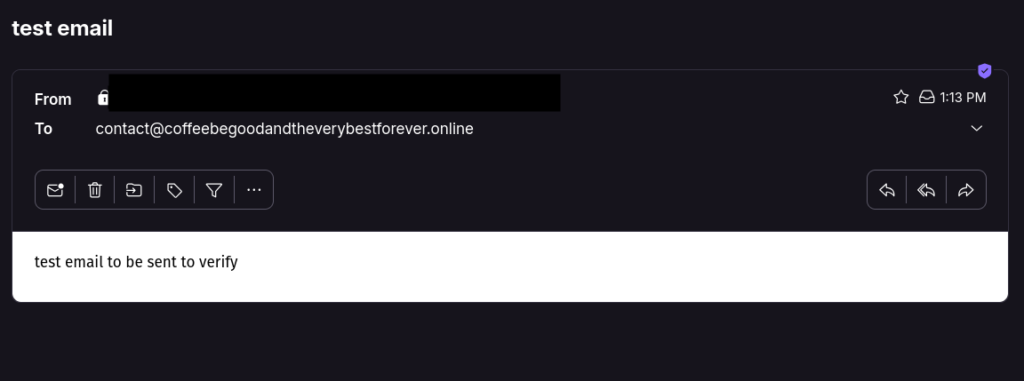
Congrats! You just setup working email using your domain name. You can send a test email to your custom domain now to verify:
Part XI: Spinning up the WordPress Instance
We’re about 70% of the way done. The next 20% is to spin up the WordPress instance and the last 10% is basic maintenance.
- Step 41: Go back to Linode and click on ‘Quick Deploy Apps’ on the left hand side. Search for ‘WordPress’
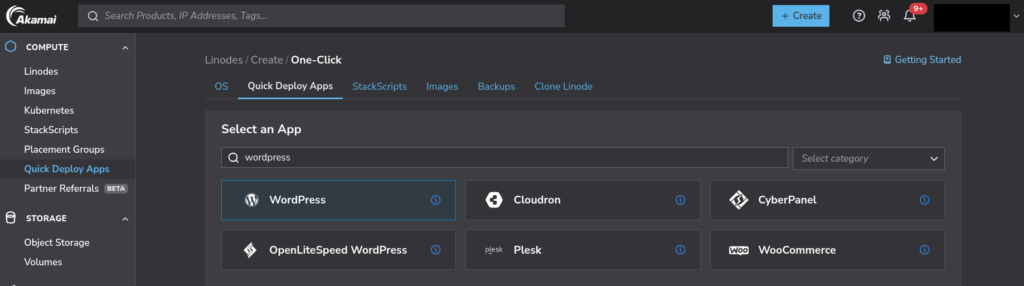
Scroll down and use any email you want for the SSL cert. I’m using my @mondragon.info email but I recommend using the custom Proton one you setup previously.
Select LAMP stack and enter your website title. For this example, I’m using ‘My Coffee Blog!’. The WordPress admin, database user, database name, and limited sudo user should be different from anything you currently use.
I recommend using Bitwarden to generate a custom username for each one of these. Look back at Step 10 if you forgot how to do this. Don’t worry about passwords. We’ll get these later once we spin up our WordPress instance and you’ll see what I mean.
The limited sudo user can’t use capital letters. Edit your Bitwarden generated username to reflect having no capital letters by pressing the ‘Edit’ button after generating.
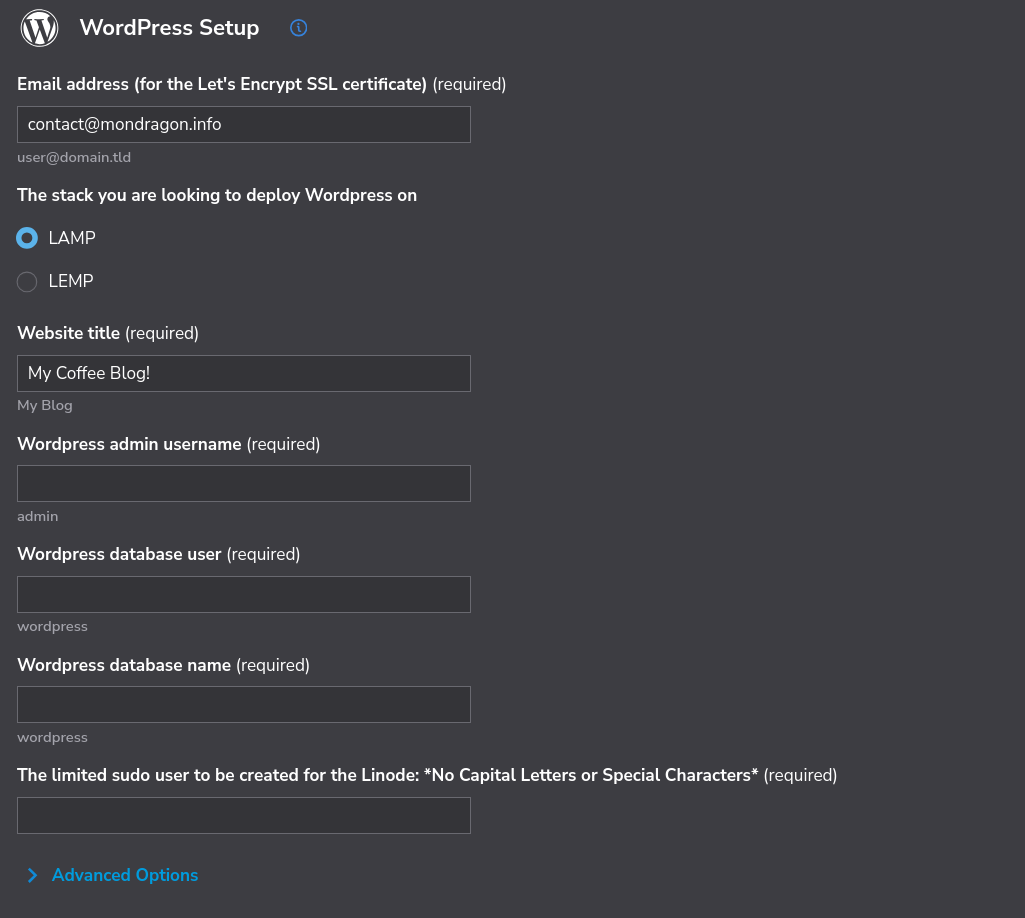
Example:
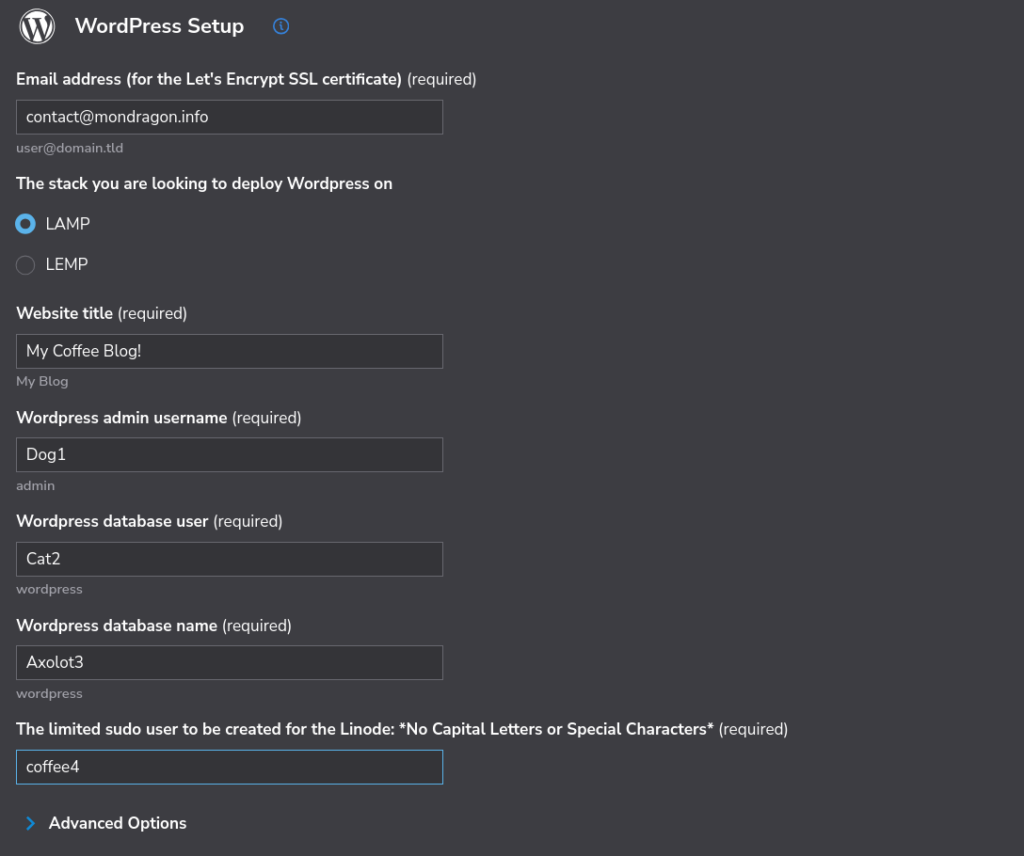
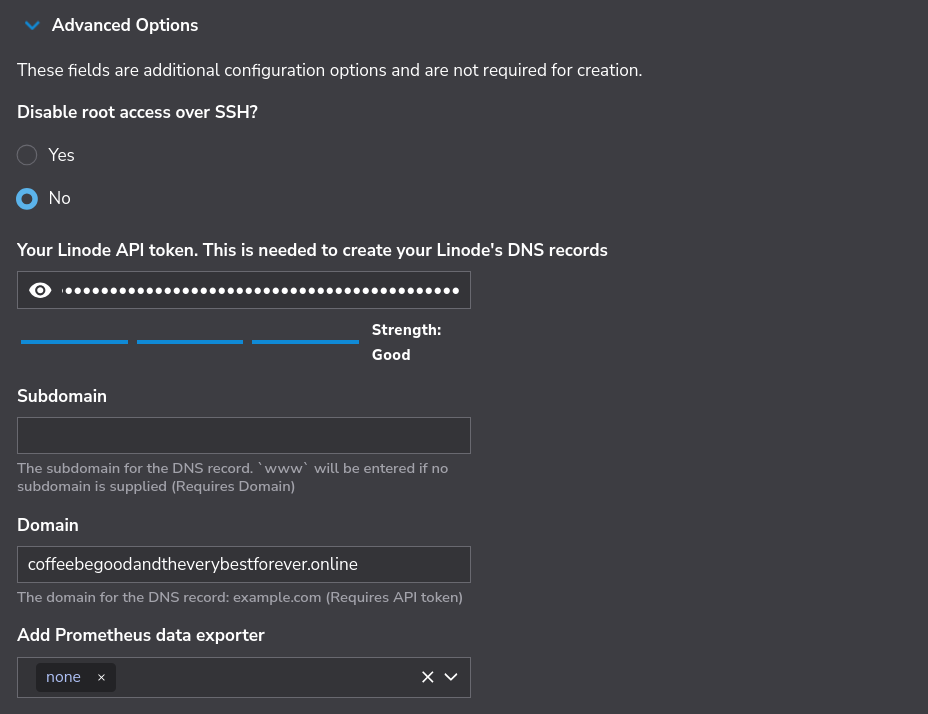
Once that’s populated click on the ‘Advanced options’ and fill in the following using the API token you saved to your Bitwarden account a while back ago. Use your custom domain:
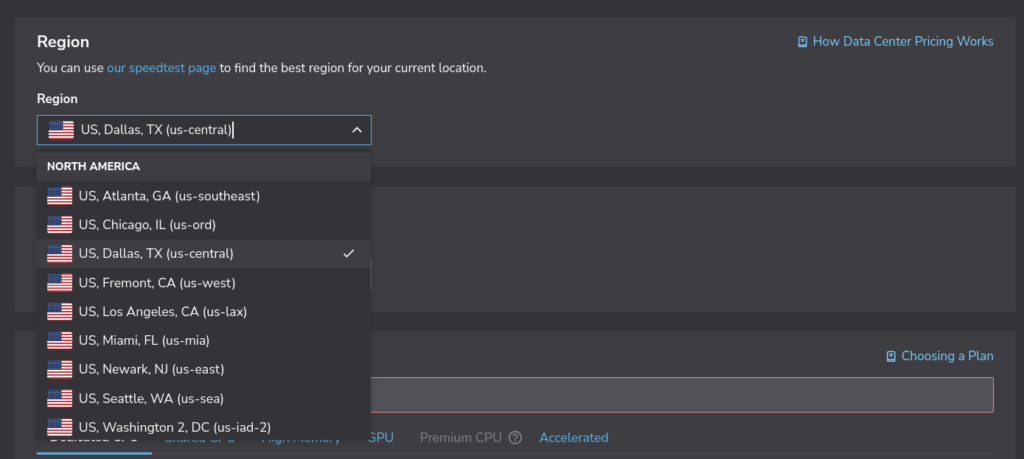
- Step 42: Select your region
Scroll down and select the region that matches closest to your current location.
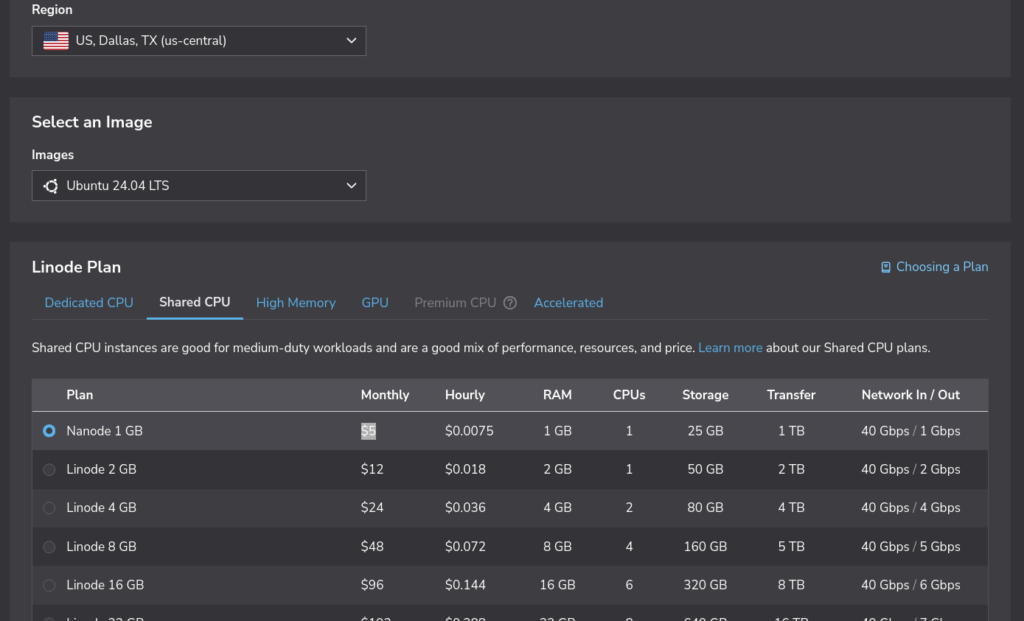
- Step 43: Select your Linode plan
Keep the Ubuntu 24.04 LTS (as of 06/2026) / default option that is selected by Linode. It’s okay if you don’t know much about Linux I’ll show you how to navigate and setup the rest of the WordPress blog later in this tutorial.
Remember how I said hosting runs about $5 a month via Linode? Click on the ‘Shared CPU’ tab and select the 1GB plan. This should be plenty for a small blog but you can always bump it up later if you need more space, RAM, etc.
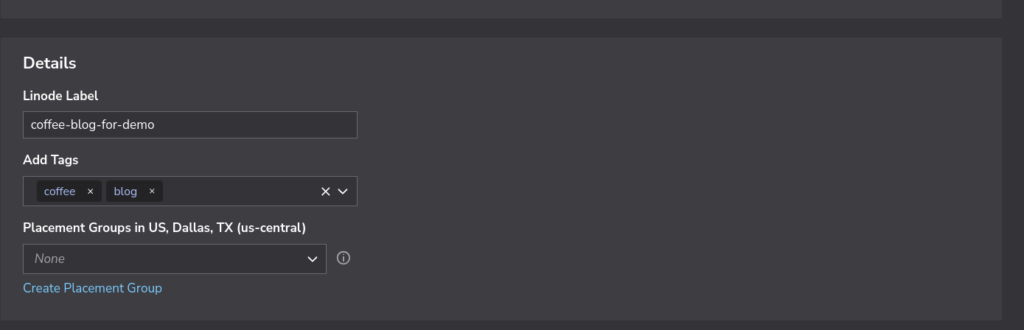
- Step 44: Enter details
Scroll down to details and edit the name of your instance to whatever you want. You can keep the placement groups blank as shown below:
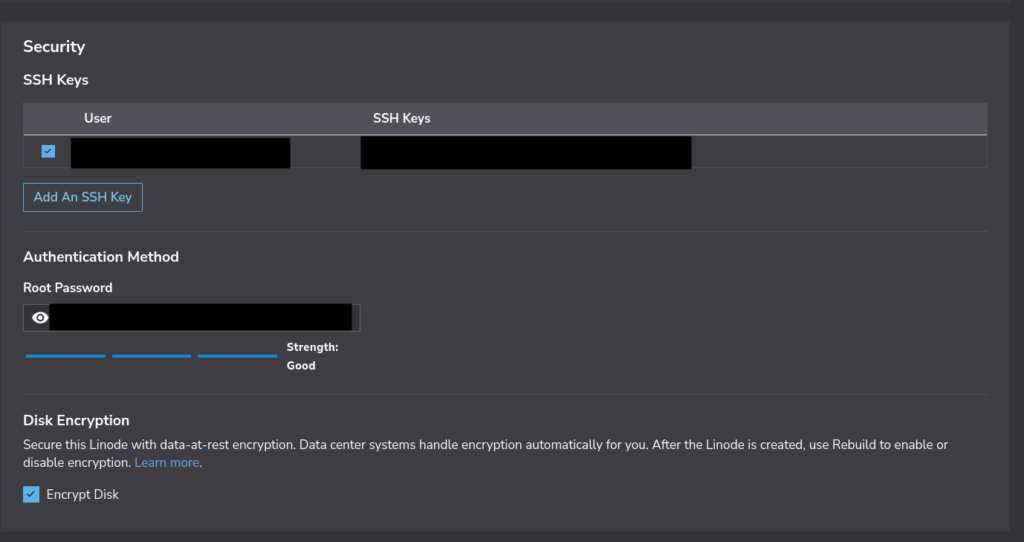
- Step 45: Security
Check off the box under SSH keys (this will be the one we created earlier from Bitwarden)
Create a Bitwarden username for ‘root’ and generate a strong password. Copy this password and paste it in the ‘Root password’ box below. Recommend having this one re-prompt you for your master password. (Step 11 has steps on performing this)
IMPORTANT: Do not use ” in the password field. Source: https://www.linode.com/docs/marketplace-docs/guides/wordpress/#:~:text=Warning
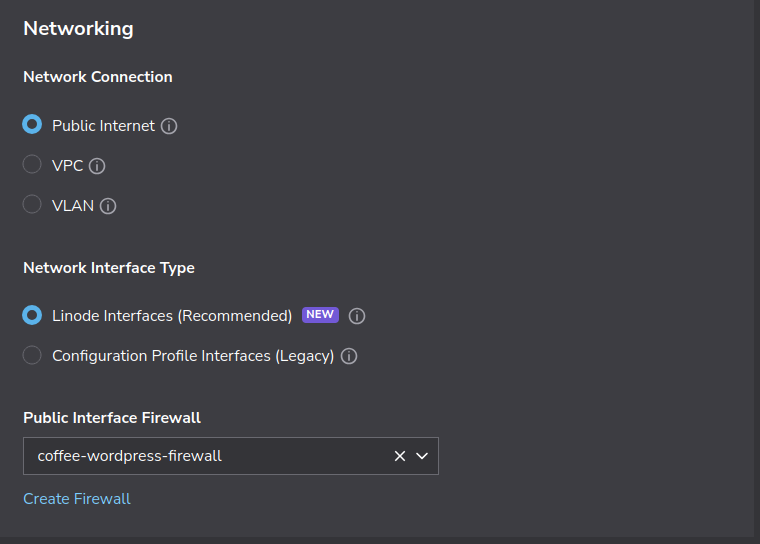
- Step 46: Setup Networking
Click on ‘Public Internet’ as this will be a public facing website. For ‘Network Interface Type’, select ‘Linode Interfaces’. On ‘Public Interface Firewall’, select the firewall we configured earlier in Part IV. In this example, it was ‘coffee-wordpress-firewall’.
- Step 47 (optional): Backup add-on
This step is optional but does help in case you need to revert back to something in case you mess up. It’s only $2/month extra and recommended if you’re new to this.
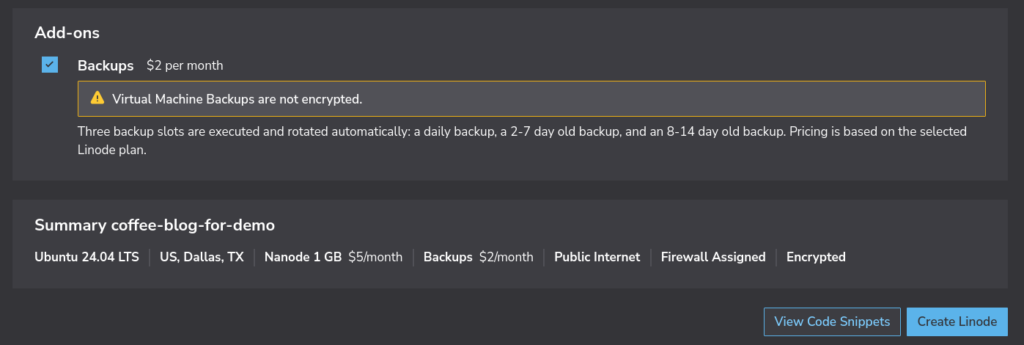
All done! Now click on ‘Create Linode’ to spin up your WordPress instance.
You should now see the following screen.
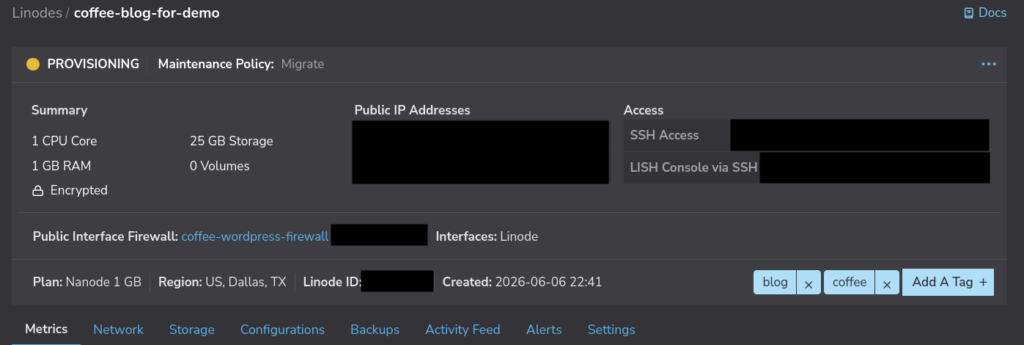
After a few moments you should then see the ‘Provisioning’ over to ‘Running’
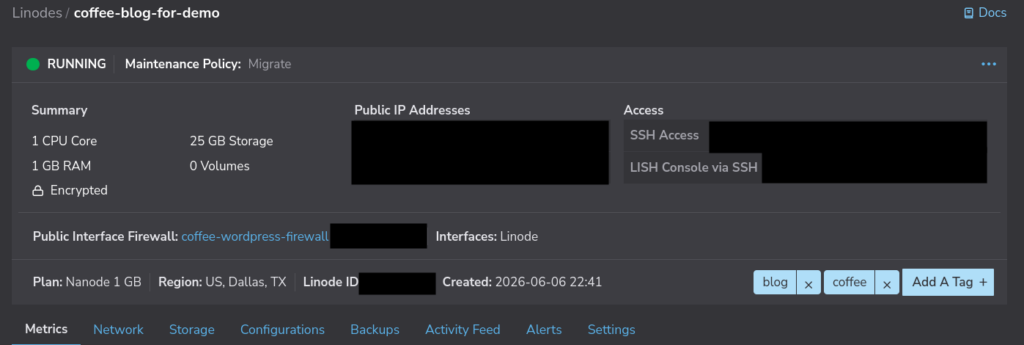
- Step 48: Getting the creds for the admin account and other accounts
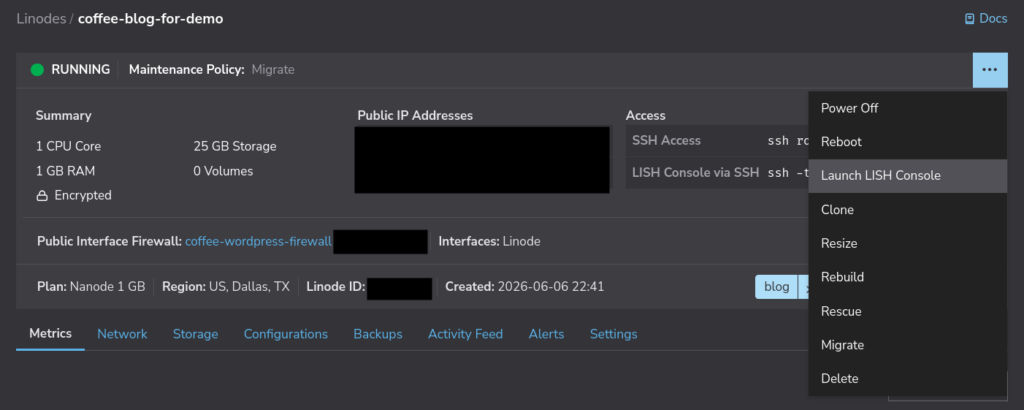
Earlier we created the usernames but skipped the passwords. We will now SSH into the Linode instance and retrieve these creds. Click on the 3 dots on the right side and select ‘Launch LISH Console’.
You will see the following screen. Click into it and press enter once:
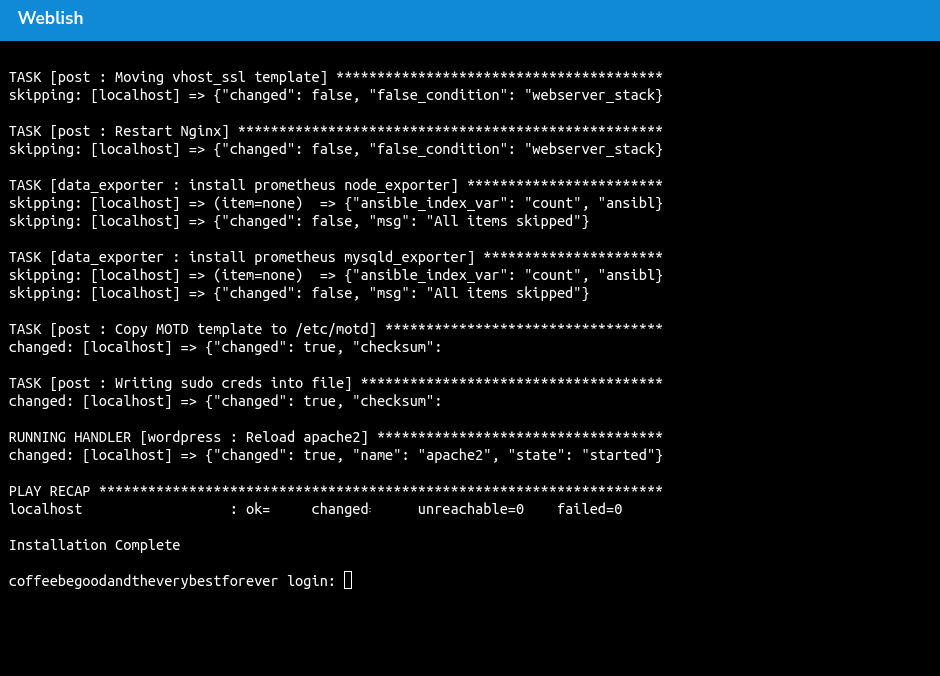
From here. Enter ‘root’ as the login and press enter:

Copy your root password from earlier that you created in Bitwarden (step 45) and then click into your console and use the following shortcut to paste: Ctrl + Shift + V
You’ll see the following screen confirming that you’ve logged in successfully:
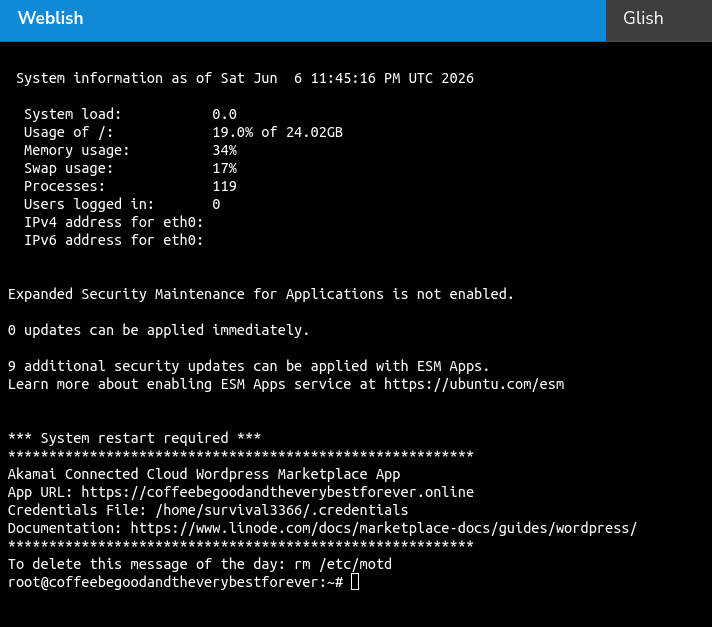
From here, enter the following to retrieve the passwords (replace USERNAME-FROM-BITWARDEN-OF-LIMITED-SUDO-USER with the limited sudo username you created a while back ago from Bitwarden step 41):
Remember to use Ctrl + Shift + V to paste into the LISH console)
cat /home/USERNAME-FROM-BITWARDEN-OF-LIMITED-SUDO-USER/.credential
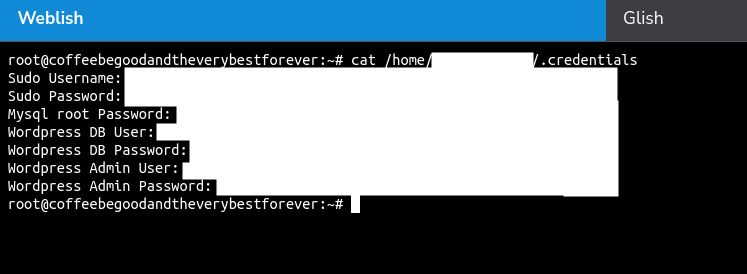
- Step 49: Copy the passwords into Bitwarden
NOTE: The Mysql root password belongs to the ‘Wordpress database name’ setup under
- Step 50: Delete the password file
Copy the following and replace USERNAME-FROM-BITWARDEN-OF-LIMITED-SUDO-USER with the username you created:
rm /home/USERNAME-FROM-BITWARDEN-OF-LIMITED-SUDO-USER/.credentials
Press enter. You will see the following:

Part XII: Creating a basic update script
- Step 51: Enter the nano text editor under your limited sudo user by doing the following
cd /home/USERNAME-FROM-BITWARDEN-OF-LIMITED-SUDO-USER/
You will now see the following:

Enter the following: nano update-script.sh
You’ll be taken to the following screen:
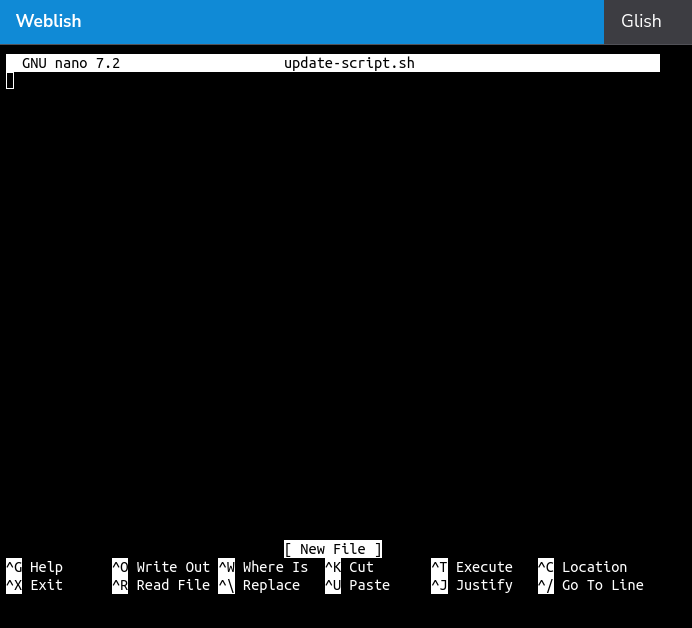
Copy the following below and paste into it using Ctrl + Shift + V:
!/bin/bash
LOG_FILE=”/var/log/auto-updates.log”
echo “$(date): Starting automatic updates” >> $LOG_FILE
apt-get update >> $LOG_FILE 2>&1
apt-get upgrade -y >> $LOG_FILE 2>&1
apt-get autoremove -y >> $LOG_FILE 2>&1
echo “$(date): Rebooting system” >> $LOG_FILE
shutdown -r +1
You will see the following:
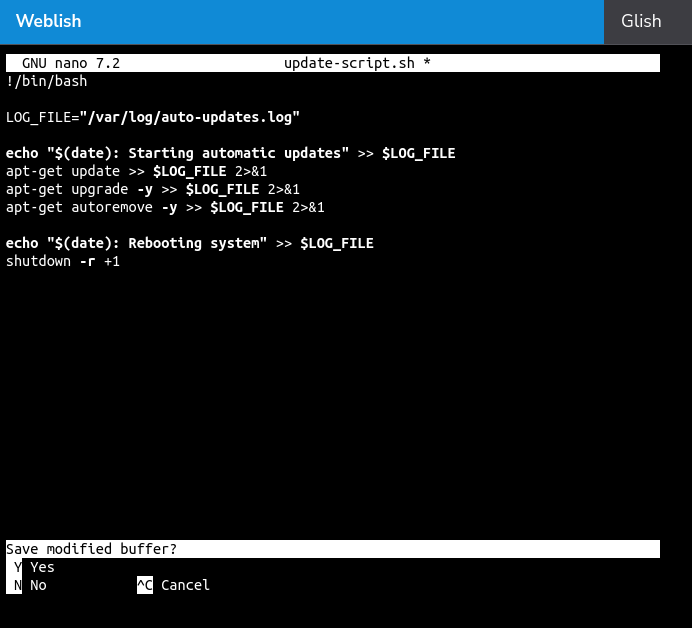
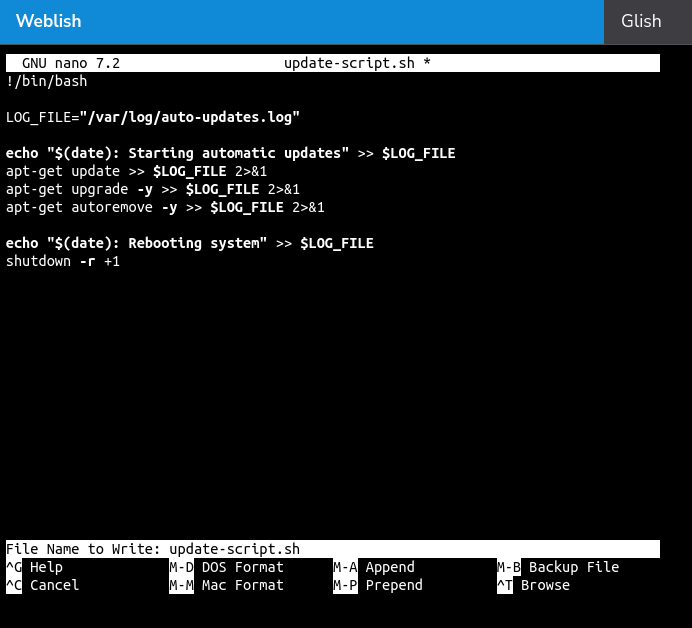
Press Ctrl + X to edit. You’ll see ‘Save modified buffer?’, press the letter ‘y’ on your keyboard. You will then see ‘File name to write’. Leave this as is and press enter:
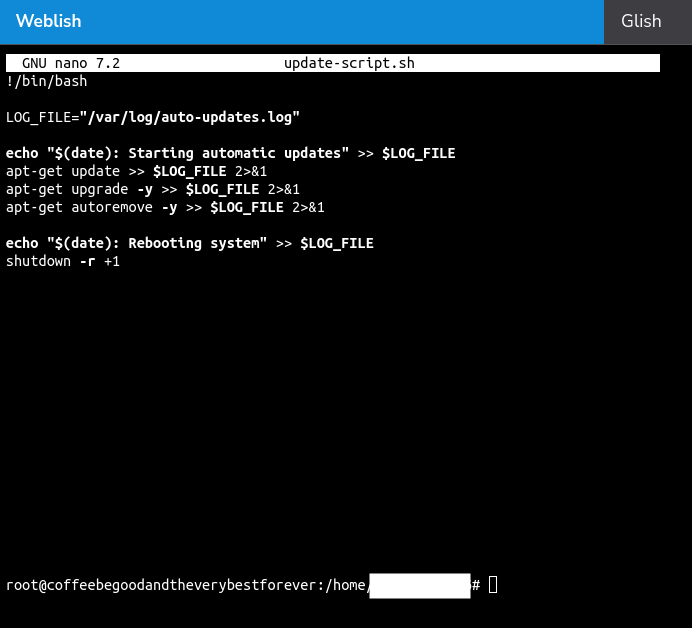
You will now exit nano and will be back on the terminal:
- Step 52: Creating a cron job to run the script on a daily basis
What is a cron job? Basically telling the system to do something on a recurring basis. We’ll be telling the Linode instance to run the script every night.
Enter cron by typing in the following:
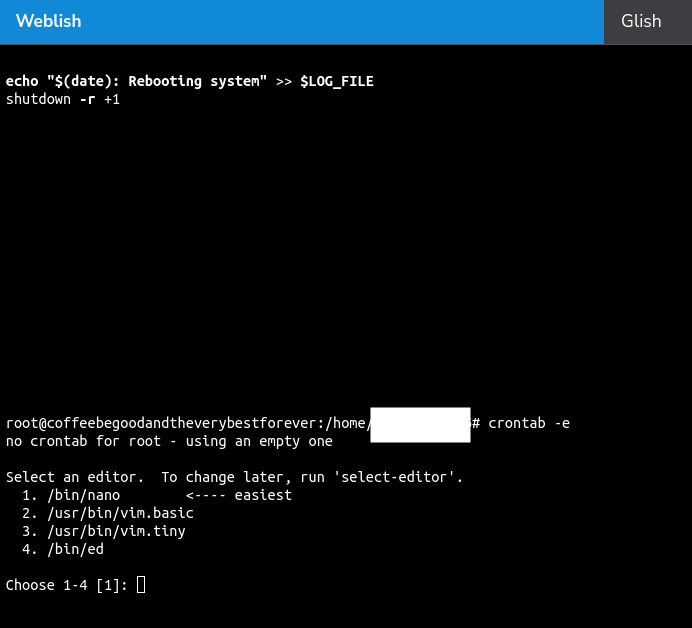
crontab -e
You will see the following screen. Type the number ‘1’ and press enter:
You will now be at this screen:
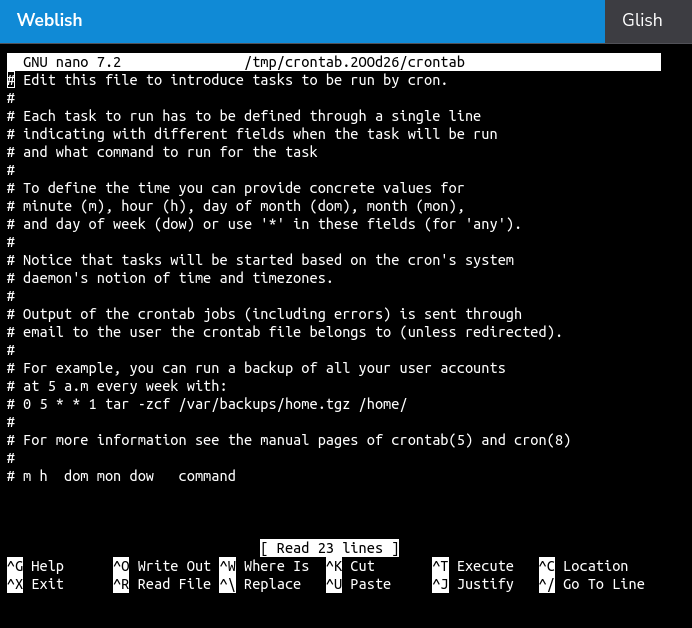
Use your down arrow to go to the last line right below #m h dom mon dow comment
Paste the following and replace the username with your limited sudo user from Bitwarden:
50 23 * * * /home/REPLACE-WITH-LIMITED-SUDO-USERNAME/update-script.sh
Remember to paste with Ctrl + Shift + V:
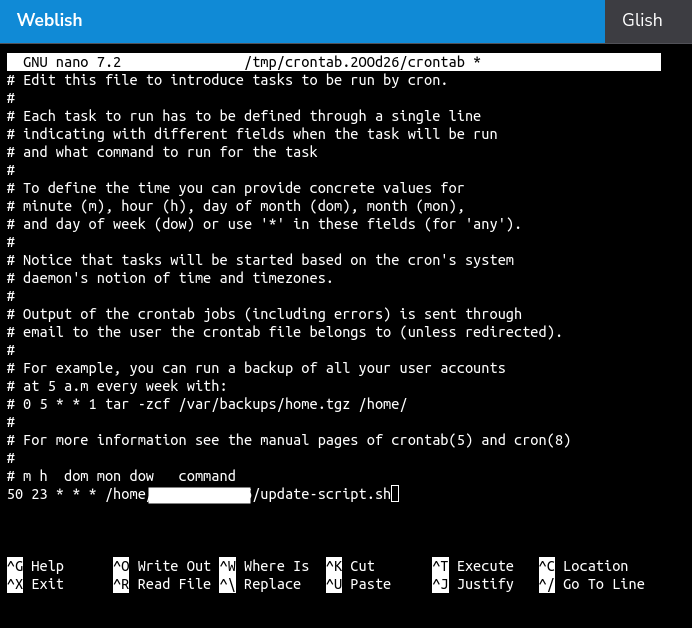
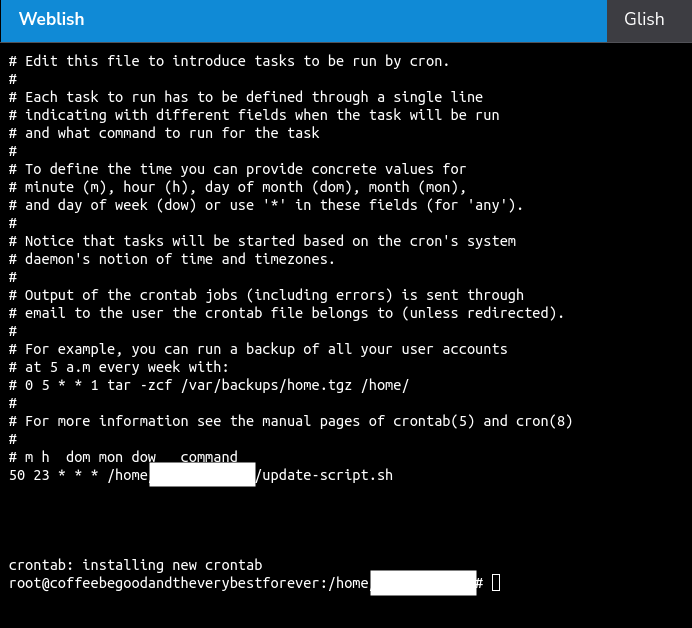
Press Ctrl + X to exit, then ‘y’ to confirm changes, then enter. You’ll see the following:
Edit: You will need to update your time zone in Ubuntu terminal. Do do this run
timedatectl
And see what time zone you are seeing. You might see UTC +0000. To update this use the following:
sudo timedatectl set-timezone TIMEZONE
Use the following link to find your timezone: https://manpages.ubuntu.com/manpages/focal/man3/DateTime::TimeZone::Catalog.3pm.html
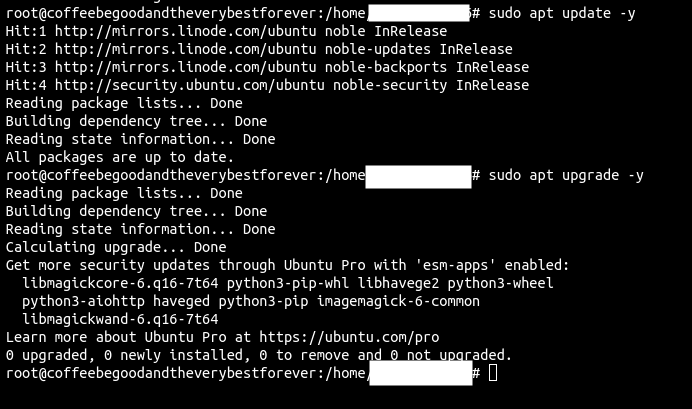
Congrats! You just setup a basic update script. Now let’s go ahead and apply some pending updates instead of waiting till night. The cron job above checks, applies, and records the changes to a file located at /var/log/auto-updates.log every night at 11:50PM.
To check and apply updates right now enter the following:
sudo apt update -y
* Enter *
sudo apt upgrade -y
* Enter *
As you can see here, there were no updates but if there were any they would be applied:
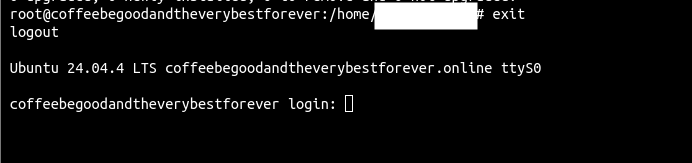
Now type ‘exit’ and press enter to logout. You will see the following screen:
You can safely close out of the browser window that came up when you launched LISH console.
All done with the server, now time for WordPress!
Part XIII: Logging into WordPress
Pat yourself on the back you good sport! If you go to yourdomain.com you’ll see the following demo page:
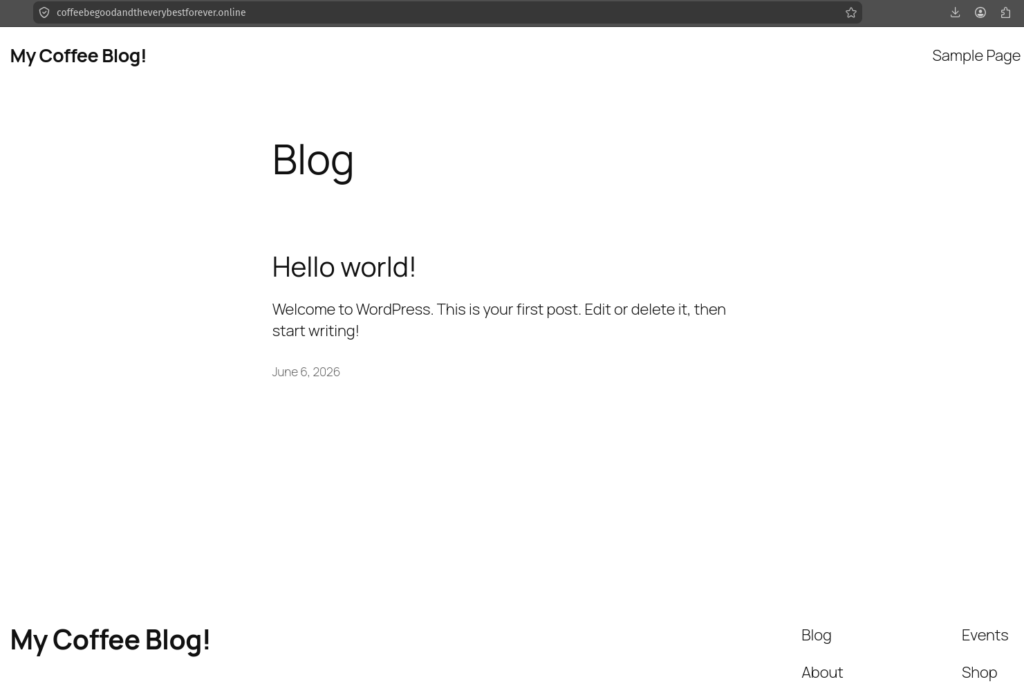
Let’s change this up and login.
- Step 53: Navigate over to yourdomain.com/wp-admin to login to the WordPress admin portal.
You’ll see the following login page. Use your WordPress admin username from Bitwarden alongside the password we collected earlier to sign-in:
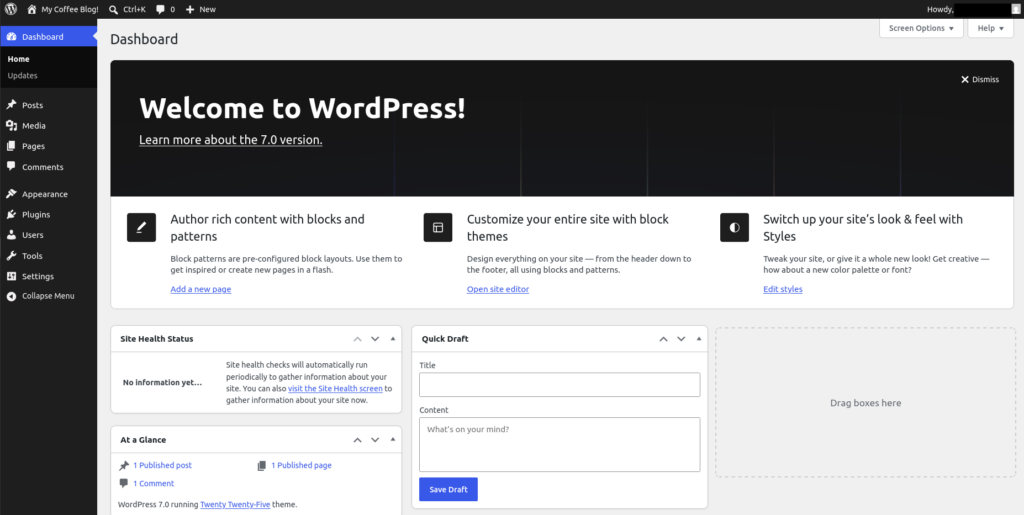
All set! From here on out I’ll guide you through hiding your admin username and setting up a basic theme. After that feel free to poke around YouTube tutorials on how to use WordPress to create your own custom content. I’m currently using the Wikio theme by Jinal Desai for mondragon.info and the Coffee theme for the demo site by Organiksoft.
I recommend using the following video by WordPress themselves: https://www.youtube.com/watch?v=tMi4F6bScqM
- Step 54: Hiding your admin username
On the left side of your dashboard click on ‘Users’ and then ‘All Users’:
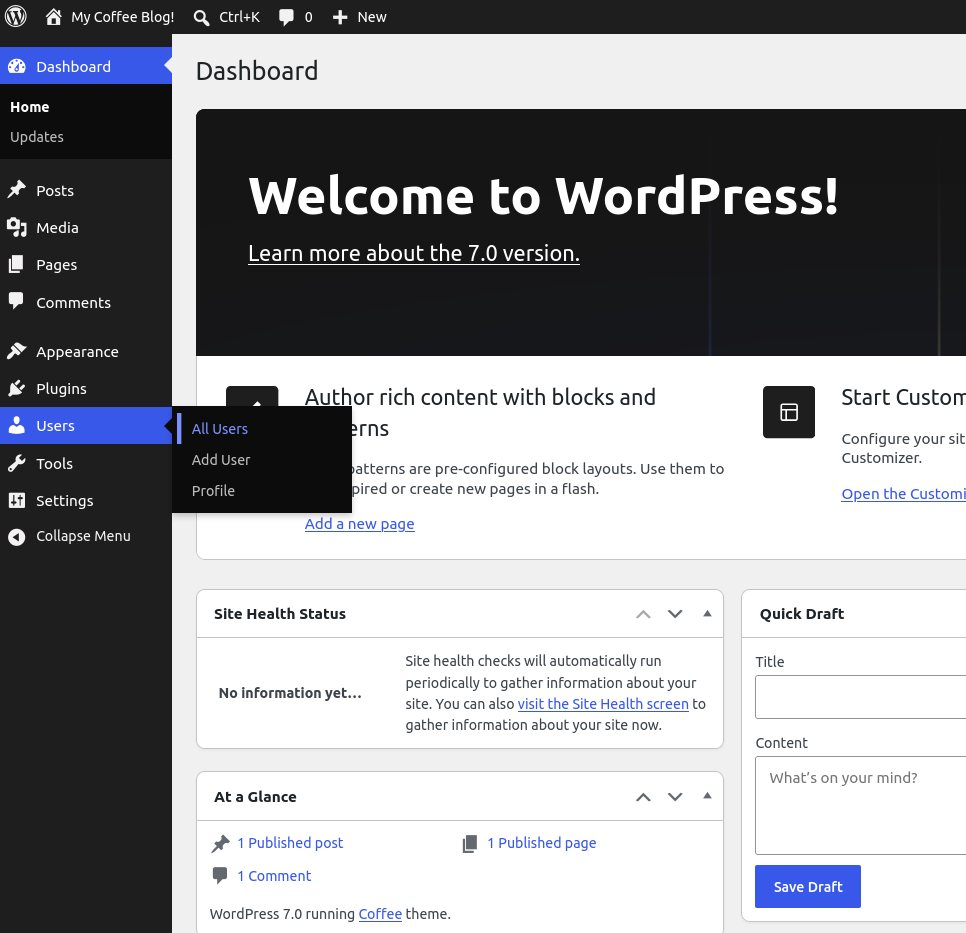
From here click on edit:
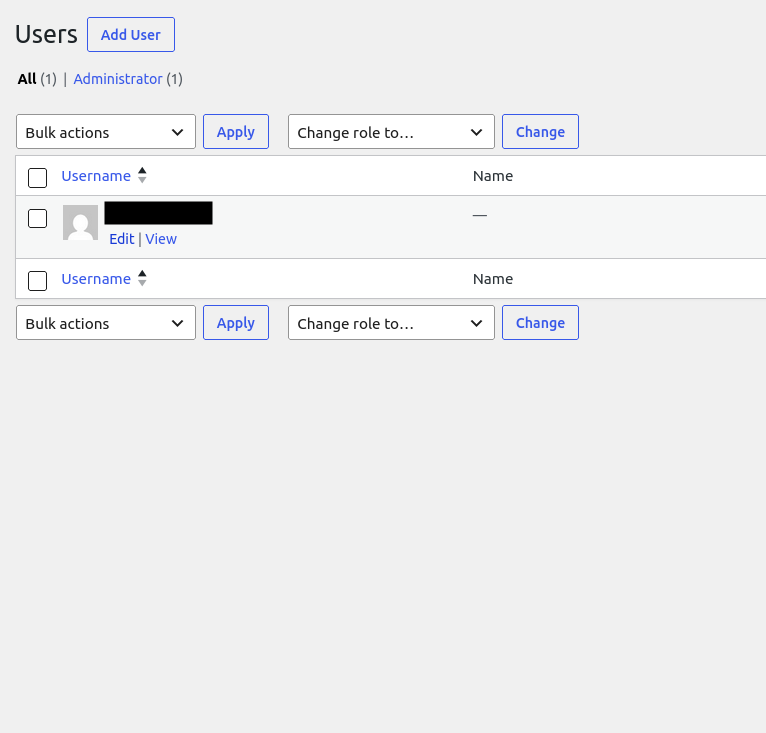
Edit the nickname (required) to ‘admin’ and then the ‘Display name publicly as’ to admin in the drop down:
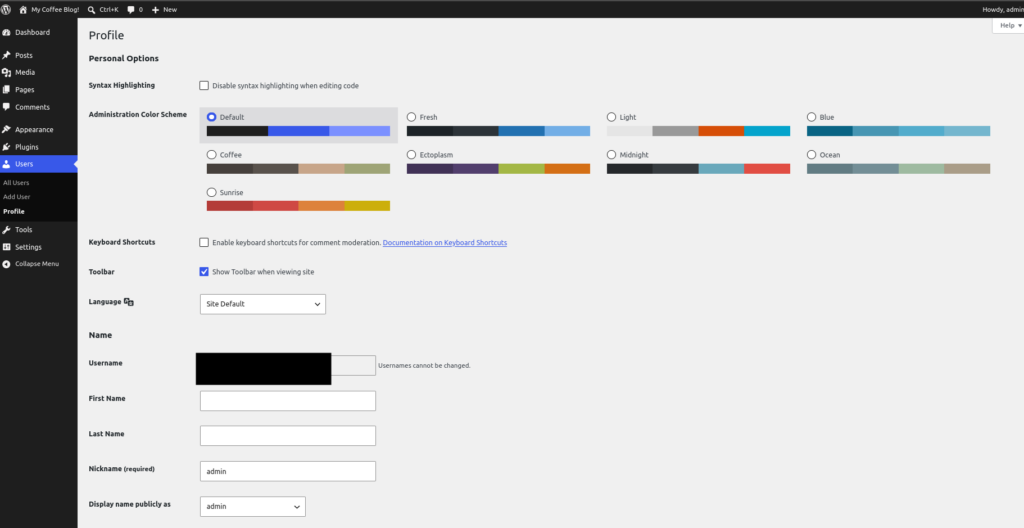
Scroll down and click on ‘Update profile’.
- Step 55: Installing theme
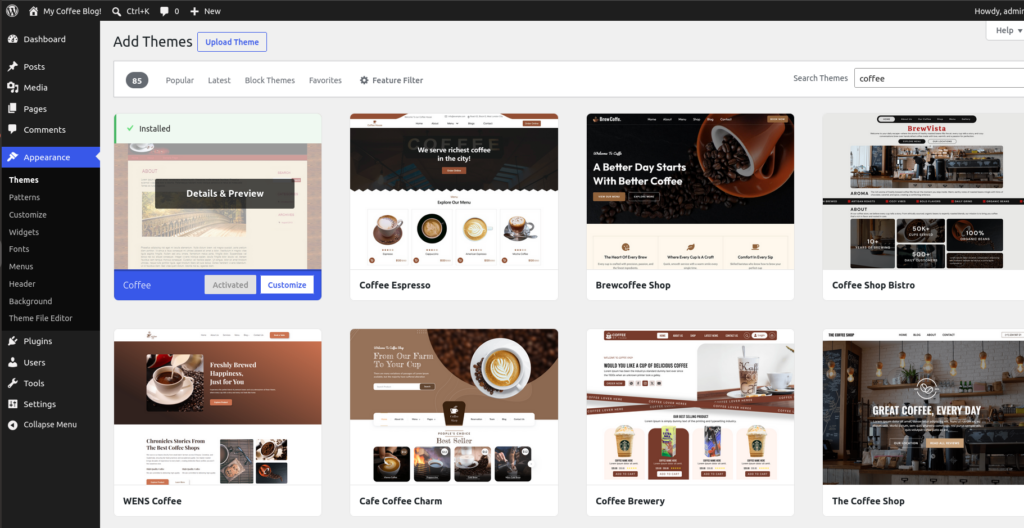
Click on the ‘Appearance’ button on the left side and then ‘Add theme’
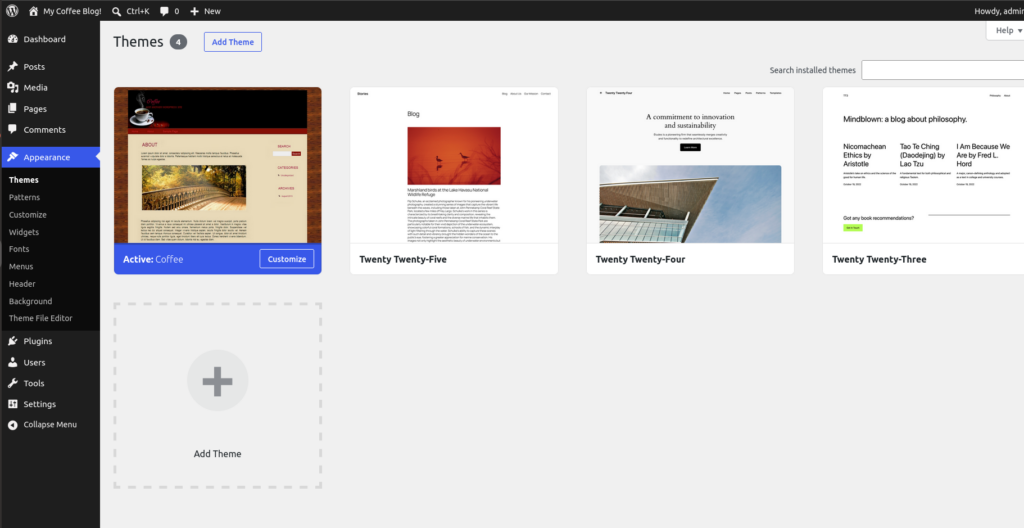
From here you can explore a few different themes by searching for key words. In this demo I’m running a coffee blog and have searched for the word ‘coffee’. Once you find something you like, install the theme and click on activate:
From here, on a new private window, navigate to your domain name and you’ll see something like the following:
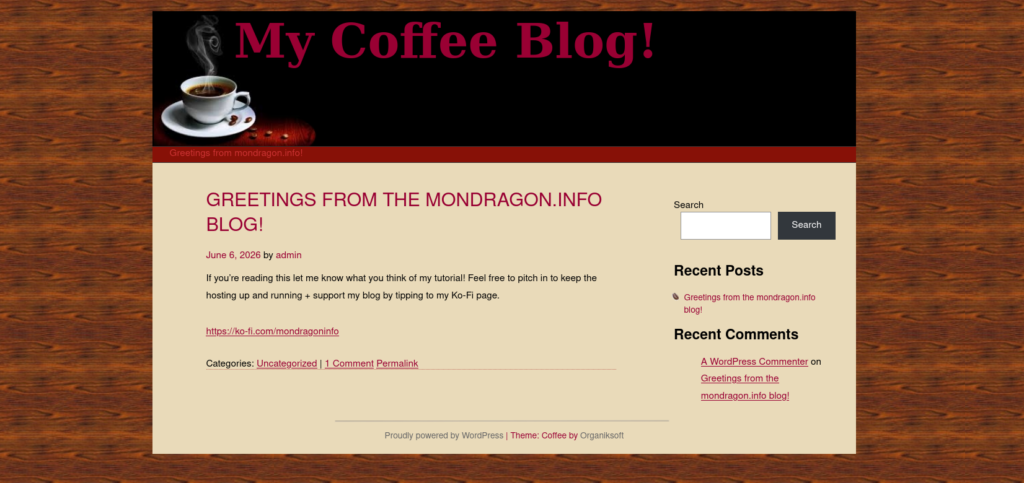
Congrats! You just setup your own blog using WordPress, Linode, Bitwarden, Proton Mail, and Namecheap. You can create different pages and posts via the pages and posts tabs on the left side of WordPress. I recommend checking in on the YouTube’s and webernets to see what cool things you can build out with WordPress.
Let me know what you think! If you liked this tutorial and would like to contribute to the blog by pitching in to keep the servers running feel free to tip me at https://ko-fi.com/mondragoninfo